Creating a photo gallery wall is a great way to add a personal touch to your home and display your favorite memories in a visually striking way. Whether you have a large wall that needs filling or simply want to create a focal point in a room, a photo collage gallery wall is a great option. However, finding the right arrangement and placing your frames can be a bit tricky. Here are 8 ideas to inspire your next photo collage gallery wall, along with some tips to help you create a beautiful display.
Create a symmetrical arrangement by placing the largest photo in the center and working outwards with smaller frames.
Play with different frame sizes and shapes to add visual interest.
Use a color scheme to tie your photos together, such as all black and white or sepia toned images.
Create a theme, such as a family photo wall or a collection of travel photos.
Use a grid layout for a modern look.
Mix in other elements, such as artwork or 3D objects, to add depth to your wall.
Hang your frames at varying heights to add movement and interest to the wall.
Plan your layout using a mock-up, either by cutting out paper frames or using a digital tool, before you start hanging frames on your wall.
When placing your frames on the wall, it’s important to take into consideration the size and scale of the frames, as well as the layout of the space. It’s a good idea to measure your wall and plan out the placement of your frames before you start hanging anything. Use a level to ensure that your frames are straight and hang them at eye level for the best viewing experience. Don’t be afraid to experiment and make adjustments until you are happy with the final result. Remember, the beauty of a photo collage gallery wall is that it can always be changed and updated as your tastes and preferences evolve.
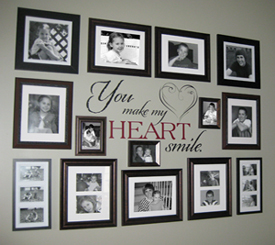
1- You Make My Heart Smile from Trading Phrases
2- How To Make A Gallery Wall from Marty’s Musings
3- Time Spent With Family from How Does She
4- Mirror Mirror on the Wall from Dimples and Tangles
5- Stairway from More Like Home
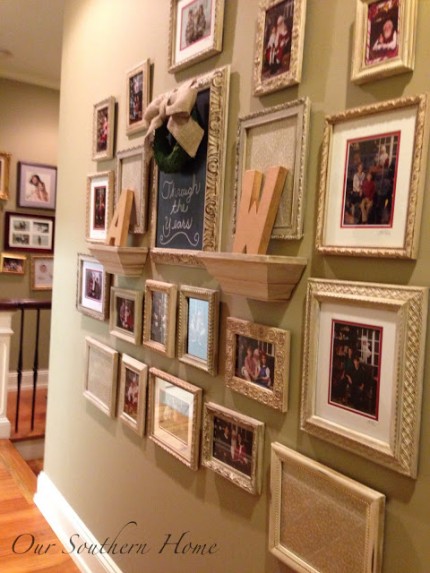
6- Hanging Gallery Wall Tips from Our Southern Home
7- Picture Gallery Wall from Lookie What I Did
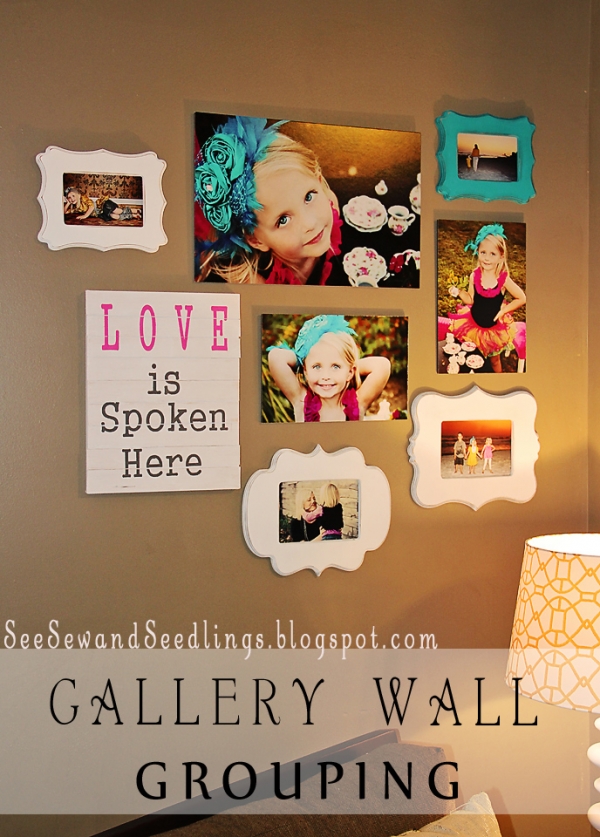
8- Gallery Wall Grouping from See Sew and Seedlings
Here are some top tips for creating a professional-looking family photo gallery wall:
Plan the layout: Before you start hanging any pictures, plan out the layout of the gallery wall. You can do this by laying out the frames on the floor to see how they look together. It’s important to consider the size and shape of each frame and how they will work together as a cohesive display.
Choose a theme: A gallery wall can be even more impactful if you choose a theme for your photos. This can be anything from family vacations to black and white portraits. A theme will help tie everything together and create a more cohesive look.
Use a variety of frame styles: Mixing and matching different frame styles and sizes can add visual interest to your gallery wall. Use frames that complement each other, but also provide some contrast.
Consider matting: Adding a mat to your framed photos can make them look more professional and polished. It also creates a border between the photo and the frame, which can make the photo stand out even more.
Create balance: A gallery wall should be balanced, so be sure to evenly distribute the frames throughout the space. You can also create balance by mixing larger frames with smaller frames or by using frames of different shapes.
Use a level and measuring tape: It’s important to make sure that each frame is level and evenly spaced. Use a level and measuring tape to ensure that each frame is hung at the correct height and distance from the adjacent frames.
Add interest with non-photographic elements: Consider adding non-photographic elements to your gallery wall, such as art prints, decorative objects, or even a mirror. This will add visual interest and create a more dynamic display.
Experiment with different arrangements: Don’t be afraid to play around with different arrangements until you find one that works for you. It may take some trial and error to find the perfect layout, but the end result will be worth it.


