 I’ve featured several projects from today’s guest poster. Her name is Connie and she runs the blog Salvage Savvy. I’m excited to share this project with you today, isn’t it beautiful?? I am just smitten with it! Connie is going to show you how she did it, so without further adieu…
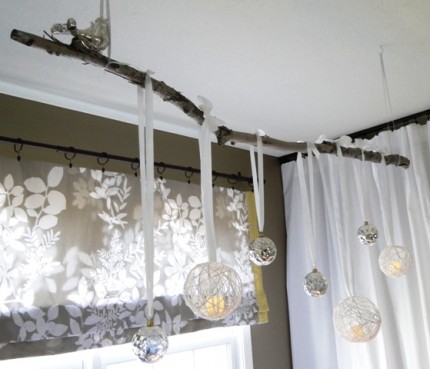 Hello fellow Craft Gossip readers, my name is Connie and I am beyond thrilled to provide a guest tutorial for you fine folks today! I run a little bloggin’ joint called Salvage Savvy, where I love to salvage or repurpose all kinds of things to create thrifty DIY home décor. Today I’m sharing with you how to make a gorgeous Christmas Candle Chandelier [would that be considered a “Candle-lier”?!]. Want to know what makes it extra wonderful? It’s made of stuff you probably already have laying around your house [and even if you have to go out and buy it all it would still only cost you about $15 to make!].
 First, begin by selecting a branch [this sounds simple enough… but I walked around waaaay too long searching for the perfect one!]. I liked this one because it had bark falling off which added great texture and interest.
 I dusted it off and then spray painted it using a Brushed Nickel color. See how amazing the bark looks in silver [love!]?
 Next I made the white yarn “candle holders.”
For this you’ll need:
100% Cotton yarn
Plain-old School glue with a little water mixed in [about a 5:1 ratio]
Balloons blown-up to the size of a large grapefruit and then covered in Vaseline
A plastic table cloth [or just use a trash bag like me if you’re fancy!] because it gets messy.
Begin by dipping about 24” sections of your yarn into the glue and then squeeze off the excess back into the bowl. Now immediately begin wrapping your balloon. You can’t mess this up, wrap away in any and every direction making sure to keep each layer tight on the balloon. Just make sure to leave an opening big enough to squeeze your candles into it [I didn’t really do that, soooo yea… that’s important.].
 Once you’re done, tuck the last piece underneath another so it’s not hangin’ out all loosey-goosey. Then roll the wrapped balloon around in glitter until it is nice and sparkly.
 Now set it aside and wait for it to dry completely [which is the hardest part for me because I’m impatient]. Once your balloons are dry, deflate the balloon inside and pull it out…so easy!
 Next, I screwed 2 Mug hooks into the ceiling based upon my branch measurements. *Note: I chose a light branch… if you choose a heavy branch then you’ll want to use ceiling toggle bolts instead to make sure it’s safe.
Then I decided how low I wanted the branch and tied ribbon “loops” onto each hook at that length, which allowed me to simply slip my branch into the hanging loops.
Now you’re ready to assemble everything! Just thread ribbon into each yarn candle holder and ornament and tie them at the top of the branch. Be sure to arrange it all at varying lengths for interest.
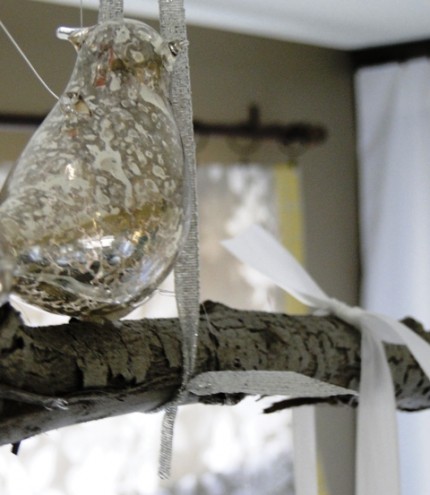 And I added a little birdy to my branch… I secured it onto the branch with hot glue, but I also attached it to the Mug hook using clear fishing wire for extra safety.
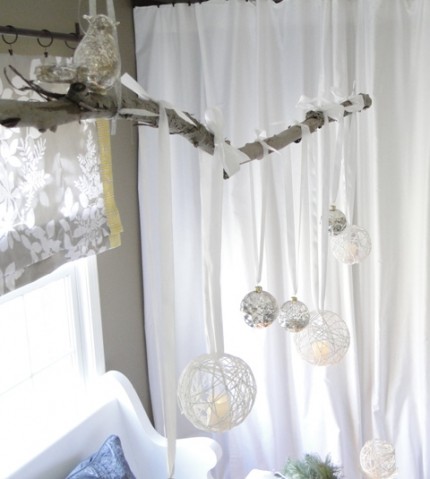 Finally, insert your flameless candles, turn them on and enjoy your beautiful new Candle-lier! *Another safety note: ONLY use flameless candles (LED tealights) for this project! I love this project because it can be used in so many different ways and for all seasons, but for now… Have a Merry Christmas!
 Here are a few more thrifty DIY projects from Salvage Savvy that I hope you will enjoy!
 $8 Lamp Makeover
 Create Your Own Unbelievable Artwork
You can also find Salvage Savvy on Facebook. Thanks so much for sharing your awesome project with the Craft Gossip readers Connie!


 Vera Wang inspired Pillow


So beautiful and doable! Thanks for the great tutorial.
Oh my gosh, I LOVE the chandelier! Can’t wait to try my hand at making it. Thank you for the tutorial!!!
How do I get the candle in the candelier?
Absolutely beautiful, would look amazing in a store window!