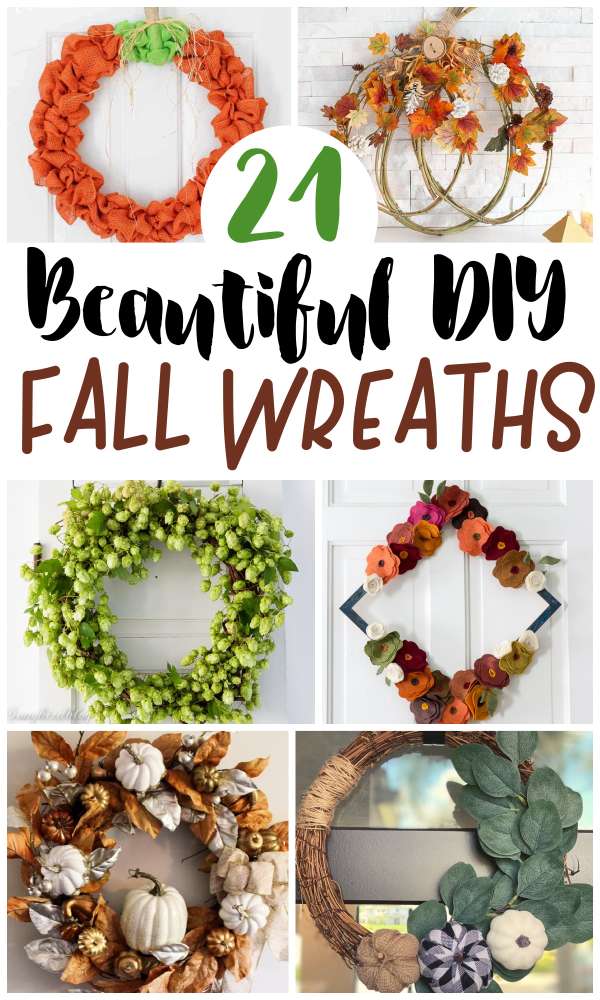
I feel like every Fall, thousands of new wreaths are being released in stores and online. It’s amazing how creative people can get with their wreath designs and the attention to detail that goes into each one. However, there’s one thing that all of these wreaths seem to have in common, and that is their traditional styling. Fall is all about leaves, nature, and all things earthy, and I absolutely love that.
Every time fall rolls around, I can’t help but feel a sense of excitement and anticipation as I start to decorate my home with all of the beautiful autumn-themed items. From pumpkins and gourds to hay bales and scarecrows, there are so many fun and festive ways to get into the fall spirit. But one of my absolute favorite things to decorate with during this time of year are maple leaves.
Whether they are real or fake, I don’t mind. I love the bright, bold colors of maple leaves, and the way they look when they’ve been perfectly arranged on a wreath or in a vase. To me, it’s just so satisfying to bring a little bit of nature into my home, and to be surrounded by all of the beautiful colors of fall.
There’s just something about the look and feel of real maple leaves that is hard to beat. When you bring them into your home, you get a sense of being in the great outdoors, even if you’re just sitting on your couch. The way the leaves rustle when you walk by and the way the light shines through them, making them glow, is just magical.
Looking for Fall decorating items? Check out these Fall crafts from our sister site and these Fall decorations we found on Amazon.
This
DIY Fall Wreaths –
DIY Rustic Glam Fall Wreath – Our Crafty Mom
Felt Flower Fall Wreath – Hearth and Vine
Fall Hops Wreath – Songbird Blog
DIY Felted Acorn Wreath – Pillar Box Blue
Embroidery Hoop Wreath with Wood Slices – Lydia Out Loud
Easy Fall Wreath – Kenarry
Autumn Harvest Thanksgiving Wreath – Frugal Mom Eh
DIY Fall Farmhouse Pumpkin Wreath – Swanky Den
Fall Pumpkin Buffalo Plaid Wreath – Mooshu Jenne
Happy Fall Yall Autumn Wreath – Leap of Faith Crafting
Monogram Fall Wreath – Craftaholics Anonymous
DIY Fall Wreath with Fake Flowers – Artsy Fartsy Mama
Easy Fall Wreath with Twine and Pinecones – Artsy Craftsy Mom
Purple and Mustard Yellow Fall Wreath – A Pumpkin and a Princess
Fabric and Felt DIY Fall Wreath – Uncommon Designs Online
Burlap Pumpkin Wreath – Crafts by Amanda
Scarecrow Fall Wreath Tutorial – Intelligent Domestications
DIY Colorful Pine Cone Fall Wreath – Sarah Hearts
Fall Ornament Wreath – Where the Smiles Have Been
Fall Split Wood Bead Wreath – Lolly Jane
Pumpkin Grapevine Wreath – Crafts by Amanda
The first day of autumn is known as the autumnal equinox. On this day, the number of hours of daylight and darkness are equal.
Did you know Fall is actually called Autumn everywhere else in the world? Yep, Fall is a US-based reference only.
However, as much as I love real maple leaves, I also have a soft spot for fake ones. Fake maple leaves are so convenient, and they are the perfect solution if you live in an area where fall leaves are not as readily available. With fake maple leaves, you can decorate your home with the same beautiful autumn colors, but you don’t have to worry about them wilting or drying out.
I love using fake maple leaves to create a stunning autumn wreath for my front door. I’ll gather a handful of leaves in varying sizes and colors, and then arrange them in a circular shape on a foam wreath form. I’ll use floral wire to secure the leaves in place, and then add a ribbon or bow to finish off the look. The end result is always a stunning, eye-catching piece that is sure to welcome guests in style.
I also love using fake maple leaves to decorate other areas of my home, such as my mantel or my coffee table. I’ll arrange them in a vase or basket, and then add in some pine cones, acorns, and other autumn-themed items to create a warm and inviting display.
One thing I love about fake maple leaves is that they are so versatile. They come in all different colors, from bright reds and oranges to deep purples and gold, so you can easily find a set of leaves that will complement your home’s decor. Plus, because they are made from plastic or silk, they are incredibly durable and long-lasting, so you can use them year after year.
I just can’t get enough of maple leaves, whether they are real or fake. To me, they are the perfect representation of fall, and I love the way they bring a touch of nature into my home. Whether you’re decorating for a holiday party, or just creating a cozy autumn atmosphere, maple leaves are the perfect addition to any fall-themed display.
How to Prepare and Dry Leaves for Fall Craft Wreaths: A DIY Guide
Fall is a season celebrated for its vibrant colors and natural beauty, making it the perfect time for crafting and decorating your home with a stunning fall craft wreath. To create a beautiful wreath using real leaves, it’s essential to properly prepare and dry them. In this DIY guide, we’ll take you through the steps to ensure your leaves are ready for crafting.
Materials You’ll Need
Before you begin, gather the following materials:
Fresh Leaves: Collect a variety of fresh leaves from your garden or local park. Different shapes and colors will add depth and interest to your wreath.
Paper Towels: You’ll need these for the drying process.
Wax Paper: To protect your work surface.
Glycerin (Optional): Glycerin can help preserve the color and flexibility of the leaves.
Step-by-Step Instructions
1. Leaf Collection
Begin by collecting an assortment of leaves. Look for leaves that are relatively intact and free from blemishes.
2. Remove Stems
Carefully remove the stems from each leaf. You want to work with just the leaf itself for your wreath.
3. Optional Glycerin Soak
If you want to preserve the leaves’ color and flexibility, you can create a glycerin solution. Mix one part glycerin with two parts water. Soak the leaves in this solution for several days. This step is optional but can enhance the longevity of your wreath.
4. Pressing the Leaves
Place each leaf between two sheets of paper towel to help absorb moisture. Then, sandwich the paper towels between sheets of wax paper to protect your workspace. Stack some books or heavy objects on top to press the leaves flat. Leave them like this for about a week.
5. Drying
After pressing, the leaves should be relatively dry, but they may still contain some moisture. Lay them out in a single layer on a clean, dry surface, such as a baking sheet, and let them air dry for another few days. Make sure they are completely dry before using them in your wreath.
6. Crafting Your Wreath
Now that your leaves are thoroughly prepared and dried, you can start crafting your fall wreath. Use a wire wreath frame or a foam wreath base to attach your leaves using glue or wire, arranging them in a pleasing pattern.
Tips:
Handle leaves gently to prevent tearing.
Experiment with different leaf sizes and colors to create a visually appealing wreath.
Finish your wreath with complementary decorations like acorns, pinecones, or ribbon for an extra touch of fall charm.
By following these steps and putting your creativity to work, you’ll have a beautifully crafted fall wreath that adds a touch of autumn elegance to your home decor.


