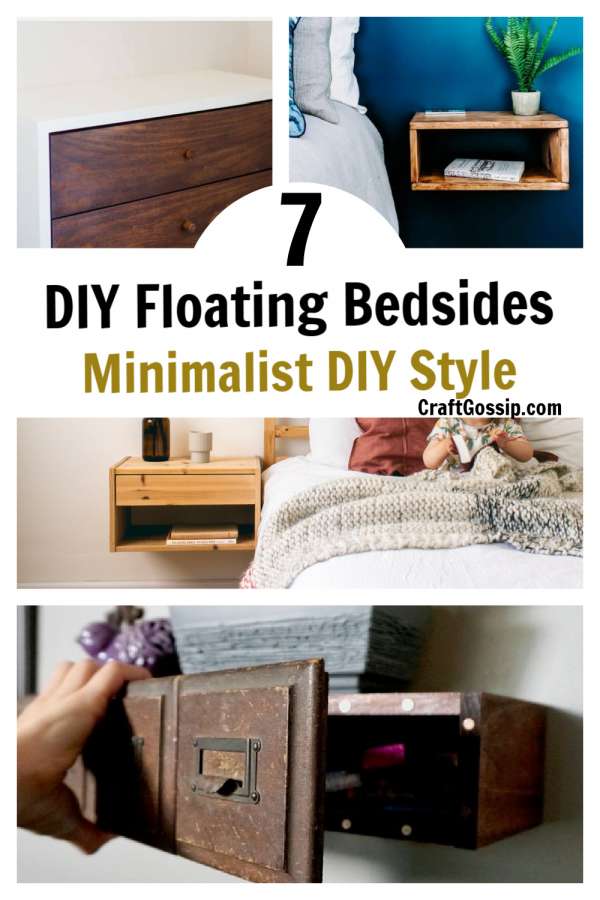
Floating shelves have become a popular design trend in recent years, and for good reason. These shelves provide a sleek, minimalist look that complements any décor style. They are functional and practical, providing a space to display your favorite items, store books, and even act as a bedside table. They are easy to install and can be customized to fit your personal style and needs. Whether you’re looking to update your home with a new piece of furniture, or just need a weekend project to keep you busy, a floating shelf is a great option.
This roundup of floating shelf projects focuses on how to create a stylish floating bedside table. Not only do these tables provide a practical place to store your books, phone, and other essentials, but they also add a touch of sophistication to your bedroom. They can be customized to fit your personal style, whether you prefer a classic, minimalist look or a more eclectic, colorful design.
One of the benefits of making your own floating bedside table is that you can choose the materials and finish that best suit your style and needs. You can use different types of wood, such as pine, oak, or maple, and finish it with a clear coat of polyurethane or paint it to match your bedroom’s décor. Additionally, you can choose the size and shape that works best for your space.
To get started, you’ll need a few basic tools and supplies. These include a saw, drill, sandpaper, clamps, and screws. You’ll also need to decide on the type of wood you want to use, and purchase enough to create the size and shape of your table. Some tutorials recommend using pre-cut pieces of wood, while others suggest cutting your own pieces to the desired size and shape.
The building process is fairly straightforward and can be completed in a weekend with the right tools and supplies. You’ll begin by cutting the pieces of wood to the desired size and shape, then sanding the pieces until they are smooth. Next, you’ll drill pilot holes and attach the pieces together using screws and clamps. Once the table is assembled, you can finish it with a clear coat of polyurethane or paint it to match your bedroom’s décor.
One of the best things about creating a floating bedside table is that it’s a customizable DIY project. You can choose the size, shape, and style that best fits your needs, and add your own personal touch with the finish and accessories. You can also choose to add additional features such as a built-in light or a small drawer to store items.
Creating a floating bedside table is a fun and rewarding DIY project that can be completed in a weekend. With the right tools and supplies, anyone can create a stylish and functional piece of furniture for their home. Whether you prefer a minimalist look or a more eclectic design, this project provides a great opportunity to add a unique touch to your home. So get started today and enjoy the satisfaction of creating your own beautiful, one-of-a-kind floating bedside table.
DIY projects are a great way to bring new life to old items and make your home unique. One of the best ways to get started is with a DIY upcycled floating shelf. At Craftbits.com, we have created a step-by-step guide to help you transform an old piece of wood or even an old door into a beautiful floating shelf. Whether you’re looking to add some extra storage or just want a unique piece of decor, this project is perfect for you.
DIY Floating Shelf With Hidden Storage – DIY projects for everyone!
This tutorial is perfect for those who love the sleek look of floating shelves but also need a bit of extra storage. This DIY project will show you how to create a floating shelf with a hidden storage compartment that can be used as a bedside table. The combination of floating shelves and hidden storage make this project both functional and stylish. With simple steps and a few supplies, you can create a custom piece of furniture that will add a touch of sophistication to your bedroom.
Get ready to bring a touch of modern elegance to your bedroom with this DIY floating nightstand project. This tutorial provides step-by-step instructions on how to create a minimalist floating shelf that doubles as a bedside table. The modern design features clean lines and a sleek finish, making it a perfect fit for contemporary bedrooms. With basic woodworking skills and a few supplies, you’ll be able to create a beautiful and functional piece of furniture that adds style and practicality to your room.
Floating Bedside Tables DIY (Thrifted & Upcycled)
For those who love upcycling and repurposing old items, this DIY floating bedside table tutorial is perfect. This project shows you how to transform a thrifted piece of furniture into a beautiful floating bedside table. The result is a unique and functional piece that not only looks great, but also saves money and reduces waste. With a few tools and supplies, you’ll be able to give an old item a new life and add a touch of personality to your bedroom.
DIY Floating Nightstands – DIY Huntress
This DIY tutorial from the DIY Huntress provides step-by-step instructions on how to create a floating nightstand that is both beautiful and functional. The simple design features clean lines and a sleek finish, making it a great addition to any bedroom. With a few tools and supplies, you’ll be able to create a custom piece of furniture that adds style and practicality to your room. Whether you’re a seasoned DIYer or just starting out, this project is a great way to improve your skills and add a beautiful piece to your home.
Nightstands Day 9 – Floating Nightstand with Drawer
This tutorial is part of a series of DIY nightstand projects and focuses on creating a floating nightstand with a built-in drawer. The addition of the drawer makes this project both functional and stylish, providing extra storage space for your essentials. The simple design and step-by-step instructions make this project a great option for those new to woodworking. With a few tools and supplies, you’ll be able to create a beautiful and practical bedside table in no time.
Build 2 DIY Floating Nightstands in Less Than an Hour
For those who want a quick and easy DIY project, this tutorial is perfect. This project shows you how to build two floating nightstands in less than an hour. The simple design and fast building process make this project a great option for those who need new bedside tables in a hurry. With a few tools and supplies, you’ll be able to create a beautiful and functional piece of furniture in no time. So if you’re looking for a quick and easy DIY project, this tutorial is for you!
How to build a DIY floating nightstand – full tutorial and instructions
This comprehensive tutorial provides step-by-step instructions on how to build a floating nightstand from scratch. The tutorial covers everything from selecting the right materials to finishing the project with a clear coat of polyurethane.


