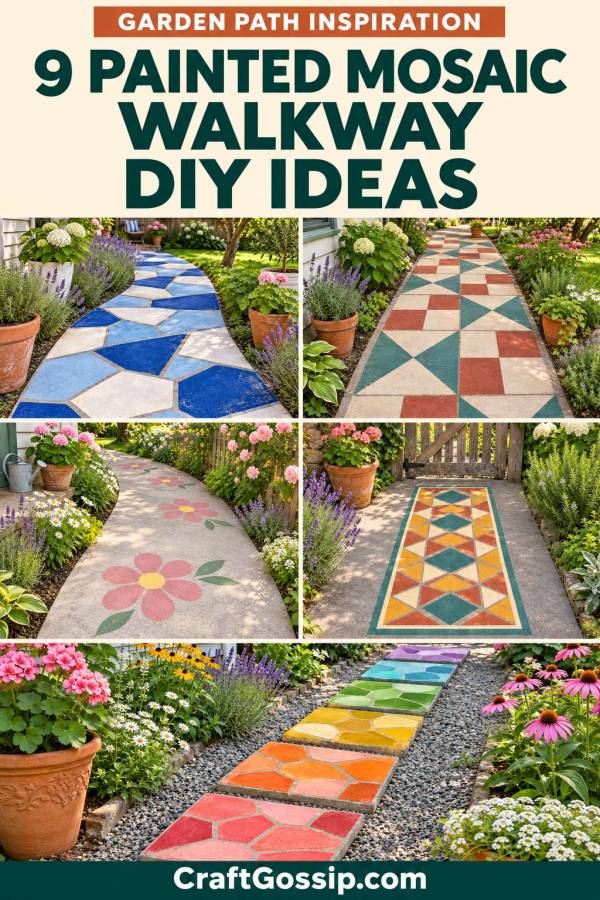
There’s something rather disappointing about a plain concrete path running through a garden you’ve spent ages making lovely. The flowers are doing their thing, the pots have been rearranged three times, and there in the middle is a grey strip looking thoroughly uninspired.
That’s where these painted mosaic walkway DIY ideas come in. With a suitable outdoor paving paint system and a little planning, you can create the look of colourful mosaic pieces, patterned tiles or patchwork paving on an existing surface.
The appeal is the colour and pattern. You’re painting the illusion of separate pieces, so there’s no tile cutting or grouting involved. However, this is still an outdoor floor project. Surface preparation, paint compatibility and slip resistance matter just as much as choosing a lovely shade of blue.
Whether you fancy a cottage garden path, Mediterranean colours or something that looks suspiciously like your favourite quilt, here are nine designs worth considering.
What Is a Painted Mosaic Walkway?
A painted mosaic walkway uses painted shapes separated by narrow background lines to suggest individual tiles or pieces of stone.
Some designs imitate irregular broken-tile mosaics. Others use repeating squares, triangles, flowers or decorative stencil patterns.
For inspiration using actual mosaic materials, take a look at these garden mosaic projects. You can borrow a colour combination or arrangement and interpret it in paint.
The important distinction is that a painted finish will need maintenance. It doesn’t turn concrete into ceramic tile, and it won’t repair a damaged path.
Before You Buy Paint, Check Your Walkway
Start with a sound, stable surface. Loose pavers, uneven edges, active cracks and drainage problems need attention before decorating.
Identify whether your walkway is bare concrete, previously painted concrete, sealed paving or another material. Each may require a different preparation and coating system.
Ask the paint manufacturer to confirm that the complete system is suitable for:
- Your exact surface and any existing coating.
- Outdoor pedestrian traffic.
- Layered decorative painting or stencilling.
- The path’s slope and exposure to rain.
- The required slip resistance when wet.
A product labelled “exterior paint” isn’t automatically suitable for a floor. Also, a paving coating approved for one continuous colour may not be supported for layered stencil work.
My suggestion is to settle those practical questions before falling in love with a stencil. It saves a rather frustrating conversation halfway through the project.
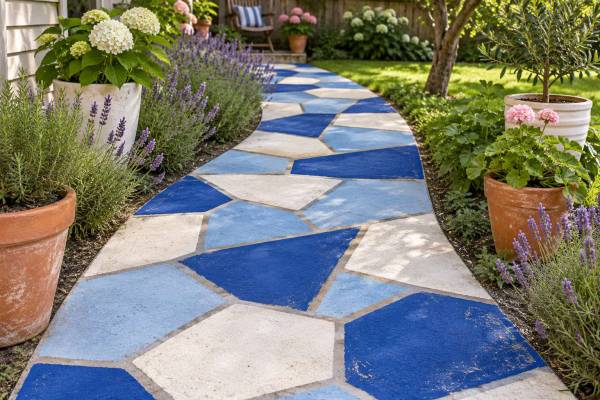
1. Mediterranean Blue and White Mosaic
Think deep blue shapes against a warm white background, with a few lighter blue pieces scattered through the design.
For a broken-tile effect, draw irregular polygons with narrow gaps between them. Keep the shapes reasonably large so the pattern reads clearly from the house or garden gate.
Make it work: Repeat the same three colours throughout the path. A limited palette helps freehand shapes feel intentional, even when your brushwork gets a little enthusiastic.
This is a lovely option beside white pots, terracotta planters or a sunny courtyard.
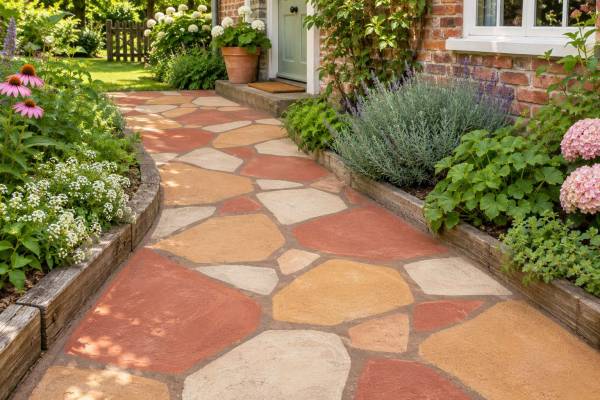
2. Terracotta and Cream Faux Stone
If bright colours aren’t your thing, try a softer painted mosaic path using terracotta, sand and warm cream.
Create irregular stone-like shapes over a muted background, leaving visible gaps to suggest joints. Avoid outlining every piece in strong black, which can make a gentle design look surprisingly cartoonish.
Make it work: Use a few larger shapes among the smaller ones. A path filled with tiny pieces takes much longer to paint and can look busy.
I’d choose this combination beside brickwork, timber edging or a cottage garden with plenty of greenery.
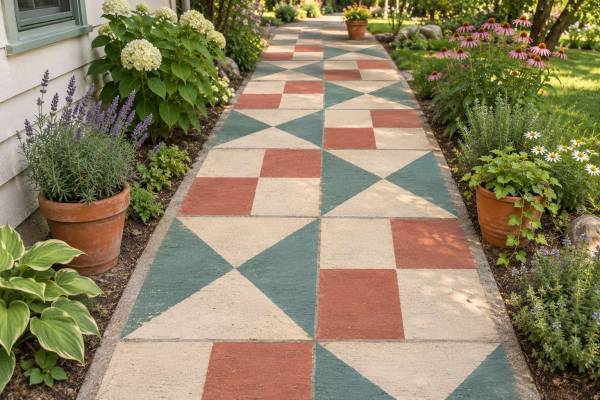
3. A Patchwork Quilt Walkway
This one is for anyone who sees an empty surface and immediately starts mentally arranging quilt blocks.
Divide the walkway visually into squares, then fill them with simple painted triangles, four-patch arrangements or diamond motifs. Two or three colours will give you the patchwork feeling without turning the garden into a paint-chart display.
Make it work: Sketch the full repeat on paper first. Check how the pattern will finish at the edges and ends of the path.
A large, simple arrangement is much more manageable than a tiny, intricate block repeated forty times. Even quilters have their limits.
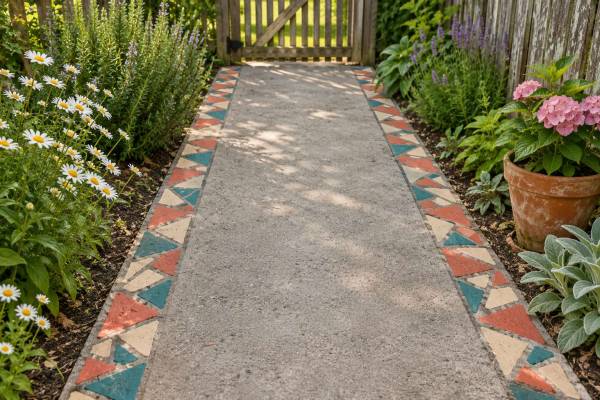
4. A Painted Mosaic Border
You don’t have to decorate the entire walkway to make a difference.
A narrow band of mosaic shapes along each side can frame the path while leaving the centre visually quiet. Try alternating triangles, little rectangles or irregular pieces in a restrained colour scheme.
Make it work: Measure your borders at regular intervals. Small changes in width become quite noticeable along a long, straight path.
This approach reduces the area of decorative painting, although preparation requirements still apply wherever you’re coating the surface.
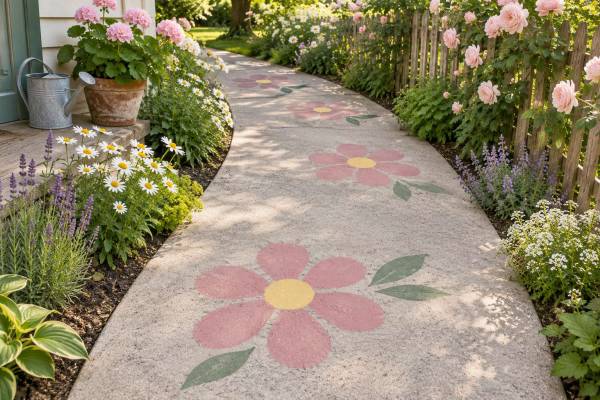
5. Cottage Garden Flower Mosaics
Paint simple flowers made from separate petal shapes, leaving the background visible between each “piece.”
Choose a few repeated blooms rather than scattering a different flower everywhere. Soft yellow centres, dusty pink petals and muted green leaves would make a cheerful combination.
Make it work: Keep petals broad and easy to recognise. Tiny details tend to disappear once you’re standing up and viewing the finished walkway.
If you prefer natural garden motifs with actual texture, these leaf-imprint stepping stones offer another direction for a garden project.
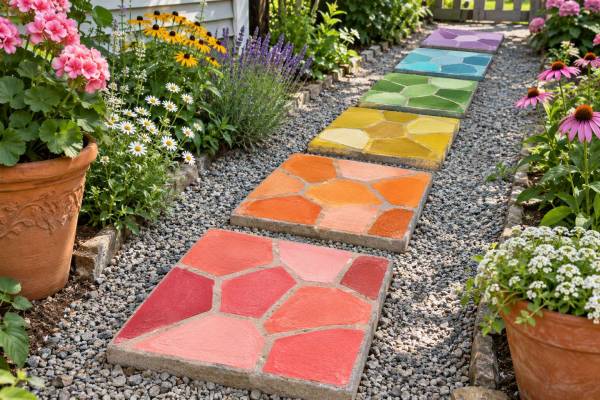
6. Rainbow Mosaic Stepping Pavers
A small group of existing concrete pavers can be a more manageable starting point than a whole garden path.
Give each paver a different main colour, then repeat the same simple mosaic arrangement across them. Alternatively, use the same colours on every paver but change their positions.
Make it work: Keep the pavers stable and level, preserve drainage gaps, and avoid building up thick paint around the edges.
For a different project using embedded decorative pieces, browse these DIY mosaic garden stepping stones for colour and layout inspiration.
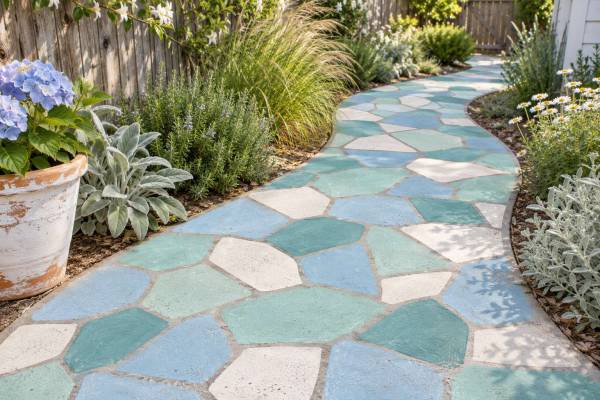
7. Coastal Sea-Glass Colours
Use pale aqua, muted teal, soft blue and warm white to suggest a sea-glass mosaic.
The shapes can be irregular, but aim for a similar scale throughout the design. Leaving consistent background gaps helps the arrangement feel connected.
Make it work: Choose colours with enough contrast to remain visible outdoors. Very pale shades can merge together in strong sunlight.
You’re borrowing the colours of sea glass here, rather than trying to create a glossy glass-like walking surface.
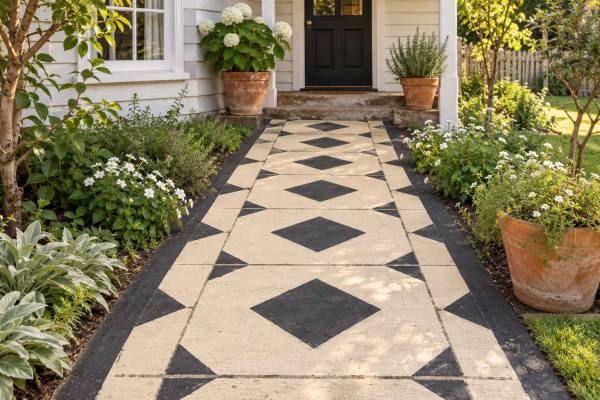
8. Black and Cream Geometric Tiles
For a more structured entrance path, use repeated diamonds, squares or a simple decorative stencil in black and cream.
This combination suits spaces where the planting already provides plenty of colour. It also gives you a clear pattern without needing several tins of paint.
Make it work: Establish a centreline and work from it. Check stencil alignment regularly instead of relying on the previous repeat, as small positioning errors can accumulate.
Choose a pattern with generously sized details. Fine stencil bridges and tiny flourishes are much less forgiving on textured concrete.
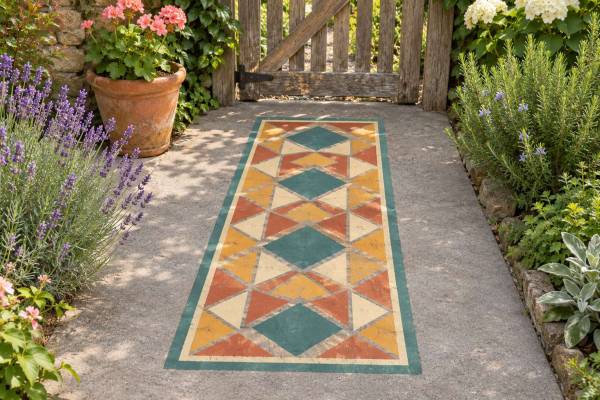
9. A Mosaic “Runner” Near the Garden Gate
Treat one section of the walkway like a painted outdoor runner, with a defined border and a repeating mosaic centre.
You might place it near a gate, beside a seating area or along a short section leading to the shed.
Make it work: Position the design on a suitable, level section and keep it clear of movement joints. Avoid using decorative outlines that could make a real step or level change harder to distinguish.
This is a useful way to introduce a bold pattern without committing to decorating the entire garden path.
Materials for a Painted Mosaic Walkway
Your exact shopping list depends on the coating system, but you may need:
- Manufacturer-approved surface cleaner and preparation products.
- Suitable repair materials for stable, repairable defects.
- Primer, if specified.
- Exterior pedestrian paving coatings approved for your decorative application.
- A compatible slip-resistant finish or additive, where specified.
- Outdoor painter’s tape suitable for the surface.
- A reusable stencil, if using one.
- Tape measure, straightedge and suitable marking tool.
- Small rollers, stencil brushes, paintbrushes and trays.
- Protective equipment specified on the product labels.
A reusable geometric stencil and a small stencil brush can make a repeating design easier. Check the stencil’s dimensions before buying, especially if you’re decorating individual pavers.
How to Paint a Mosaic Effect on a Concrete Walkway
1. Plan the design and quantities
Measure the walkway and sketch your pattern. Decide which colour will form the visible “grout” lines between your painted shapes.
Calculate paint quantities using the manufacturer’s coverage figures and required number of coats. Textured surfaces and multiple colours can affect how much you need.
2. Prepare the surface properly
Follow the selected system’s instructions for cleaning, removing unsound coatings, repairing suitable defects and any required etching or priming.
Allow the surface to dry as directed. Don’t paint over dirt, algae, moisture or loose material and expect the decorative layer to hold everything together.
3. Make a test patch
Test the complete system in an inconspicuous area, including your intended colours, stencil technique and any specified finish.
Follow the manufacturer’s instructions for checking adhesion and curing. A successful test patch is useful, but it doesn’t replace confirmation that the products suit the application.
4. Apply the background colour
Apply the specified coats and observe the drying and recoating times.
This background becomes the narrow lines between your mosaic shapes, so choose a colour that works with the whole design.
5. Mark and paint the pattern
Use your sketch to establish the layout. For irregular mosaics, draw the individual shapes and paint inside them, leaving the background visible between pieces.
For stencils, use a lightly loaded brush or roller. Too much paint encourages bleeding underneath.
Only apply tape to a coating when its manufacturer permits it, and follow the tape instructions for removal.
6. Finish and allow full curing
Apply a protective coating only if the paint system specifies or permits it. An extra clear sealer is not automatically beneficial and may change adhesion or slip resistance.
Keep people, pets and garden furniture off the walkway for the stated curing period. Touch-dry paint isn’t necessarily ready for muddy shoes and wheelbarrows.
Mistakes Worth Avoiding
The biggest mistake is choosing paint by colour alone. A gorgeous sample pot intended for walls doesn’t become walkway paint because we ask nicely.
Also avoid:
- Painting in unsuitable heat, cold, humidity or forecast rain.
- Bridging movement joints with filler or heavy coatings.
- Using an unapproved glossy sealer over the finished design.
- Assuming an additive makes every surface safe when wet.
- Starting with an intricate pattern before testing a small section.
- Expecting paint to disguise structural damage permanently.
Can You Make a Painted Mosaic Walkway on a Budget?
Keep the design simple and the colour palette small. A two-colour border or a short decorative section can give you plenty of visual impact with less detailed painting.
Use sound existing paving where suitable, borrow basic tools, and choose a reusable stencil you can use again.
Where I wouldn’t cut corners is preparation or the coating system. Repainting a peeling path is a much less enjoyable craft project than painting it properly the first time.
How Long Will a Painted Walkway Last?
There isn’t one honest lifespan that applies to every painted path. Surface condition, preparation, coating choice, sunlight, moisture and foot traffic all affect wear.
Inspect the finish periodically and follow the manufacturer’s cleaning and maintenance advice. Keep a record of the products and colours used so future touch-ups are easier.
A painted mosaic walkway is a lovely way to give an ordinary garden feature some personality. Start with a manageable design, choose a palette you enjoy, and give the preparation the attention it deserves. The prettiest result is one you can enjoy walking on as well as looking at.

Leave a Reply