As someone who grew up near the coast, I’ve always been drawn to beachy and nautical decor. There’s something about the colors, textures, and overall vibe of the ocean that just speaks to me. So, when I moved into my own place a few years ago, I knew I wanted to incorporate some of these elements into my home decor.
One of my favorite ways to do this is through DIY projects, and nautical beach styled mirrors have become one of my go-to projects. Not only are they practical (who doesn’t need a mirror in their home?), but they also add a touch of whimsy and personality to any room. Plus, making them myself allows me to customize them to my liking and save money compared to buying them from a store, yes I am one of those people.
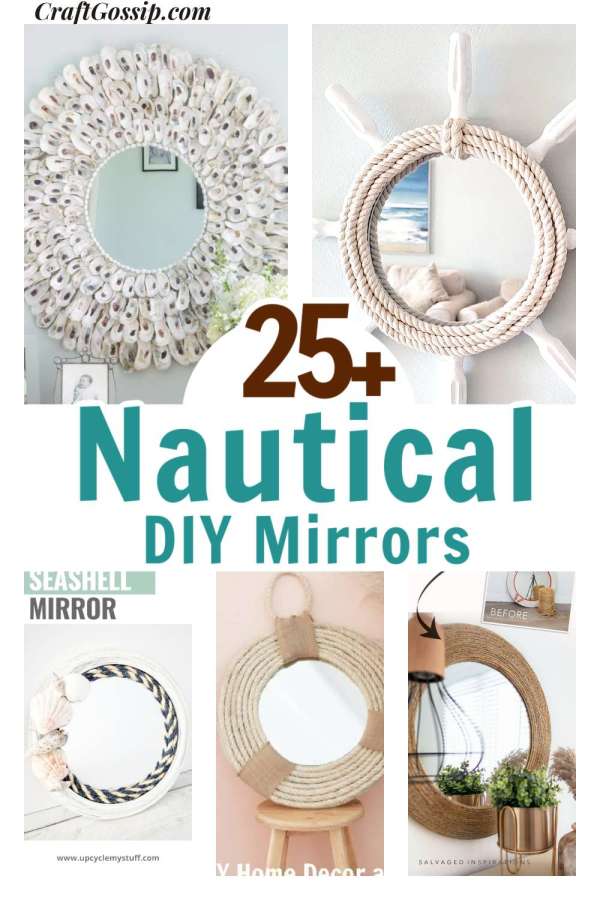
Over the years, I’ve tried out a variety of DIY nautical beach-styled mirror projects, and I’ve compiled 25 of my favorites to share with you in this article. There’s something for everyone here, but my favorite ones are always the driftwood ones they get the most feedback from people who come to my home.
One of my favorite projects in this roundup is the driftwood-framed mirror. To make this, you’ll need a large piece of driftwood (or several smaller pieces), a circular mirror, and some basic tools like a drill and saw. The end result is a rustic, beachy mirror that adds a touch of natural beauty to any room. Don’t have driftwood? No, I didn’t either, so here is my DIY recipe for making your own Driftwood.
Making DIY driftwood is a great way to add a natural, beachy feel to your home decor without having to scour the beach for hours. With a few simple materials and some patience, you can create your own driftwood pieces that will look just like the real thing. Here’s how:
Materials:
Unfinished wood
Wire brush
Hammer
Nails
Container large enough to fit your wood
Water
Bleach

Sunlight or a well-ventilated area
Instructions:
Begin by selecting your unfinished wood. You can use any type of wood, but lighter woods such as pine or poplar will give you the best results. You can also use scraps or old pieces of wood that you have lying around.
Use a wire brush to create texture on the surface of the wood. This will help give it a weathered, driftwood-like appearance.
To create the signature markings on driftwood, use a hammer and nails to create small dents and scratches on the surface of the wood. Be sure to vary the size and shape of the marks to create a more natural look.
Fill a container large enough to fit your wood with a mixture of water and bleach. Use a ratio of 3 parts water to 1 part bleach.
Submerge your wood in the bleach solution and let it soak for 24-48 hours. This will help remove any natural color or stains from the wood and give it a more weathered appearance.
After soaking in the bleach solution, remove the wood and let it dry completely in a well-ventilated area or in sunlight. This may take several days.
Once the wood is dry, mix a solution of equal parts hydrogen peroxide and water in a spray bottle.
Spray the solution onto the wood and let it sit in the sun or a well-ventilated area for a few hours. This will help lighten the wood and give it a more natural, driftwood-like color.
Repeat steps 7 and 8 until you achieve the desired color.
Your DIY driftwood is now ready to use! You can use it for a variety of home decor projects, such as creating a driftwood mirror, a driftwood picture frame, or a driftwood vase.
Creating DIY driftwood is a fun and easy way to add a natural, beachy feel to your home decor. With this tutorial, you can create your own driftwood pieces that will look just like the real thing. Just be sure to take your time and follow the steps carefully for the best results.
Okay, let’s move on to the tutorials. Don’t forget any of these tutorials can be made using upcycled mirrors, just use the frame you have on hand.
DIY Nautical Hamptons Mirror — CraftBits.com
Beachwood Place: DIY Shell Mirror
DIY Driftwood Mirror – Taryn Whiteaker Designs
DIY Nautical Rope Mirror – Artsy Chicks Rule®
DIY Rope Mirror- A Quick Upcycling Project
How to Make a DIY Nautical Mirror with Rope – The Ponds Farmhouse
https://salvagedinspirations.com/diy-rope-mirror/
DIY Mirror Project – Nautical Style
DIY Rope Mirror Tutorial | Nautical Style Bathroom Mirror – Southern Revivals
DIY Seashell Mirror – Upcycle My Stuff
Cheap & Easy DIY Stick Framed Mirror (That looks Expensive!)
Beautiful DIY BoHo Mirror (Video Included) – Bella Branch DIY
Make an Easy DIY Rope Mirror | My Pear Tree Home
DIY Nautical Rope Mirror – Upcycled Treasures
Easy Driftwood Mirror – The Wood Grain Cottage
DIY Driftwood Mirror: Rethinking a DIY Disaster! — The Learner Observer
Easy DIY Seashell Frame – Outnumbered 3 to 1
How To Make A Shell Mirror Tutorial With Your Treasures From The Sea
How To Make An Oyster Shell Mirror – Shine Your Light
Coastal Mirror – Across the Blvd
Easy to Make Oyster Shell Mirror · Nourish and Nestle
Using Oyster shells? here is my tutorial for cleaning them properly –
However, before you can start crafting with oyster shells, you need to make sure they are properly cleaned. Here’s how to clean oyster shells for DIY crafts:
Gather your supplies. You’ll need a bucket, a scrub brush, dish soap, and a pair of gloves. I also like to use an old toothbrush to get into the nooks and crannies of the shells.
Rinse the shells. Place the oyster shells in a colander and rinse them under running water. This will help remove any loose debris or sand.
Soak the shells. Fill the bucket with warm water and add a few squirts of dish soap. Place the shells in the bucket and let them soak for at least 30 minutes.
Scrub the shells. Put on your gloves and take a scrub brush to the shells. Scrub them gently, being careful not to break any of the delicate edges. Use the toothbrush to get into any tight spaces.
Rinse and dry the shells. Rinse the shells under running water and place them on a towel to dry. If you’re in a hurry, you can use a hair dryer on a low setting to speed up the drying process.
By taking the time to properly clean your oyster shells, you’ll ensure that your DIY crafts turn out beautiful and stay beautiful, nothing worse than moldy stinky oyster shells because you didn’t clean them properly.