• Home
  • Suggest A Craft
  • DIY Newsletter

Home and Garden

Ideas For DIY

  • About CraftGossip
  • Our Network
    • Bath & Body Crafts
    • Candle Making Ideas
    • Crochet Ideas
    • Cross Stitch
    • Edible Crafts
    • Felting Patterns
    • Glass Art
    • Home & Garden Ideas
    • Indie Crafts
    • Jewelry Making
    • Kids Crafts
    • Knitting Patterns
    • Lesson Plans
    • Needlework
    • Party Ideas
    • Polymer Clay
    • Quilting Ideas
    • Recycled Crafts
    • Scrapbooking
    • Sewing Patterns
    • Card Making
    • DIY Weddings
    • Not Craft Ideas
  • Giveaways
  • Roundups
  • Store
  • Search

DIY Spring Daffodil Wreath

February 10, 2019 by Shellie Wilson

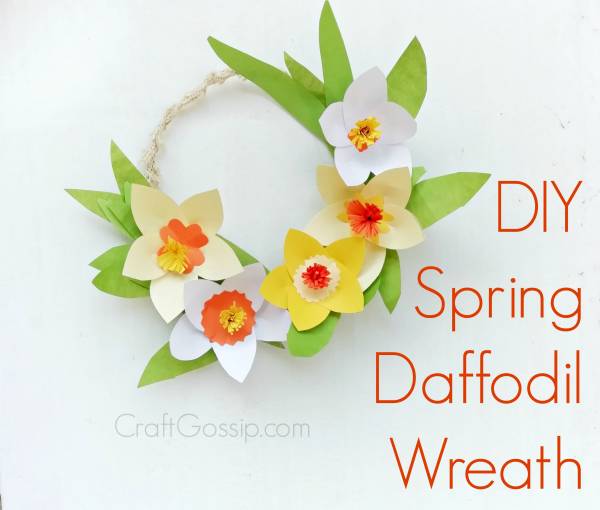
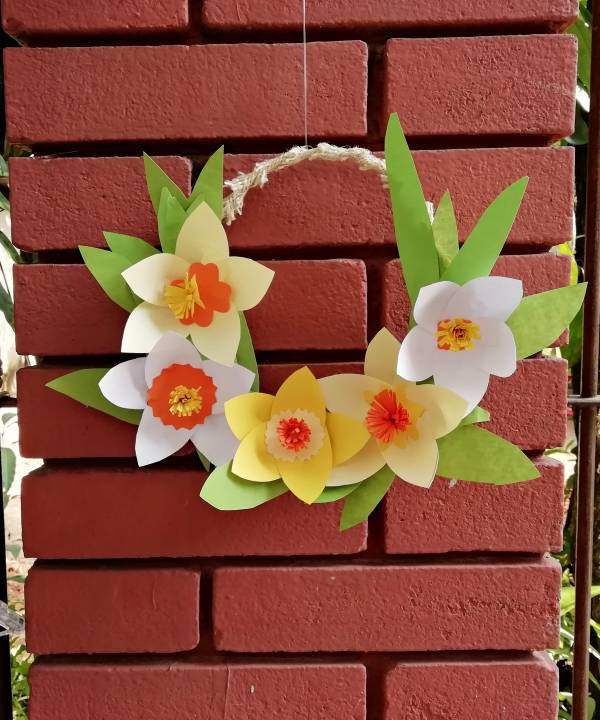
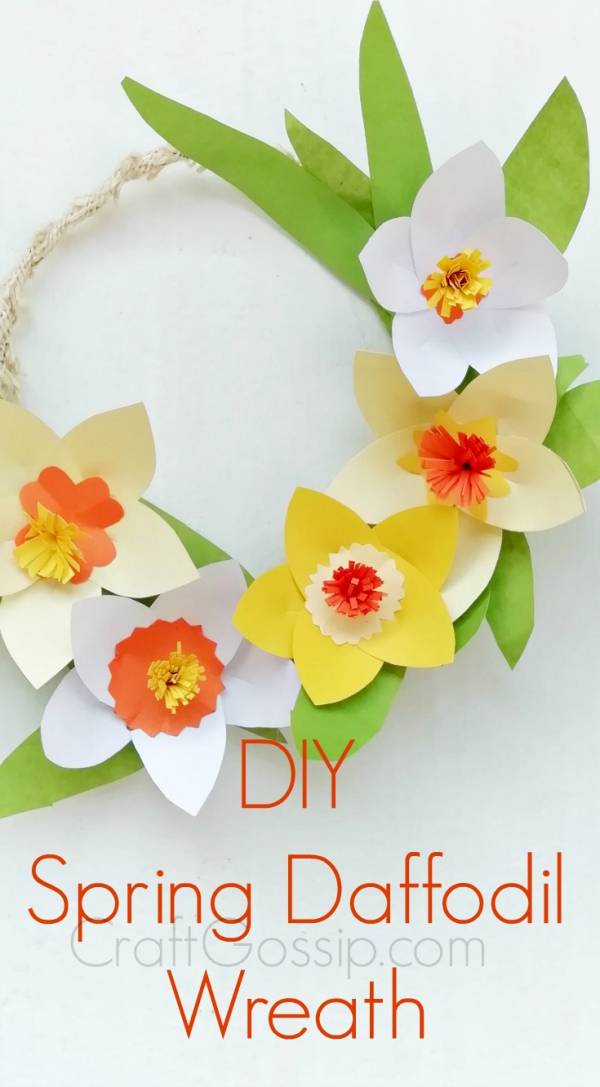
DIY Paper Daffodil Wreath – This springtime wreath is perfect for Spring or Easter decor. This spring project is made with paper flowers and you can use the printable templates below to create each flower for your Wreath.
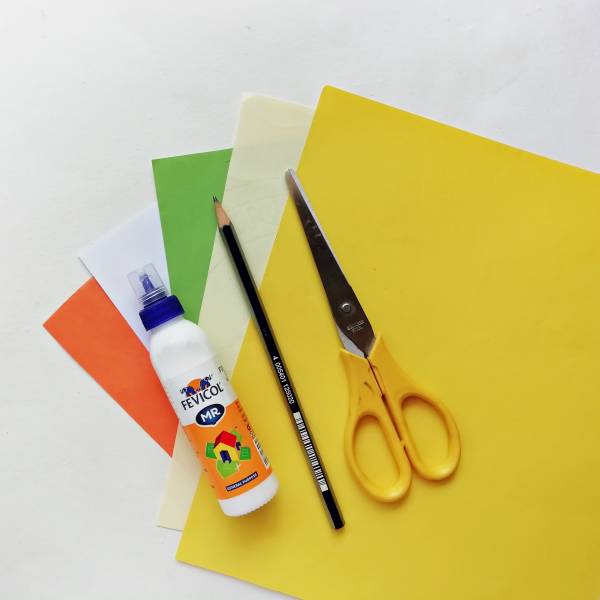
Daffodil templates 1c

Daffodil Template 2

Supplies
1. Colourful Paper.
2. Paper Glue
3. Scissors.
4. Pencils.
5. Wire.
6. Burlap Fabric.
7. Hot Glue Gun.


Introduction:
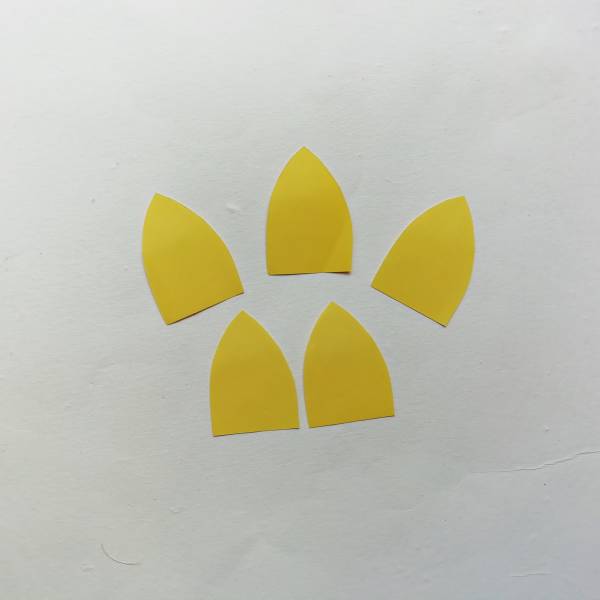
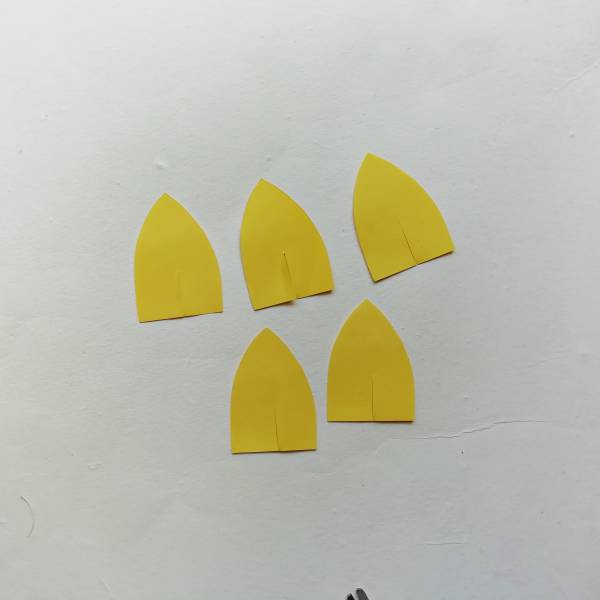
Step 1: Draw a petal shape using the template. Or you can print the templates directly
on the paper.


Step 2: Cut out the petals using the templates.


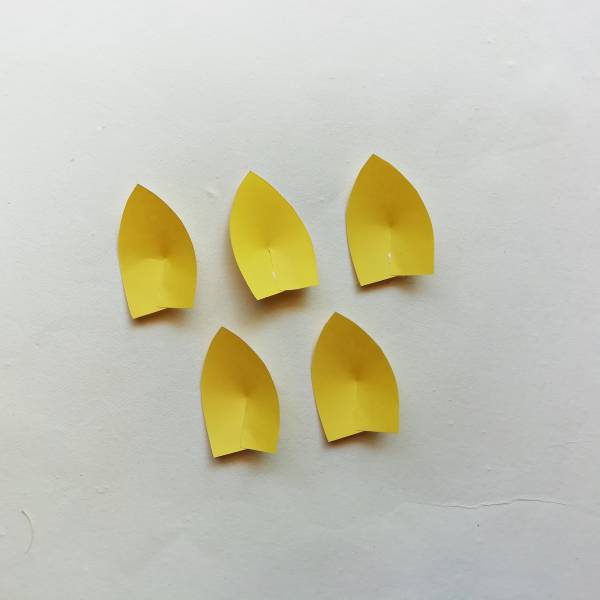
Step 3: Cut the petals halfway through the middle from the bottom side.


Step 4: Overlap the both slits and glue them together.


Step 5: Cut out a circular piece of paper from the templates.


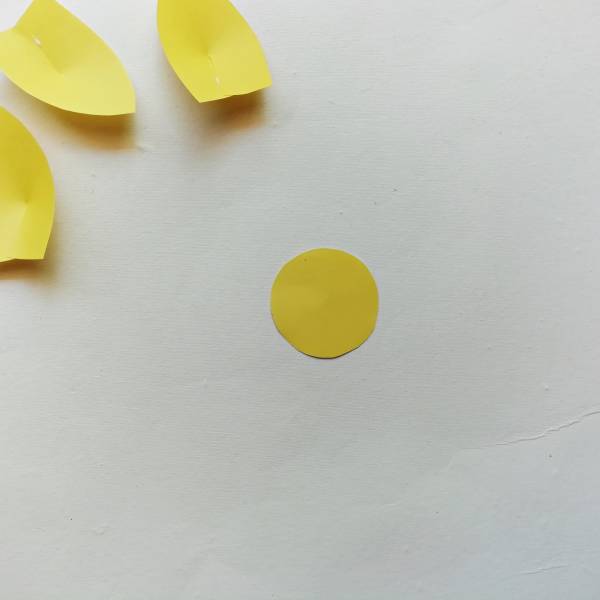
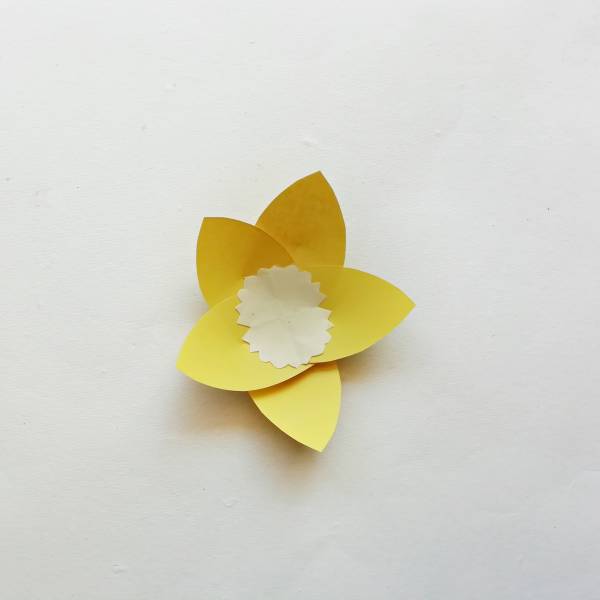
Step 6: Place a petal over the circular paper piece and glue it there.

Step 7: Glue rest of the petals over and around the circular piece.

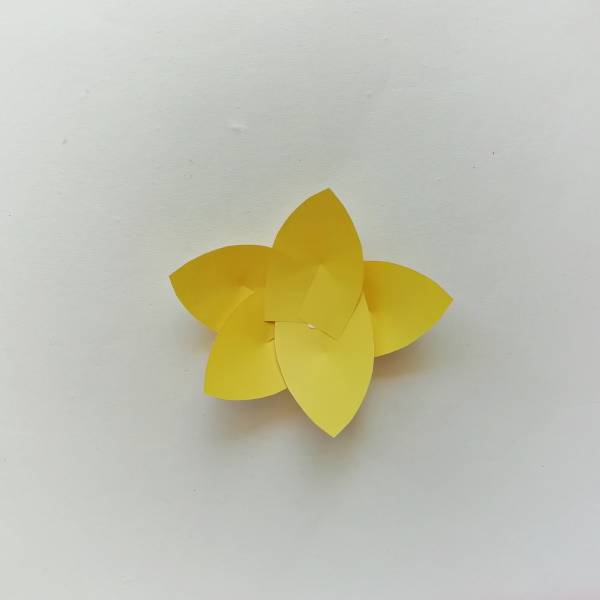
Step 8: Cut out another circle from the template (the one with zigzag edge).


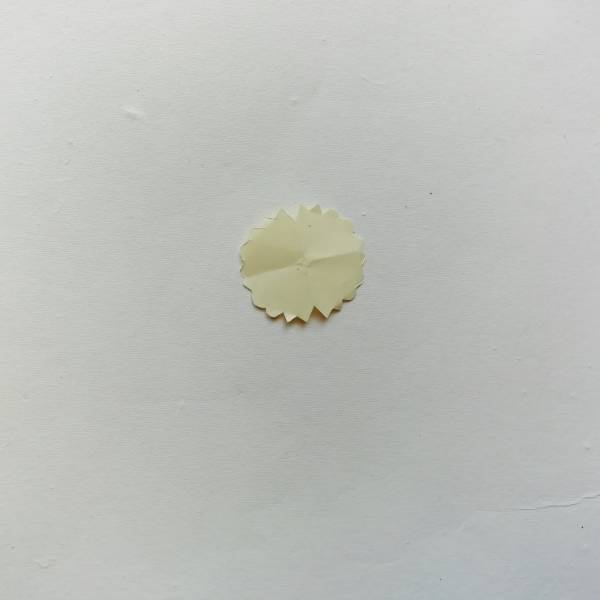
Step 9: And glue the piece on the middle of the flower.


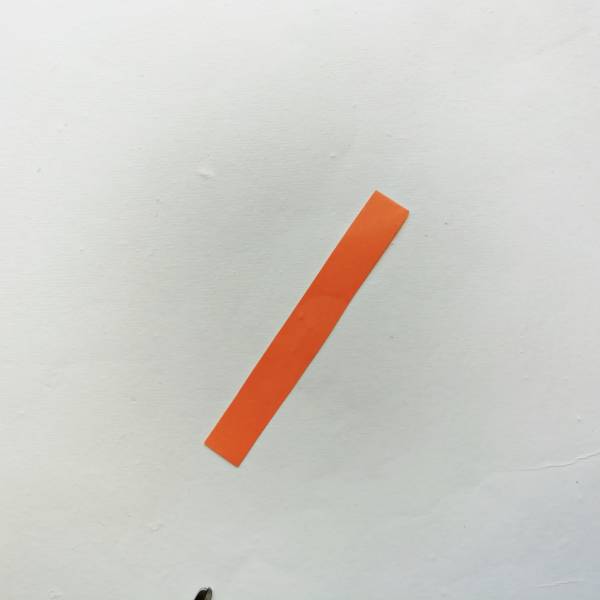
Step 10: Cut out a strip of orange paper.


Step 11: Make some horizontal cuts on the paper from start to end. Don’t cut all the
way through.


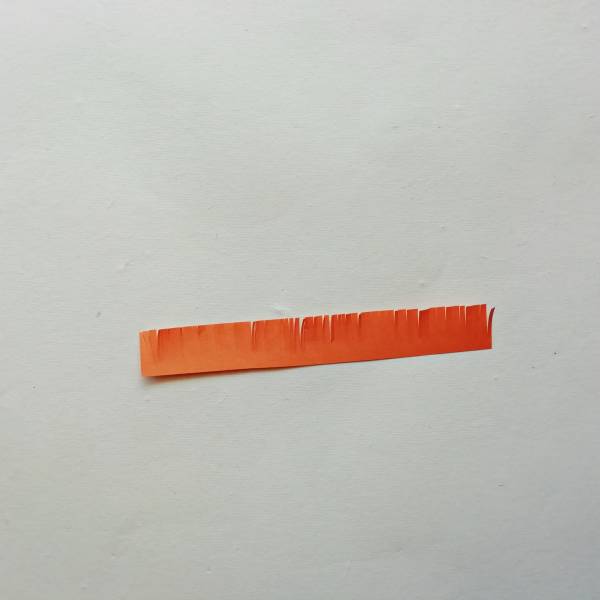
Step 12: Then roll the strip and glue it to secure the roll.

Step 13: Then glue the rolled strip on the middle of the flower.

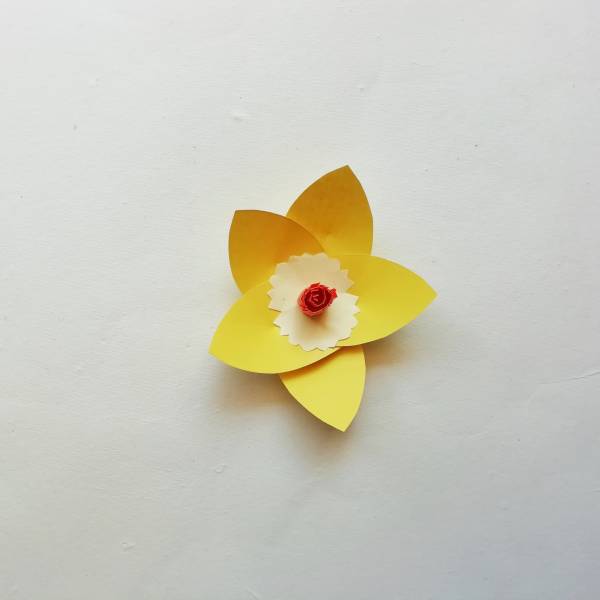
Step 14: Make more flowers similarly. Make at least 5-6 flowers or else the wrath might
look incomplete.

Step 15: Cut out some leaves for the wrath using the template.
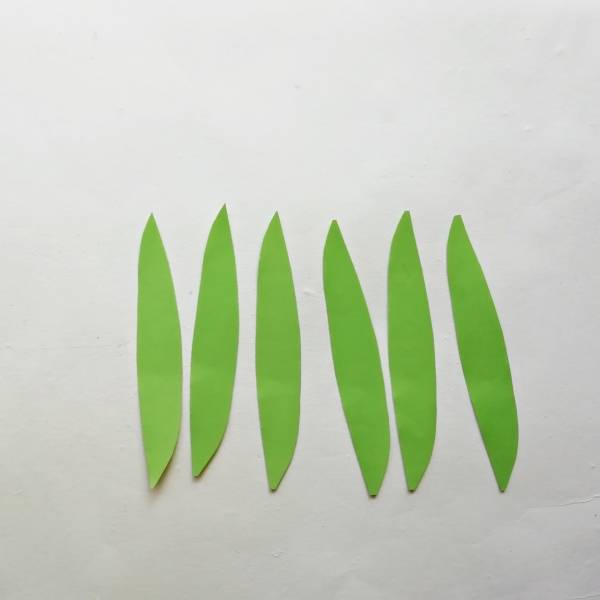
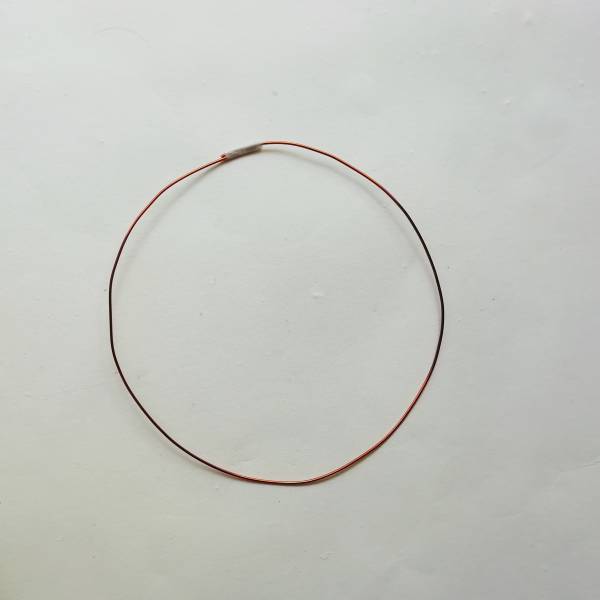
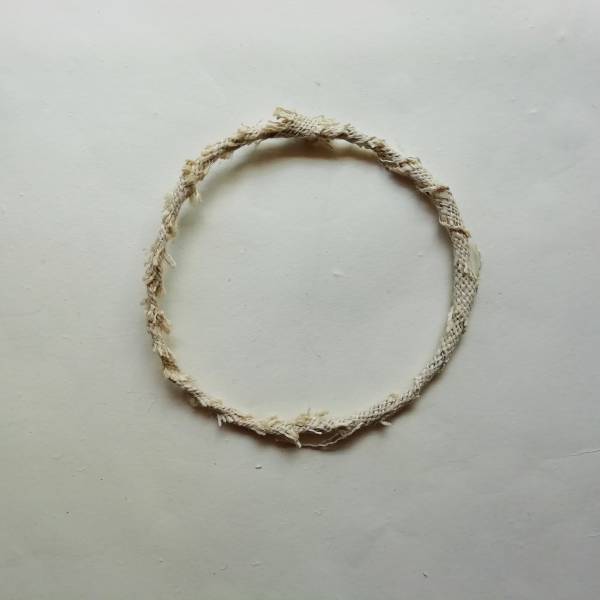
Step 16: Now take a wire about 2 feet long and give it circular shape. Wrap the both
ends together with another thinner wire to secure the round shape.

Step 17: Now take strips of burlap fabric.


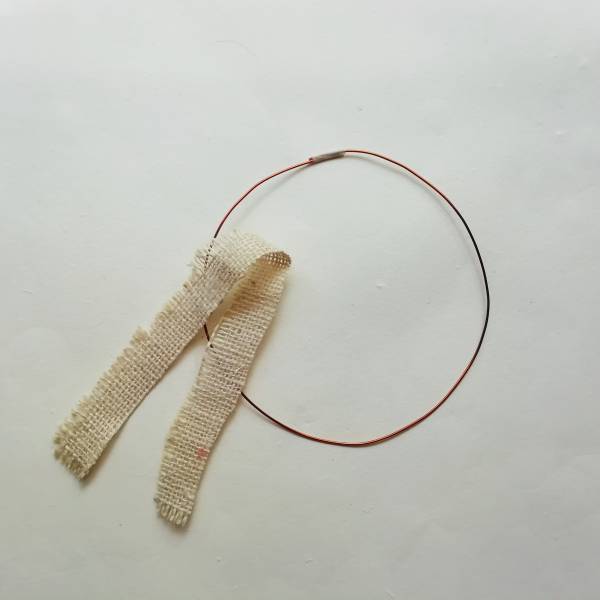
Step 18: Wrap the whole wire around with the burlap fabric and use hot glue to secure
the wrap.


Step 19: Now take the flowers and leaves for the wreath,


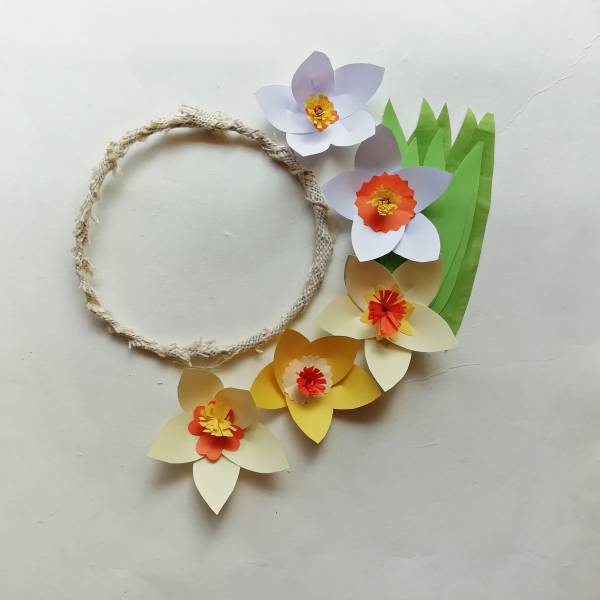
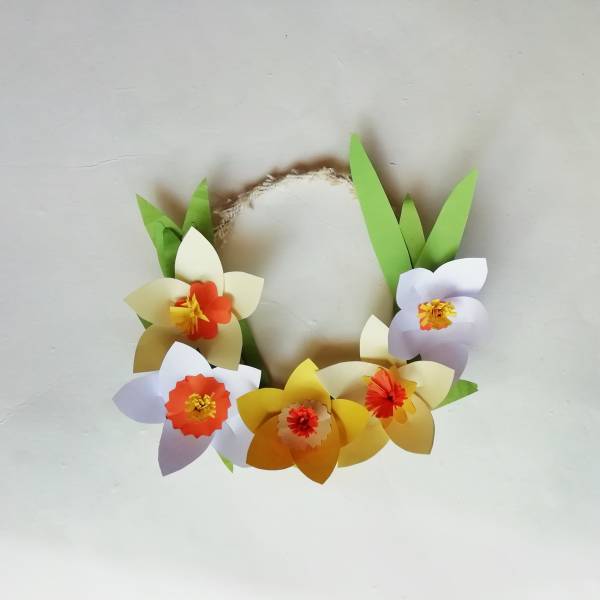
Step 20: Glue all the leaves around the wreath, keep 2-3 inches blank on the top side.


Step 21: Now glue the flowers over the leaves. And the wreath is now complete.


Wanting to be part of our crafting community? Check out our Facebook Groups.

Craft Gossip & DIY

Easter Crafts & DIY

Christmas Crafts & DIY

Organize my life and get my sh#t Together

Get Featured On CraftGossip 

Amazing Christmas Recipes


This project is a great toddler craft and also suitable for Seniors to make as a craft lesson or activity.

Related Posts:

  • DIY Spring Wreath with Leftover Flowers
  • DIY Tulip Crafts For Spring
«
»

Have you read?

How the Wilthons Transformed Their Backyard Into a Self-Sufficient Homestead in Just 6 Months

Imagine this: a typical suburban backyard filled with grass and a few shrubs. Now picture that same space transformed into a thriving homestead with vegetable gardens, chickens clucking happily in a coop, and a rainwater harvesting system in place. This is exactly what the Wilthon family accomplished in just six months, and their journey is nothing short of inspiring. From the moment they decided to make the leap into homesteading, they were determined to live a more sustainable, self-sufficient lifestyle. Here’s how they did it.

The Beginning of the Wilthons’ Homesteading Journey

It all started during the summer of 2024 when the Wilthon family—mom and dad, Emily and James, and their two kids, Lucy and Ben—decided that they wanted to make a change. Like many families, they were feeling the weight of rising grocery bills and the constant environmental stress weighing on their minds. Emily, a stay-at-home mom, had always been interested in gardening and sustainability. James, who worked as a software engineer, had a growing desire to reduce their family’s reliance on the grid and live in a way that aligned with their values.

After watching several homesteading documentaries and following local homesteaders on social media, Emily and James had an idea. They realized they didn’t need acres of land to start their homesteading adventure—just a little bit of creativity, hard work, and determination. They decided to transform their backyard into a fully functional homestead that could supply their family with food, water, and even energy—all within six months.

Step 1: Planning and Research

The Wilthons knew that starting a homestead from scratch required careful planning. They spent several weeks researching different homesteading methods, talking to local homesteaders, and getting advice from online communities. They also created a budget to ensure they could make the most of their resources.

“We knew we had to start small and not overwhelm ourselves,” said Emily. “It was about making gradual, manageable changes that would add up over time.”

Their plan included growing a vegetable garden, raising chickens for eggs, collecting rainwater, and implementing solar panels to reduce their dependence on the power grid. They also decided to start composting to reduce waste and improve soil quality for their garden.

Step 2: Building the Vegetable Garden

The first major project they tackled was transforming a large portion of their backyard into a garden. They started by researching which vegetables would grow best in their climate, focusing on easy-to-grow crops like tomatoes, lettuce, carrots, and peppers.

They used raised beds to make gardening easier, especially since the soil in their area wasn’t ideal for planting. Emily and James built the raised beds themselves using reclaimed wood, saving money while also practicing sustainable building methods.

“We wanted to make sure our garden would be productive, but we also wanted it to be low-maintenance and sustainable,” said James. “We opted for organic growing methods and started by composting kitchen scraps and using natural fertilizers.”

In just a few weeks, their garden began to thrive, and they were soon harvesting fresh vegetables right from their backyard.

Step 3: Raising Chickens for Eggs

Next on the Wilthons’ homesteading list was raising chickens. They did a lot of research on raising chickens for eggs and learned that it was one of the easiest and most rewarding aspects of homesteading.

The family built a simple chicken coop using leftover materials from their garden project, ensuring the chickens would be safe and comfortable. They started with six hens, choosing a breed known for being friendly and good egg layers.

“We were surprised at how easy it was to care for the chickens,” said Emily. “The kids loved collecting the eggs every morning, and we were amazed at how much of a difference it made to have fresh, homegrown eggs.”

Within just a few months, the Wilthons had a steady supply of eggs and were able to cut back on grocery store purchases. They even used the chicken manure to fertilize their garden, creating a sustainable loop in their homesteading system.

Step 4: Harvesting Rainwater

One of the most ambitious projects the Wilthons took on was harvesting rainwater. Living in a climate where water conservation is important, they saw the value in capturing rainwater for their garden and household needs.

They installed a rainwater collection system on their roof, which included gutters, downspouts, and a large storage tank. The system was fairly easy to install and didn’t require much maintenance.

“We’ve had a lot of rain this year, and the rainwater collection system has been a lifesaver,” said James. “We use the rainwater to water the garden, wash the car, and even for our outdoor cleaning. It’s amazing how much water we’ve saved.”

By collecting rainwater, the Wilthons not only saved money on their water bill but also reduced their environmental impact.

Step 5: Adding Solar Power

The final piece of their self-sufficient puzzle was adding solar panels to their home. The Wilthons had always wanted to reduce their reliance on fossil fuels, and solar energy seemed like the perfect way to do so.

After researching local solar panel installation companies and calculating their energy needs, they decided to install a small solar array on their roof. With their system in place, the Wilthons were able to generate enough energy to power their lights, appliances, and even their small garden pump.

“We didn’t want to go completely off-grid just yet, but being able to generate our own energy is a huge step in the right direction,” said Emily. “It gives us peace of mind knowing we’re contributing to a greener planet and saving money on our energy bills.”

Step 6: Learning Along the Way

The Wilthons were quick to realize that homesteading isn’t always easy. There were challenges, like dealing with pests in the garden and learning to manage the chickens. But every step of the way, they learned new skills and gained confidence in their ability to live more sustainably.

“We’ve made mistakes along the way, but that’s part of the process,” said James. “What’s important is that we’re learning and growing. The kids are more involved than ever, and we’re teaching them valuable skills that will last a lifetime.”

The Result: A Thriving Homestead

After just six months, the Wilthons had successfully transformed their suburban backyard into a fully functional homestead. They were growing their own food, collecting rainwater, raising chickens for eggs, and generating solar power to reduce their carbon footprint.

“We never imagined we’d be able to achieve all of this in just six months,” said Emily. “It’s been a lot of work, but the rewards are so worth it. We feel more connected to our food and the environment, and we’re teaching our kids valuable lessons about sustainability.”

Looking ahead, the Wilthons plan to continue expanding their homesteading efforts. They’re considering adding more chickens, possibly raising a few goats, and experimenting with more advanced gardening techniques like permaculture. They’re also exploring the idea of creating a small greenhouse to extend their growing season.

“The journey doesn’t end here,” said James. “Homesteading is a lifelong process, and we’re excited to see where it takes us.”

The Wilthon family’s story is a perfect example of how anyone, regardless of their living situation, can take small steps toward self-sufficiency. With dedication, planning, and a willingness to learn, the Wilthons turned their dreams of homesteading into a reality—and they did it in just six months.

Are you ready to start your own homesteading adventure? If the Wilthons can do it, so can you!

Explore

Bedrooms Christmas Craft Ideas Easter Garden and Yard Halloween Holidays Home Decor Kitchens Living Areas Makeovers and Redos More DIY's Organizing Outdoor Decor Porches, Patios and Decks Recycled Crafts Seasonal Trash to Treasure Windows and Walls Wreaths

RSS More Articles

  • Designer Spotlight: Curious Carrie Designs
  • DMC Oval Cushion Punch Needle Pattern – A Modern Twist on Cozy Decor
  • Blueberry Learning Activities
  • How the Wilthons Transformed Their Backyard Into a Self-Sufficient Homestead in Just 6 Months
  • Michaels Acquires Joann Intellectual Property; Joann Website Now Forwards to Michaels
  • Make Day and Night Floral Cards with the Same Stamp Set
  • Book Review: “Sewing Guide to Cancer ” – A Heartfelt and Practical Companion for Difficult Times
  • 12 School Graduation Scrapbook Layout Ideas
  • A Whimsical Sock Pattern to Blow Your Mind
  • Fast, Fun, and Perfect for Vintage Fabrics: The Chunky Cuts Quilt Pattern

Copyright © 2025 · CraftGossip | Start Here | Contact Us | Link to Us | Your Editors | Privacy and affiliate policy