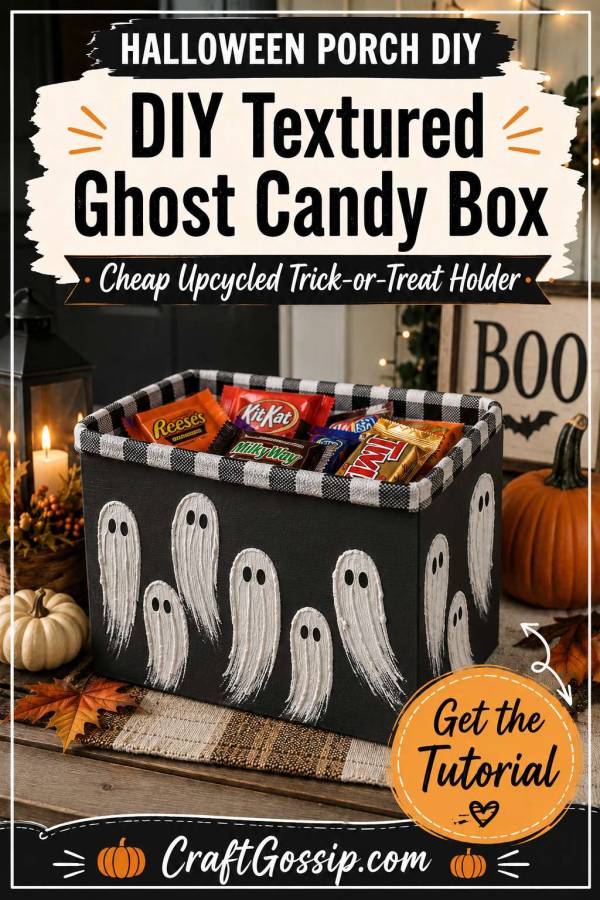
A cardboard delivery box, a little leftover joint compound and a handful of Halloween candy are all you need to make this cheap textured ghost candy holder for the porch.
This project takes the same wonderfully imperfect ghost technique used in our dimensional textured ghost canvas tutorial and turns it into something practical. Instead of hanging the ghosts on the wall, we are adding them to an upcycled cardboard box that can sit by the front door holding wrapped treats for trick-or-treaters.
It is inexpensive, easy to customise and just rustic enough that a few wonky ghosts only add to its charm. Frankly, Halloween is the one season when a slightly battered cardboard box can be described as atmospheric rather than something you forgot to recycle.
What You Need
- Small sturdy cardboard box
- Craft knife or scissors
- Ruler
- Black acrylic paint
- Wide paintbrush or foam brush
- Lightweight joint compound, spackle or artist modelling paste
- Scrap cereal-box cardboard
- Small palette knife or putty knife
- Black acrylic paint pen or fine paintbrush
- White acrylic paint, optional
- Clear matte acrylic sealer
- Black plastic liner, fabric or tissue paper
- Hot glue gun or strong craft glue
- Wrapped Halloween candy
- Small sign or cardstock label, optional
- Battery-operated fairy lights, optional
A shallow shipping box, sturdy shoe box or small produce carton works particularly well. Avoid very thin cereal boxes because the weight of the candy and textured paste may cause them to bend.
Choosing the Right Cardboard Box
Choose a box that is low enough for children to reach into easily but deep enough to stop the candy spilling onto the porch.
A box approximately 10 to 14 inches wide is a useful size for a small candy holder. You can leave the top completely open or cut the front edge slightly lower to create a scoop-style opening.
Check the base for weak spots before decorating it. Reinforce the bottom with another piece of cardboard if needed, especially if you plan to fill it with several bags of candy.
Remove old shipping labels, loose tape and glossy stickers. A little leftover tape is not the end of the world, but smooth surfaces can make the paint and paste harder to stick.
Step 1: Shape the Box
Close and glue the bottom flaps securely.
Leave the top open. Cut away the top flaps if you want a simple open basket, or fold them inward and glue them against the inside walls for extra strength.
For easier access, draw a shallow curve across the upper front edge and cut it away with a craft knife. This creates a lower opening while leaving the back and sides tall enough for decorating.
Adults should handle the craft knife and cutting stages.
If the cardboard feels flimsy, glue extra cardboard panels inside the front and side walls before painting.
Step 2: Seal the Cardboard
Bare corrugated cardboard can absorb paint and moisture very quickly. A thin sealing coat helps prevent the box from becoming soggy or warped.
Brush the outside with a thin coat of white acrylic paint, matte craft sealer or diluted PVA glue. Do not soak the cardboard.
Allow it to dry completely before continuing.
You can skip this step when using a very sturdy box and applying only thin layers, but sealing gives you a more reliable finish.
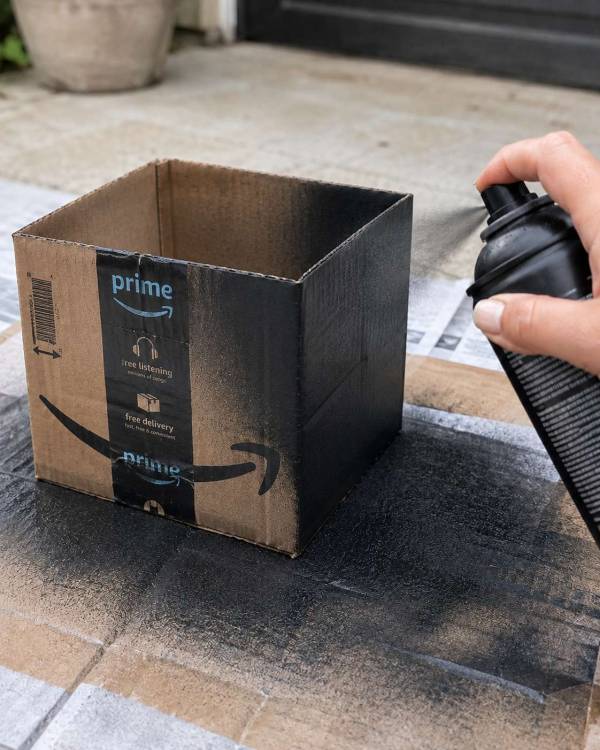
Step 3: Paint the Candy Box Black
Paint the outside of the box with black acrylic paint.
Apply two thin coats rather than one very heavy coat. Allow each coat to dry before adding the next.
Paint the top edges and any visible areas around the opening. You do not need to paint the inside if you will be adding a removable liner.
A matte black finish gives the textured white ghosts the strongest contrast and helps disguise printing or small imperfections in the recycled cardboard.
Step 4: Make a Ghost-Shaping Tool
Cut a strip of cereal-box cardboard approximately 1½ inches wide.
Round one short end into an arch. This curved edge forms the head of each ghost.
Make several tools in different widths for a mixture of larger and smaller ghosts.
The cardboard tool will soften as it absorbs moisture from the joint compound, so keep a few replacements nearby. Apparently even ghost-making tools have a limited afterlife.
Step 5: Practise the Textured Ghost Swipe
Place a little joint compound along the rounded edge of the cardboard tool.
Test the motion on a spare piece of cardboard before working on your finished box.
Press the rounded edge onto the surface and pull downward in one smooth movement. Begin with slightly firmer pressure to create a rounded head, then lighten the pressure as you move down so the bottom becomes wispy.
Lift the tool away cleanly.
Use a fairly thin layer of compound. Heavy blobs take longer to dry and can cause the cardboard beneath them to bend.
Step 6: Add the Textured Ghosts
Lay the box on one side so the panel you are decorating faces upward.
Add the ghosts one panel at a time rather than trying to work around an upright box.
Start with the front because this will be the most visible side. Arrange the ghosts in staggered rows, leaving a little black space between them.
Vary the sizes and directions. Some ghosts can lean slightly, while others can have longer or shorter wispy tails.
Keep the compound away from the folds and corners of the box. Thick paste placed across a fold is likely to crack when the cardboard moves.
Once the front is complete, leave it flat until the paste has started to set. Turn the box carefully and decorate the remaining sides.
You can cover the entire box in ghosts or add just a small cluster to the front and one ghost on each side.
Step 7: Dry the Box Thoroughly
Leave each decorated panel facing upward while it dries.
Drying time depends on the thickness of the paste, humidity and the product you use. Thin ghosts may become firm in several hours, while thicker sections may need overnight.
Do not place the box outside while it is drying.
Avoid using a hairdryer because fast drying can cause cracks and may warp the cardboard.
A small fan placed several feet away can improve air circulation, but it should not blow directly onto the wet paste.
Step 8: Add the Ghost Faces
Once the textured ghosts are completely dry, add two black eyes to each one.
Use a black acrylic paint pen, the handle end of a paintbrush dipped into black paint or a tiny detail brush.
Simple oval eyes are all you need.
Give a few ghosts different expressions by adding:
- A tiny round mouth
- Sleepy closed eyes
- One winking eye
- Rosy pink cheeks
- Small painted bows
- Mini paper witch hats
Do not press hard with a paint marker, as dried joint compound can chip if it is handled roughly.
Step 9: Add a Candy Sign
Cut a small rectangle from leftover cardboard or black cardstock.
Add a message such as:
Please Take One
Help Yourself, Little Ghosts
Trick-or-Treat Candy
Take a Treat — No Tricks Required
Attach the sign to the back of the box using glue, or mount it on a wooden craft stick and tuck it inside.
Keep the wording large and easy to read from the pathway.
Step 10: Seal the Finished Box
Apply a light coat of clear matte acrylic sealer to the painted exterior and textured ghosts.
Several light coats are safer than one heavy coat. Too much wet sealer at once may soften or warp the cardboard.
Allow the sealer to dry completely before adding the liner or candy.
Sealing gives the box some protection against fingerprints and light moisture, but it does not make cardboard waterproof.
Step 11: Line the Inside
Add a removable liner before filling the box with treats.
You can use:
- A black plastic tablecloth
- A clean reusable shopping bag
- Black cotton fabric
- Halloween tissue paper over a plastic liner
The best option for porch use is to place a plastic tub inside the decorated box. This supports the cardboard, keeps wrapped candy clean and protects the interior from sticky wrappers or damp air.
Fold the liner neatly over the inside edges and secure it with small dots of hot glue or removable double-sided tape.
Step 12: Fill With Wrapped Candy
Only use individually wrapped treats.
Arrange larger candy packets at the back and smaller pieces toward the front so children can reach them easily.
Do not overfill the box. Cardboard candy holders can become surprisingly heavy once every bargain bag of chocolate in the supermarket has somehow fallen into your trolley.
For a fuller look without adding too much weight, place an upside-down plastic container beneath the liner to raise the candy.
Optional Battery Light Detail
Wind a short strand of battery-operated fairy lights around the inside edge of the box.
Hide the battery pack beneath the liner or attach it to the back.
Use only cool-running battery lights. Do not use candles, tea lights or anything with a real flame near cardboard, tissue paper or candy wrappers.
A soft warm-white glow looks lovely, while purple lights give the box a more dramatic haunted feel.
How to Protect the Candy Box on the Porch
This project is intended for a covered, dry porch.
Place it on a small table or stool rather than directly on the ground. This keeps it away from damp concrete, garden moisture and enthusiastic pets.
Bring the box inside if rain is expected.
Even with sealer, cardboard and joint compound are not suitable for prolonged outdoor exposure.
For added protection, set the completed box inside a shallow plastic tray. The tray will catch moisture without being very noticeable from the front.
Textured Ghost Candy Box Variations
Neutral Ghost Box
Paint the box charcoal, beige or muted sage rather than black. Use creamy white ghosts for a softer farmhouse-style Halloween display.
Haunted House Candy Box
Cut a simple roof shape from extra cardboard and attach it to the back. Add windows, bats and textured ghosts floating around the front.
Ghost Family Box
Create several large ghosts on the front and give each one a different accessory. Add glasses, bows, moustaches or hats to represent family members.
Glow-in-the-Dark Ghost Box
Brush glow-in-the-dark craft paint over the dried ghosts. Charge the paint under a bright light before placing the holder outside.
Spooky-Cute Pastel Box
Paint the box pale lavender or dusty pink and tint artist modelling paste with a little white and pastel acrylic paint.
Matching Porch Sign
Use the same textured ghost technique on a flat piece of corrugated cardboard to create a matching “Trick-or-Treat” sign.
For more inexpensive recycled Halloween decorating ideas, our toilet paper roll ghosts turn ordinary cardboard tubes into another quick spooky-cute project. CraftBits also has a more elaborate Halloween crate of the undead for anyone ready to move from adorable ghosts to full haunted-yard drama.
Important Porch Safety Tips
Keep the candy holder under cover and away from rain.
Use battery-operated lighting only.
Keep all decorations clear of paths, steps and doorways.
Do not use staples, sharp wires or exposed craft-knife edges.
Choose individually wrapped candy.
Bring leftover treats and the box indoors at the end of the evening.
If food allergies are a concern, include a few clearly separated non-food treats such as stickers, pencils or small glow bracelets.
This upcycled textured ghost candy box is inexpensive enough to make from supplies already hiding in the recycling pile, but it still gives your porch a proper handmade Halloween feature.
The ghosts do not need to be perfect, the cardboard does not need to be pristine and the whole project can be adapted to whatever box happens to arrive at your door that week.
That is my favourite kind of seasonal craft: cheap, cheerful and useful enough to justify keeping yet another cardboard box.