• Home
  • Suggest A Craft
  • DIY Newsletter

Home and Garden

Ideas For DIY

  • About CraftGossip
  • Our Network
    • Bath & Body Crafts
    • Candle Making Ideas
    • Crochet Ideas
    • Cross Stitch
    • Edible Crafts
    • Felting Patterns
    • Glass Art
    • Home & Garden Ideas
    • Indie Crafts
    • Jewelry Making
    • Kids Crafts
    • Knitting Patterns
    • Lesson Plans
    • Needlework
    • Party Ideas
    • Polymer Clay
    • Quilting Ideas
    • Recycled Crafts
    • Scrapbooking
    • Sewing Patterns
    • Card Making
    • DIY Weddings
    • Not Craft Ideas
  • Giveaways
  • Roundups
  • Store
  • Search

Easy DIY Christmas Platter Plate That Your Guests Will LOVE

December 16, 2023 by Shellie Wilson

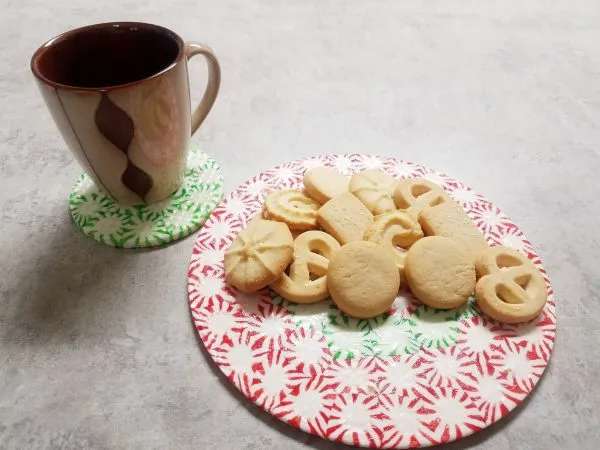
Peppermint Candy Christmas Platter

Heat an oven to 350 degrees.

Prepare your pan by lining it with parchment paper or use a springform pan or round tin for a round tray. Ensure that your cookie tray or pan has edges to prevent the candy from spreading too thin and becoming brittle.

Place the unwrapped hard candy mints on the parchment paper, leaving extra room on the sides as the mints will melt and spread, filling gaps on the tray. Arrange the candies close together, with spacing only at the edges.

Bake for approximately 5-8 minutes, keeping a close eye on the process.

Allow the melted candy to harden at room temperature until the tray becomes solid. Keep in mind that the candy tray will be brittle, but you can preserve it by applying a clear food-grade varnish.

Consider making smaller versions as coasters if desired.

You can read the full tutorial here –  Peppermint Candy Christmas Platter Plate
Related Posts:

  • Create a Gorgeous Dollar Tree Easter Wreath That…
  • Make Your Own Natural Spider Repellent – Plus More…
«
»

Have you read?

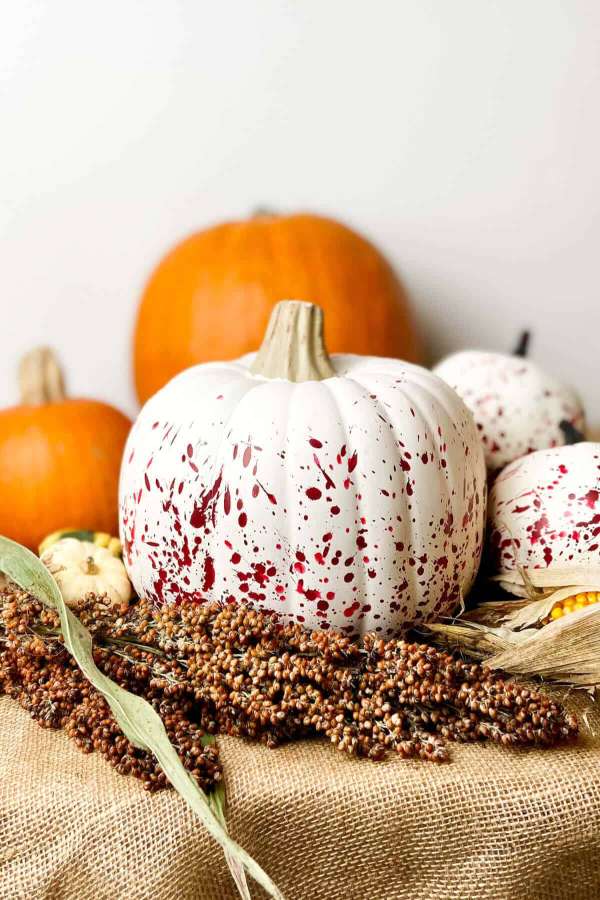
Spooky and Stylish: How to Make Halloween Splatter Pumpkins for a Bold Décor Statement

Oh my gourd-ness, it’s almost Halloween, and these Halloween splatter pumpkins are the perfect last minute decoration! With just a few inexpensive craft pumpkins and some paint, you’ll add this whimsical yet spooky decor to your home in no time at all.

 These Halloween Splatter Pumpkins are just what you need to bring some bold, creative energy to your fall décor! This DIY project is a perfect way to add a pop of color and an artistic twist to your Halloween setup. Imagine traditional pumpkins transformed with splashes of paint that give them a spooky, yet modern vibe—perfect for both indoor and outdoor spaces.

Whether you’re decorating your porch or crafting unique centerpieces, these splatter pumpkins are a stylish way to up your Halloween decor game without any complicated steps. Plus, they’re an awesome way to get the whole family involved in creating something cool and fun.

Ready to make your pumpkins stand out this Halloween? href=”https://maplewoodroad.com/halloween-splatter-pumpkins/” target=”_new” rel=”noopener” data-start=”870″ data-end=”961″>Check out the full tutorial here! and get started on creating your own spooky masterpiece today!

20+ DIY Pumpkin Themed Centerpieces For Fall

DIY $1 Painted Pumpkins

Rustic Pumpkins – Mason Jar Lids

Explore

Bedrooms Christmas Craft Ideas Easter Garden and Yard Halloween Holidays Home Decor Kitchens Living Areas Makeovers and Redos More DIY's Organizing Outdoor Decor Porches, Patios and Decks Recycled Crafts Seasonal Trash to Treasure Windows and Walls Wreaths

RSS More Articles

  • Crochet Your Own Adorable Amigurumi Tiny Baymax – Free Pattern
  • Crow Cross Stitch Patterns
  • Free Crochet Pattern – Ingrid
  • How to Watercolor on Black Cardstock for a Floral Card
  • DIY Teddy Bear Pattern: A Cuddly and Customizable Project for All Ages
  • Knit a Blanket with the Texture of a Ceiling
  • 20 FREE Camping Quotes Die Cut and Printable Files
  • Book Review: Super Fun Math Games for Kids
  • IWAS Upcycled Drinking Glasses
  • Free Crochet Strawberry Ribbon Scrunchie Pattern

Copyright © 2025 · CraftGossip | Start Here | Contact Us | Link to Us | Your Editors | Privacy and affiliate policy