
• Home
  • Suggest A DIY
  • DIY Newsletter

Home and Garden

Ideas For DIY

  • About CraftGossip
  • Our Network
    • Bath & Body Crafts
    • Candle Making Ideas
    • Crochet Ideas
    • Cross Stitch
    • Edible Crafts
    • Felting Patterns
    • Glass Art
    • Home & Garden Ideas
    • Indie Crafts
    • Jewelry Making
    • Kids Crafts
    • Knitting Patterns
    • Lesson Plans
    • Needlework
    • Party Ideas
    • Polymer Clay
    • Quilting Ideas
    • Recycled Crafts
    • Scrapbooking
    • Sewing Patterns
    • Card Making
    • DIY Weddings
    • Not Craft Ideas
  • Giveaways
  • Roundups
  • Store
  • Search

Easy To Make Christmas Signs To Decorate Your Home

November 23, 2021 by Shellie Wilson


Words are powerful so what better way to set the mood for this year’s holiday season than with a gorgeous Christmas sign? Christmas is a busy season when it comes to expenses, so making your own sign is a great way to keep them in check without compromising your festive decor.

These DIY Christmas signs are easy to make and require inexpensive supplies. The results are gorgeous! I am sure your family and guests will be impressed with your crafting skills.

A Christmas sign is super versatile: it can add some holiday cheer to your front porch, create pretty background decor for your Christmas tree or add the seasonal festive touch to your mantel.

Fabric and wood are often used to make Christmas signs which is great, especially if you have some scraps on your hands. I love crafting, so I can totally see this as a yearly family tradition. Check out my collection of DIY Christmas signs and let’s get ready for the holidays!

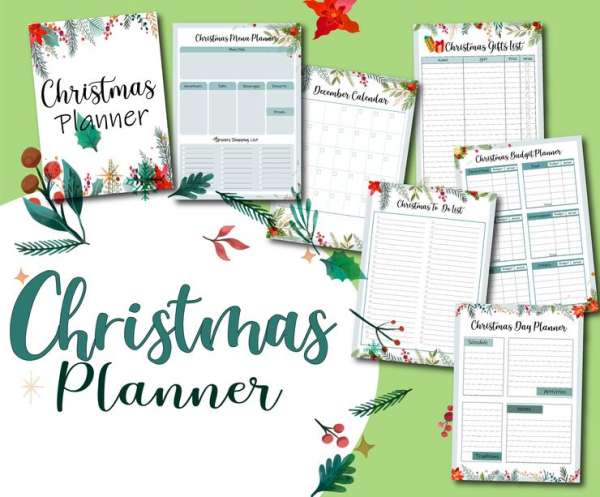
Check out our FREE Christmas planner  INSTANT DOWNLOAD
Reclaimed Wood DIY Christmas Sign from kristimurphy.com

DIY Metal Christmas Sign from refreshrestyle.com

DIY Vintage Christmas Signs from dreamalittlebigger.com

DIY Rustic Christmas Joy Sign Using Pallet Wood from sixcleversisters.com

Reversible Thanksgiving And Christmas Farmhouse Sign from unoriginalmom.com

Rustic Front Porch Christmas Sign from mountainmodernlife.com

DIY Christmas Directional Sign from burtonavenue.com

DIY Vintage Look Noel Sign from oursouthernhomesc.com

Huge Hand Lettered Christmas Sign + Free Template from homemadelovely.com

Merry Christmas Sign from craftingintherain.com

Christmas Marquee Sign from freshcrush.com

DIY Black And White Distressed Christmas Sign from andersonandgrant.com

DIY Christmas Joy Sign Tutorial from cherishedbliss.com

DIY Christmas Tree Wood Holiday Sign from craftingcheerfully.com

How To Make A Weathered Joy Sign from ishouldbemoppingthefloor.com

DIY Pallet Christmas Sign from sixcleversisters.com

DIY Modern Christmas Sign from lovecreatecelebrate.com

DIY Large Colorful Merry Sign For Christmas Decor from clubcrafted.com

Charming Rustic DIY Joy Sign from acultivatednest.com

Embroidery Hoop Love Sign from craftberrybush.com

«
»

Have you read?

DIY Little Ghoul Balls For Halloween Tiered Tray Decor

These little mummy ghoul balls are exactly the sort of Halloween craft I love: inexpensive, quick to make and just odd enough to make people smile when they spot them staring out of a bowl.

The finished ghouls are wrapped in soft, frayed gauze with a dark eye opening and oversized mismatched eyes. Instead of adding hats, bows or lots of embellishments, this version keeps the design simple so the texture and expressions do all the work.

Pile three or five into a plain white bowl with shredded paper filler and you have an easy Halloween decoration for a tiered tray, mantel, entry table or kitchen shelf.

Supplies

  • Foam balls in two or three sizes
  • White quilt batting or polyester batting
  • Cream, ivory or tea-stained gauze
  • Black felt or black fabric
  • Large googly eyes in assorted sizes
  • Hot glue gun and glue sticks
  • Scissors
  • Kraft paper shred, raffia or natural basket filler
  • White ceramic bowl

Optional:

  • Strong coffee or black tea
  • Brown acrylic paint
  • Small paintbrush
  • Low-temperature glue gun

Choosing The Foam Balls

Foam balls measuring approximately 2½ to 4 inches work well for this project.

Use slightly different sizes so the finished arrangement does not look too uniform. One larger ghoul placed toward the back of the bowl and two smaller ones at the front creates a simple triangular arrangement.

Before covering the balls, place them inside your bowl to make sure they fit comfortably without looking crowded.

Cover The Foam Balls With Batting

Pull a thin layer of white batting around each foam ball.

The batting softens the perfectly smooth foam surface and gives the mummy wraps something to grip. It also creates the slightly plump, irregular shape shown in the finished mockup.

Wrap the batting around the entire ball and secure it with a few small dots of hot glue.

Do not worry about creating a perfectly smooth finish. Slight bumps and soft uneven areas will make the finished ghouls look more handmade.

Add The Black Eye Opening

Cut a strip of black felt approximately 1 inch wide.

The exact length will depend on the size of your foam ball. The strip should reach across the front of the ball while leaving plenty of room around the sides for the gauze wrapping.

Glue the black strip horizontally across the front of the covered ball.

This creates the deep, shadowed opening behind the eyes. The black background is what makes the large white eyes stand out so clearly.

Position The Eyes

Choose two googly eyes for each ghoul.

For the slightly startled look shown in the mockup, use eyes that are a little oversized for the ball. You can use two matching eyes, although combining slightly different sizes creates a funnier expression.

Glue the eyes onto the black felt strip.

Try placing the eyes close together and turning one pupil slightly to the side. Each ghoul should look as though it is staring in a different direction.

Let the glue set before beginning the mummy wrapping.

Prepare The Gauze

Cut or tear the gauze into long strips approximately ½ to 1 inch wide.

Torn gauze works better than neatly cut fabric because the loose fibres create the soft, webby texture seen in the mockup.

You will need several strips for each ball.

For a warm, aged colour, stain white gauze with coffee or tea before cutting it into strips.

Dip the gauze briefly into cooled coffee or tea, squeeze out the excess and allow it to dry completely. The fabric does not need to be evenly coloured. Pale and darker sections add character.

Wrap Around The Eye Opening

Begin by wrapping a strip of gauze around the top of the foam ball.

Continue wrapping in different directions, allowing the strips to overlap.

As you approach the eyes, position the gauze so it partly covers the upper and lower edges of the black felt. Leave the eyes fully visible.

Add small dots of hot glue beneath the gauze as you work. Place the glue toward the back and sides whenever possible so it does not show through the thin fabric.

The wrapping should look loose and layered rather than neat and tightly bandaged.

Build Up The Mummy Texture

Continue adding gauze until most of the batting is hidden.

Cross some of the strips diagonally over the front of the ball, but keep the eye area open. The gauze should frame the eyes rather than covering them.

Leave a few frayed edges and loose threads visible.

The finished ghoul should look soft, slightly scruffy and imperfect. This is not the project for carefully aligned bandages. The messier layers are what make the mummy texture work.

Shape The Finished Ghoul

Once the wrapping is complete, gently fluff and adjust the gauze.

Pull apart any areas that look too flat and loosen a few threads around the eye opening. Trim only the pieces that are excessively long.

Press the bottom of the ball lightly against your work surface while the glue is still slightly warm. This can create a subtle flat spot that helps the ghoul sit securely in the bowl.

Repeat the process for the remaining foam balls.

Add Optional Ageing

The mockup uses pale cream gauze and a clean, neutral colour palette. You can keep the ghouls light and simple or add a little extra ageing.

Mix a small amount of brown acrylic paint with water.

Use a nearly dry paintbrush to add tiny touches of colour around the edges of the gauze. Concentrate on the deeper folds rather than painting the entire surface.

Avoid adding too much paint. The ghouls should still look soft and cream rather than dark or muddy.

Arrange The Ghouls In A White Bowl

Fill the bottom of a white ceramic bowl with kraft paper shred, raffia or natural basket filler.

Nestle the ghoul balls into the filler with the largest one toward the back.

Position two smaller ghouls at the front and angle their faces slightly outward. Turning the eyes in different directions makes the arrangement look more playful.

Pull a little of the paper shred up around the lower edges of the balls so they stay in place.

The white bowl keeps the arrangement bright and gives the cream gauze and black eyes plenty of contrast.

How To Style The Finished Bowl

Place the bowl on a tiered tray, kitchen counter, mantel or entry table.

The neutral cream, white and black palette works beautifully with:

  • White pumpkins
  • Black candlesticks
  • Wooden bead garlands
  • Small haunted-house ornaments
  • Amber glass bottles
  • Dried leaves
  • Battery-operated candles
  • Black paper bats
  • Natural wood signs

For a bright farmhouse Halloween display, keep the surrounding decorations white, cream, black and soft orange.

For a slightly moodier look, place the bowl beside black candles and dark vintage books.

Helpful Tips

Use a low-temperature glue gun if possible. High-temperature glue can melt some types of foam and is more likely to seep through the gauze.

Apply glue sparingly. Too much glue can make the soft wraps look stiff and shiny.

Use large eyes rather than tiny googly eyes. The oversized eyes are what give these ghouls their comical, wide-eyed expressions.

Keep the design simple. The mockup works because the three ghouls match without being identical.

Make an odd number of ghouls. Groups of three or five are usually easier to arrange attractively in a bowl.

Easy Variations

Black And White Ghoul Balls

Use bright white gauze instead of cream and place the finished ghouls in a black bowl.

Primitive Mummy Bowl Fillers

Stain the gauze more heavily with coffee and add a light brown paint wash around the edges.

Mini Ghoul Balls

Use small foam balls and tiny eyes to create miniature fillers for the upper level of a tiered tray.

Giant Ghoul Bowl

Use larger foam balls and arrange them in a wide serving bowl for a Halloween table centrepiece.

Glowing Ghoul Eyes

Paint plain wooden beads with glow-in-the-dark paint and use them instead of googly eyes.

These little DIY ghoul balls are easy enough to make in an afternoon and simple enough to suit almost any Halloween decorating style. Their wide eyes and messy mummy wrapping give them plenty of personality without needing complicated accessories.

And once three little faces are peeking out of the bowl, it is surprisingly difficult to walk past without checking which direction they are looking.

Explore

Bedrooms Christmas Craft Ideas Easter Garden and Yard Halloween Holidays Home Decor Kitchens Living Areas Makeovers and Redos More DIY's Organizing Outdoor Decor Porches, Patios and Decks Recycled Crafts Seasonal Trash to Treasure Windows and Walls Wreaths

RSS More Articles

  • Book Review Wednesday: 3D Beaded Animal Crafts for Kids
  • Book Review: Simple Sashiko – 20 Easy Projects to Create & Inspire
  • Easy Lacing Cards to Make for Kids
  • 12 Nature Inspired Scrapbook Layout Designs
  • Book Review: The Knitting Book
  • DIY Little Ghoul Balls For Halloween Tiered Tray Decor
  • Free Halloween Crochet Projects You Can Finish in a Weekend
  • Cross Stitch Sheep Projects
  • Create Your Own Cozy Review: A Practical Guide to Slow Living and a More Intentional Home
  • 5 Easy Homemade Mayonnaise Recipes- Know Exactly What’s in Your Food

Copyright © 2026 · CraftGossip | Start Here | Contact Us | Link to Us | Your Editors | Privacy and affiliate policy