 Ohhh isn’t this pretty?? I’m excited to introduce you to Vivienne from The V Spot, today’s guest poster. Vivienne’s blog is full of great ideas for the home, cooking tips and great projects! I’m dying to see how she made this pretty pot, so no more delays from me. I’m turning the mic over to Viv!
Hello Craft Gossip readers! I’m Vivienne from The V Spot and I’m very happy to be sharing a project with you today. We’re going to turn boring, everyday, can’t swing a dead cat with out hitting one, terra- cotta flower pots into something a little more special.
Your supplies are pretty simple:
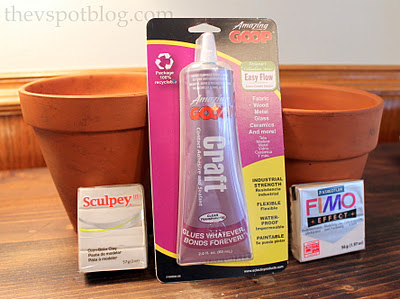 You’ll need an old flower pot, good craft glue, modeling clay, clear gloss spray paint, white gloss spray paint, and some pink acrylic paint. (Or whatever color you choose.)
Making the Clay Roses:
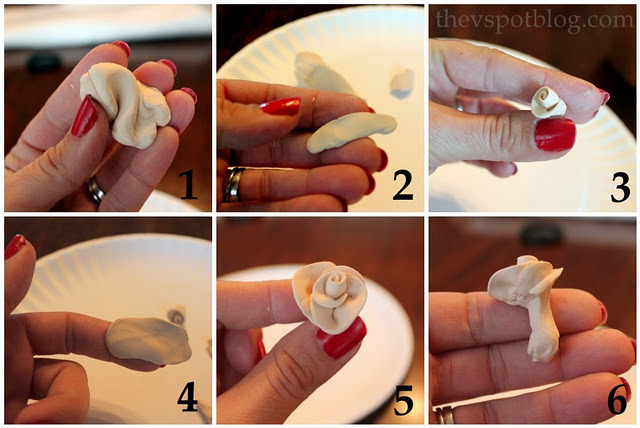
No cracks about my desperate need for a manicure, OK?
1. Knead your modeling clay until it’s nice and pliable.
2. Pinch off a small piece of clay and flatten it into a long, thin piece.
3. Start rolling at one end, sort of pinching at the bottom as you go along. That’s the center of your rose.
4. Pinch off another piece of clay and flatten it into a long oval shape to make more petals..
5. Begin overlapping where the last piece of clay ended, wrapping more “petals” as you see fit.
6. As you create more petals, you will be pinching at the bottom of your rose and will end up with a clay “stem”
Once you’ve made your rose, it’s time to Bake It.
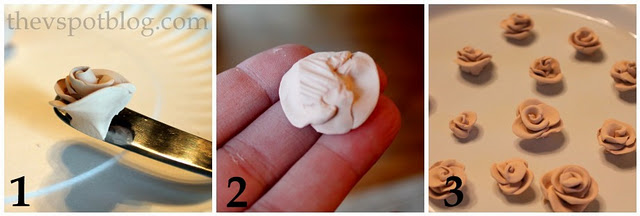
1. Cut the excess clay “stem” off of the bottom of your rose.
2. Score the bottom of the rose. The score marks help to create a stronger hold when gluing to your flower pot.
3. Put your roses on an oven safe plate and bake according to package directions.

When your roses are done baking (doesn’t that sound funny?) you can start gluing them to your flower pot. I propped mine on its side and glued a few at a time, allowing them to dry before turning the pot and doing a few more.
When all the roses are glued where you want them, take the pot outside for a few good coats of glossy white spray paint.
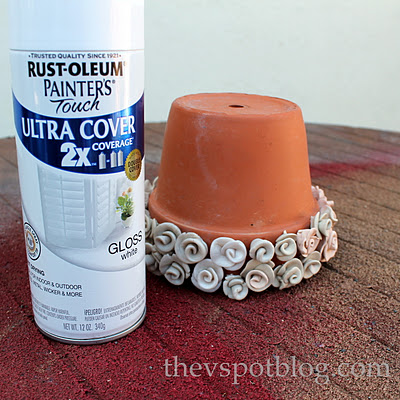 No matter what I am painting, I always start with it upside down… you get all the nooks and crannies that way.
Once my pot was painted white, I wanted a hint of color.
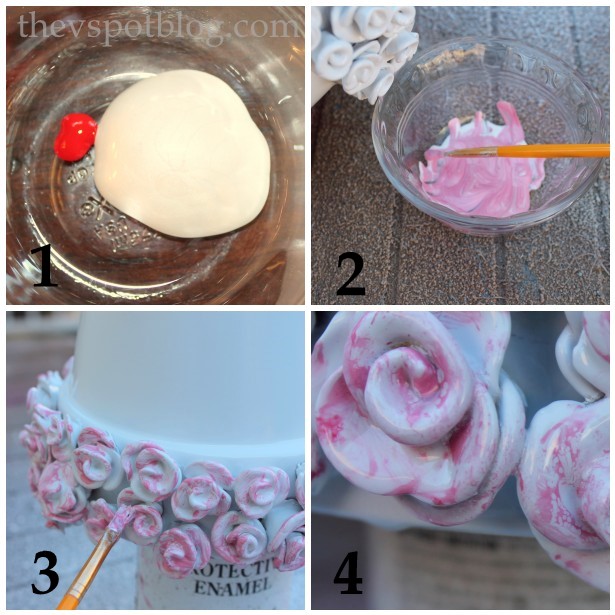 1. I added a small drop of red to some pearl acrylic paint.
2. Mix it up (it doesn’t have to be perfectly blended.)
3. You aren’t painting, so much as swiping at the roses with the pink paint. Flip the pot upside down, balanced on an empty can of spray paint, or something that will elevate it a little. You want to work very quickly, because…
4. You are going to liberally spray the wet roses with a clear gloss spray.
Step #4 is the part of the project where you need to throw all the spray-painting rules you ever learned right out the window. You are going to spray clear gloss on wet paint… you are going to spray on big, thick globs of it… not several light coats.
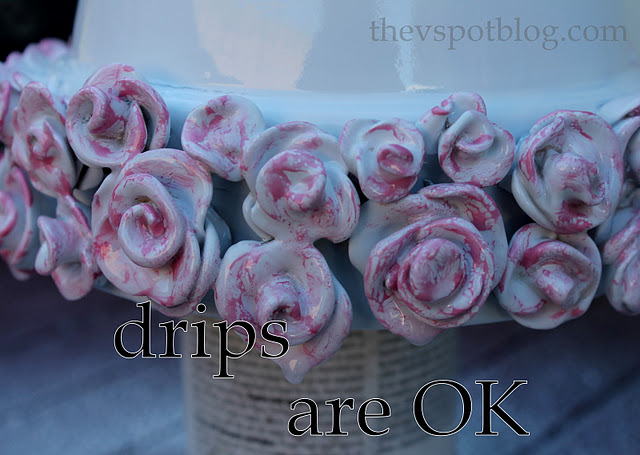 The more the colors run, the more they are thick, shiny and look like glazed ceramic. If you are a regular reader, you’ve seen me use this technique before. It will need to sit for quite a while to really “cure.”
I’m happy with how it turned out. I popped some cilantro in there and it sits on my kitchen window sill.
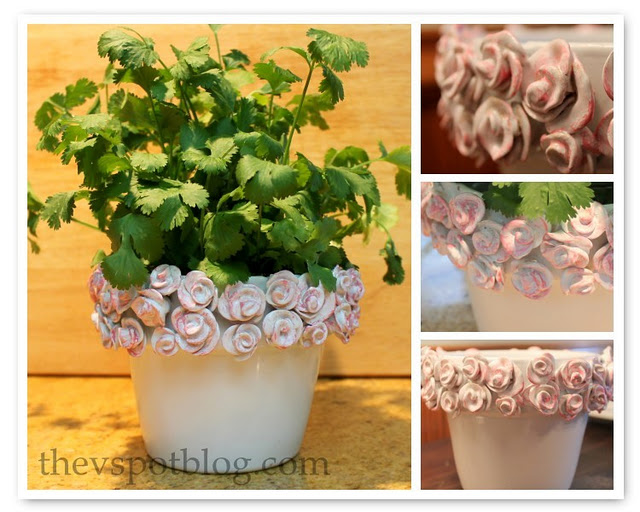 This is perfect for Valentine’s Day and is easy enough to do for no reason at all. And isn’t that why we like crafts? Not because they are necessary, but because they let us create.

If Erma Bombeck and MacGyver had a love child, that child might have turned out a little bit like me. I’m half Italian, half Redneck… I’m a mom, a wife, a DIYer and smart-alleck. You’ll find lots of crafts & home projects and funny stories about my kids (especially Grant who has his own dedicated fan base.)
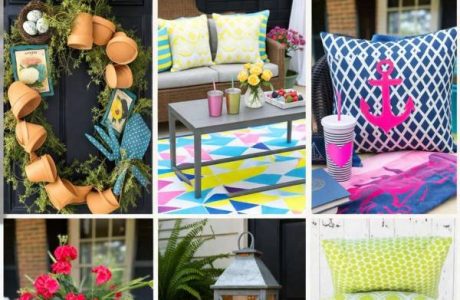
Some of my favorite projects have been my Cowhide Dresser (a Craigslist Sponge-paint nightmare that I rescued), some of my Subway Art/Typography projects like this one here, (just in time for Spring) and how to make Faux Robin’s Eggs out of bright plastic Easter Eggs.
You can connect with me on Twitter, on Facebook and on Pinterest


Wow – the roses are stunning! Love it! (and if you saw my nails, you would not be embarrassed about your mani)!!
Kelly
That looks really elegant! 🙂
Oh my goodness! This is beautiful! Love it!