• Home
  • Suggest A Craft
  • DIY Newsletter

Home and Garden

Ideas For DIY

  • About CraftGossip
  • Our Network
    • Bath & Body Crafts
    • Candle Making Ideas
    • Crochet Ideas
    • Cross Stitch
    • Edible Crafts
    • Felting Patterns
    • Glass Art
    • Home & Garden Ideas
    • Indie Crafts
    • Jewelry Making
    • Kids Crafts
    • Knitting Patterns
    • Lesson Plans
    • Needlework
    • Party Ideas
    • Polymer Clay
    • Quilting Ideas
    • Recycled Crafts
    • Scrapbooking
    • Sewing Patterns
    • Card Making
    • DIY Weddings
    • Not Craft Ideas
  • Giveaways
  • Roundups
  • Store
  • Search

Halloween Skull Wall Art

August 16, 2017 by Shellie Wilson

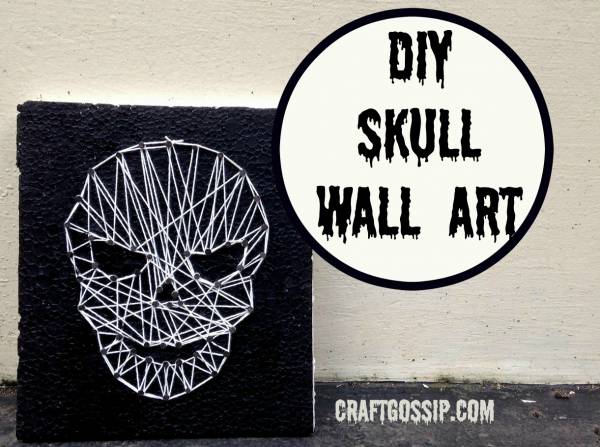
Looking for something unique and creative to decorate your house this Halloween? How about this Halloween skull string art? Check out the tutorial, grab all the supplies and get started!

Supplies:
1. White string
2. Wooden board or foam board
3. Black acrylic paint and brush
4. Nails and hammer
5. Skull template
6. Scissors
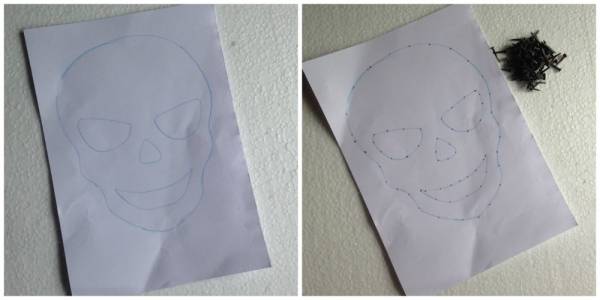
Step-1: Select a template. If you’re a beginner it’s better to select a simple pattern. You can simply do a free hand drawing of a skull, not adding too much details, only the eye holes, nose hole and mouth. Once you’re drawing the skull use a pen trace the points for nails along the skull pattern.
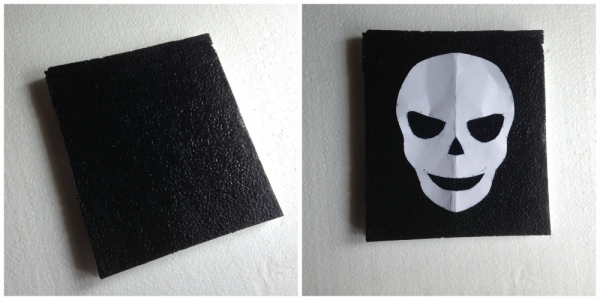
Step-2: You can either use a wooden board or a foam board as you wish. I used a foam board. The board should be square. Paint any one side of the board with black acrylic paint. Allow the paint to dry. Cut out the skull pattern and also cut out the eye holes, nose hole and mouth from it.
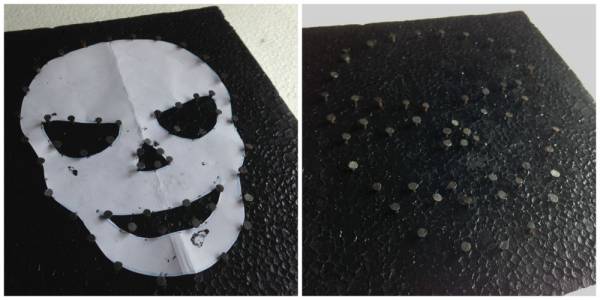
Step-3: Simply hammer the nails on their position as marked along the skull template. Once you’re done hammering the nails carefully remove the template from the board.
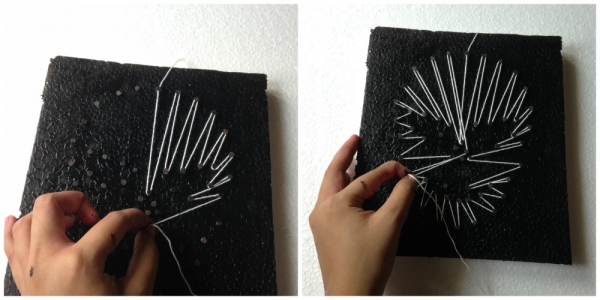
Step-4: Use white string for the string art. Start from the top of the skull, or from any point you feel comfortable to start from. You can create a random pattern or a geometric pattern, I went for a geometric pattern at first and did a random pattern later.
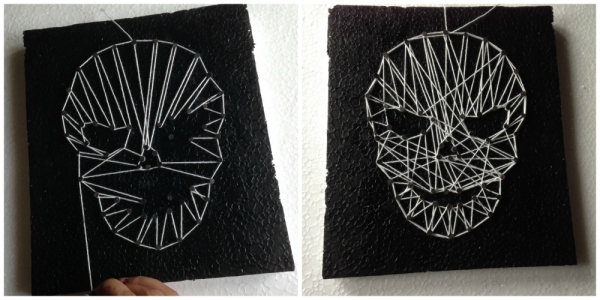
Step-5: After filling the skull with geometric pattern I traced the sides of the skull and the eye holes, nose hole and mouth. Then I did a random pattern to fill the large gaps.
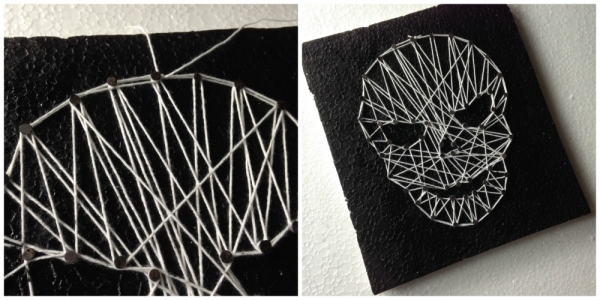
Step-6: Once you’re satisfied with the string art go through nails and bring you string to the starting nail. Tie a knot and cut off extra thread.

Attach a hanging mechanism or a stand at the back side of the board.

Enjoy!


Related Posts:

  • Turn Nature’s Treasures into Stunning Boho Wall Art
  • 10 Halloween Crafts Made From Scrap Wood
«
»

Comments

  1. Dolly Kemp says

    August 17, 2017 at 8:45 am

    The project looks great, thanks for sharing. I love it that you can choose some different shablons and make different decorations.

Have you read?

Master the Art of Polka Dots with This Easy Painting Tutorial!

Polka dots are timeless, fun, and the perfect way to add a little pop of personality to any project. Whether you’re looking to update home decor, clothing, or craft projects, learning how to paint polka dots is an easy way to elevate your designs. This step-by-step guide on how to paint polka dots will show you how to create perfect, uniform dots every time, no matter your skill level!

From choosing the right tools to picking the best surface for your project, this tutorial makes polka dot painting simple and fun. You can add them to pillows, canvas art, mugs, or even furniture for a fresh, playful look. So if you’re ready to get crafty and embrace the dot trend, this tutorial is for you!

Excited to start painting your own polka dots? href=”https://www.pillarboxblue.com/how-to-paint-polka-dots/” target=”_new” rel=”noopener” data-start=”888″ data-end=”979″>Check out the full tutorial here!

How To Strip Paint From Your Old Furniture With Easy Off Oven Cleaner

Transform Furniture For Under $10

Thrift Store Furniture Makeover

Explore

Bedrooms Christmas Craft Ideas Easter Garden and Yard Halloween Holidays Home Decor Kitchens Living Areas Makeovers and Redos More DIY's Organizing Outdoor Decor Porches, Patios and Decks Recycled Crafts Seasonal Trash to Treasure Windows and Walls Wreaths

RSS More Articles

  • 20 Cowl Crochet Patterns For Winter Gifting
  • Master the Art of Polka Dots with This Easy Painting Tutorial!
  • Do You Park Your Cross Stitch Thread? Try The Royal Roads Method
  • Etsy Spotlight – Sew Your Own Baby Dress with the Harper Dress Pattern PDF
  • July 4th Mini Scrapbook Album
  • Upcycled Writing Desk to Cocktail Cabinet
  • Create Stunning Pineapple String Art – A Fun and Easy Tutorial You Can’t Miss
  • DMC Woodland Moth Tapestry Pattern – Earthy, Elegant, and Surprisingly Relaxing
  • Learn about Comoros for Kids
  • Classic Blocks Revisited Quilt Pattern Book

Copyright © 2025 · CraftGossip | Start Here | Contact Us | Link to Us | Your Editors | Privacy and affiliate policy