• Home
  • Suggest A DIY
  • DIY Newsletter

Home and Garden

Ideas For DIY

  • About CraftGossip
  • Our Network
    • Bath & Body Crafts
    • Candle Making Ideas
    • Crochet Ideas
    • Cross Stitch
    • Edible Crafts
    • Felting Patterns
    • Glass Art
    • Home & Garden Ideas
    • Indie Crafts
    • Jewelry Making
    • Kids Crafts
    • Knitting Patterns
    • Lesson Plans
    • Needlework
    • Party Ideas
    • Polymer Clay
    • Quilting Ideas
    • Recycled Crafts
    • Scrapbooking
    • Sewing Patterns
    • Card Making
    • DIY Weddings
    • Not Craft Ideas
  • Giveaways
  • Roundups
  • Store
  • Search

Printable Snowman Christmas Chocolate Candy Bar Wrappers

November 7, 2011 by Amanda Formaro

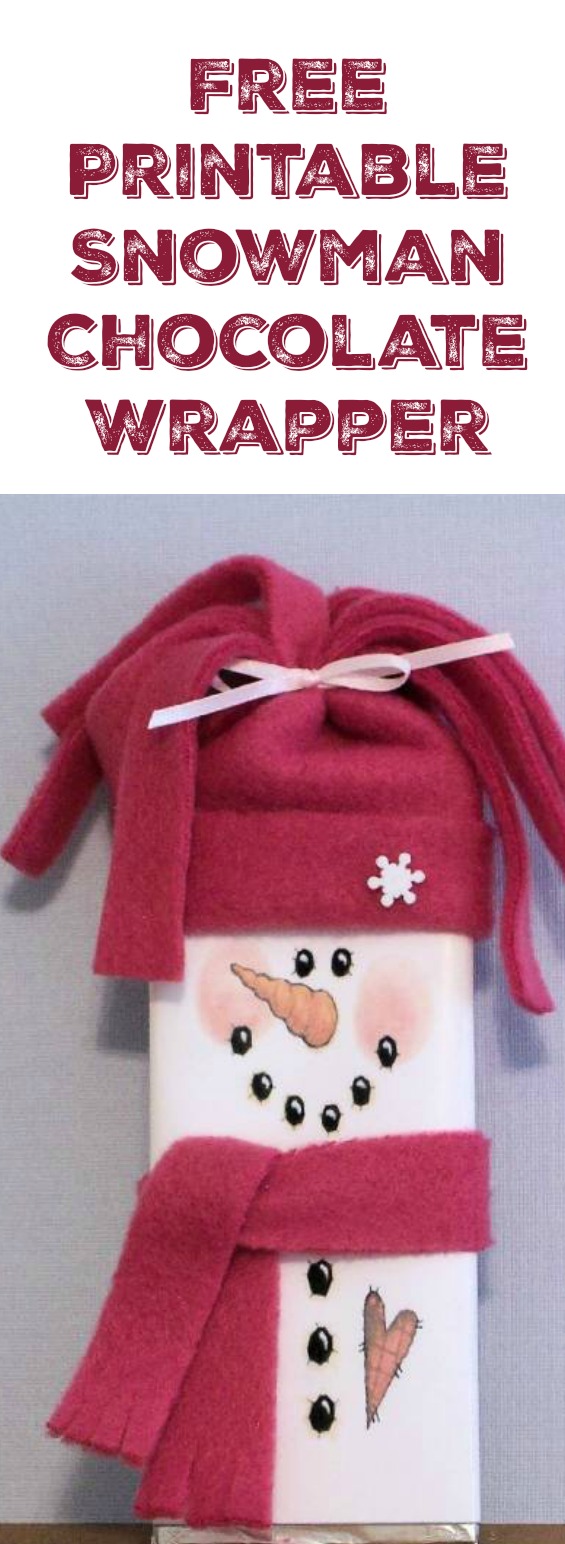
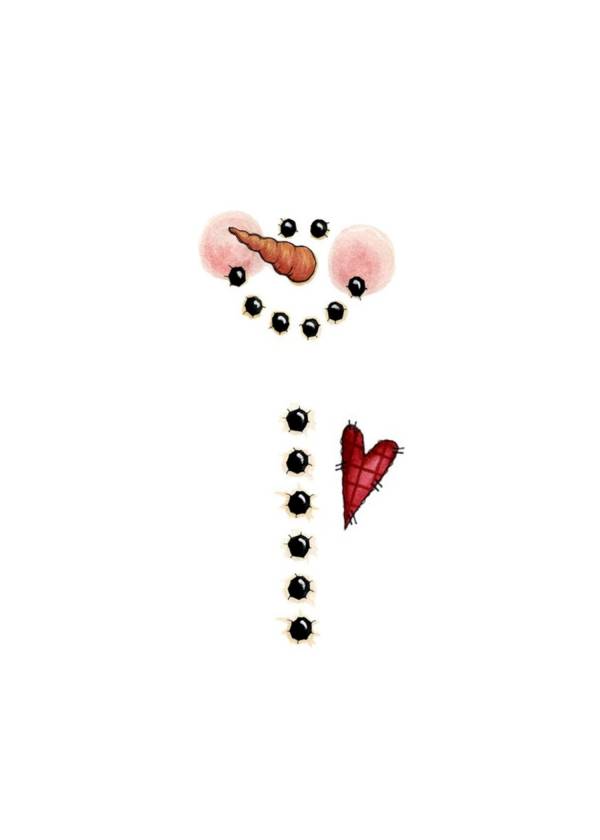
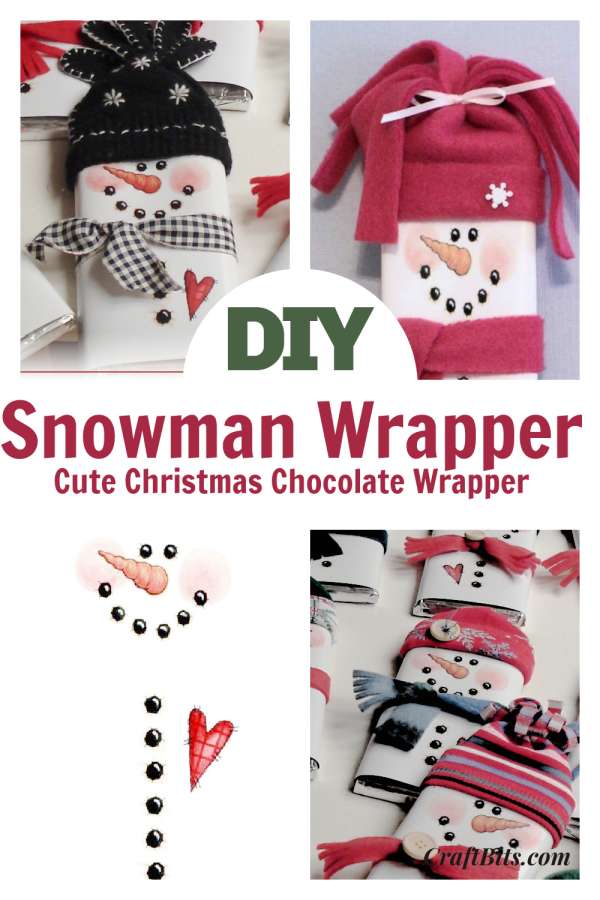
This free printable is for a Snowman Candy Bar Wrapper. This wrapper fits onto store-bought candy chocolate bars. You can then hand out these DIY handmade Christmas chocolates.  These Christmas Chocolate wrappers fit on the Aldi chocolates as well as Hersheys small bars. Print on to 6×4 photo paper for correct sizing.

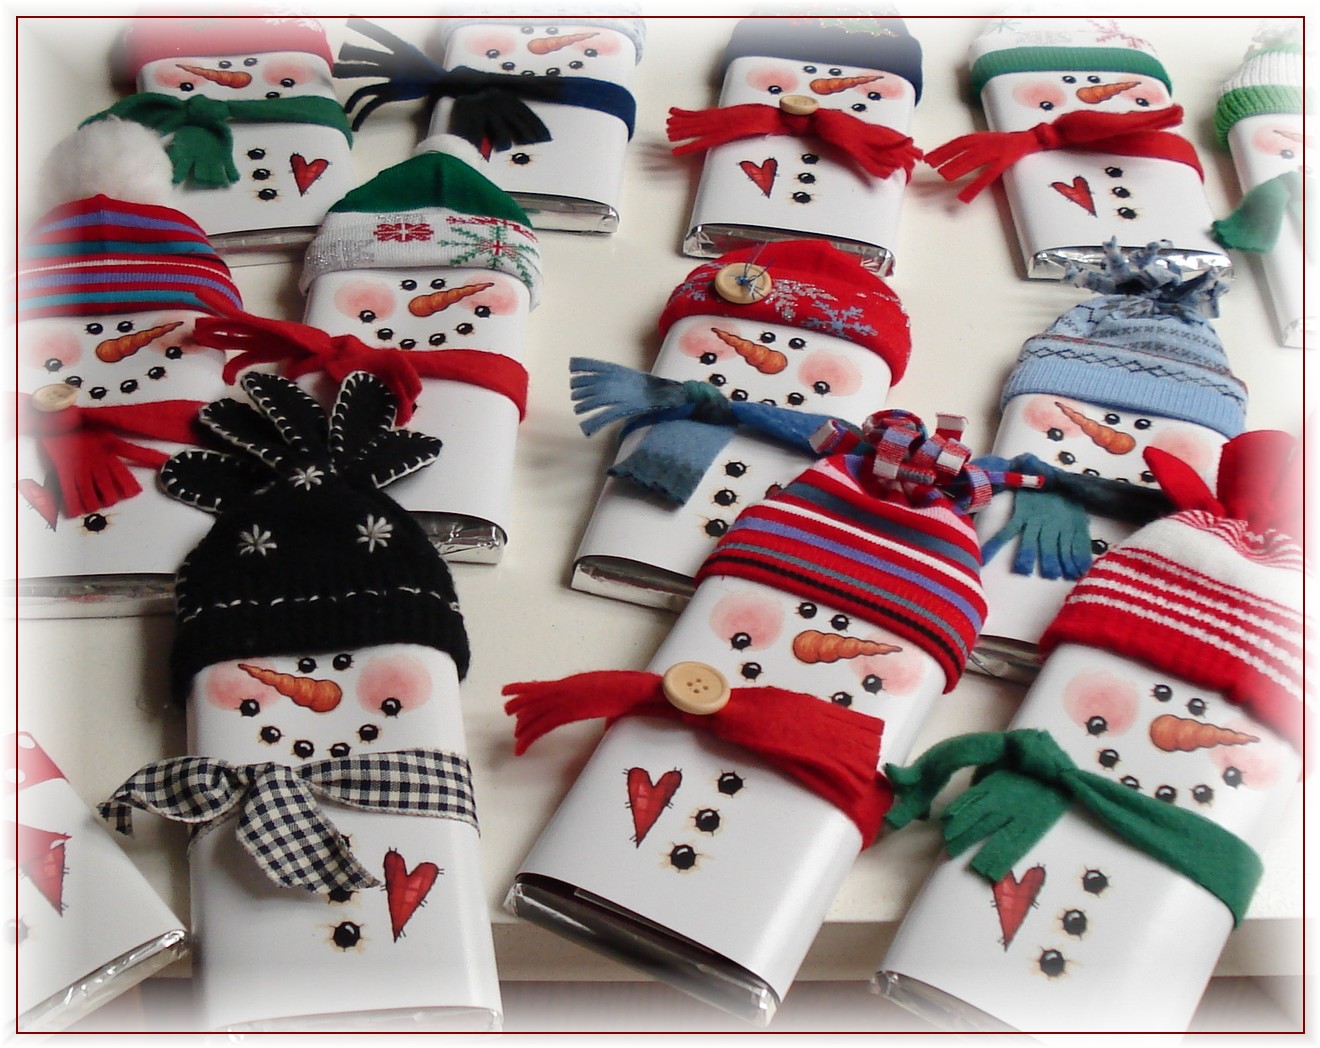
Add some fleece beanies to really finish off this DIY Chocolate Candy wrapper. For cheap fleece pick up a scarf from a Dollar store to cut into strips. To create the hats, simply make a tube and sew the top into a tuff or glue it into place. You can also use baby socks cut down shorter for a even faster creation.

I really am a sucker for a cute snowman face. And here are several cute snowman faces! Print them off and wrap your candy bars to give as gifts. Perfect for school before winter break!  Get the freebie at here– Snowman Freebie….

Img src – Crafthubs
Printable Snowman Candy Bar Wrappers

«
»

Comments

  1. Rona says

    November 9, 2011 at 12:39 pm

    So creative!! Thank you

  2. Nila Johnson says

    November 25, 2011 at 10:19 am

    How do I print just the face?

    • Amanda Formaro says

      November 26, 2011 at 11:11 am

      Hi Nila, please check with the designer by clicking on the link and going to the tutorial.

    • Tammy says

      December 4, 2019 at 12:00 pm

      Click on “Snowman Freebie” under the first picture. It will then open into another file and you can print straight from there.

  3. Harriet Throssel says

    September 6, 2012 at 9:44 pm

    I can’t print it…I have tried several different ways!

    • Amanda Formaro says

      September 7, 2012 at 8:08 am

      Hi Harriet. Please click through to the designer’s website and follow her instructions. If it still doesn’t work, please contact her directly. Thanks!

    • Tammy says

      December 4, 2019 at 12:01 pm

      Click on “Snowman Freebie” under the first picture. It will then open into another file and you can print straight from there.

  4. dancer12 says

    December 9, 2012 at 7:33 pm

    how do u print?

    • Amanda Formaro says

      December 12, 2012 at 6:53 am

      Please follow the link in the post that will take you to the blog that made these and you will find printing instructions there

    • Tammy says

      December 4, 2019 at 12:01 pm

      Click on “Snowman Freebie” under the first picture. It will then open into another file and you can print straight from there.

  5. Mj says

    October 1, 2014 at 5:50 am

    How did you so the cute hats?

  6. Judy Chlupsa says

    October 14, 2019 at 5:44 pm

    This little snowman is adorable, thank you for sharing your design!

  7. Margie Hood says

    December 13, 2019 at 8:07 am

    Oh my heart..so much cuter even after I printed the lil thing off..Thank you for sharing, my daugher will love this in her stocking..so kind of you to share my friend..not many people go out of their way this time of year!

  8. mary hodges says

    December 14, 2019 at 1:35 am

    How did you make the hat??? These are so cute

Have you read?

Halloween Crafts You Need to Start Now: 15 Big DIY Props Worth the Build Time

There are Halloween crafts you can knock over in twenty minutes with a glue gun and a packet of plastic spiders—and then there are the projects that quietly take over the garage for six weeks.

This roundup is for the second kind.

We are talking about towering haunted trees, life-size witches, giant spiders, cemetery gates, pumpkin arches and full-sized crypts. These are the wonderfully ambitious DIY Halloween props that need drying time, multiple coats of paint, unexpected trips to the hardware store and, quite possibly, a family member asking whether you genuinely intend to keep a coffin in the shed all year.

The good news is that large Halloween decorations do not need to be completed in one frantic weekend. Starting early means you can build the frame now, add texture next weekend, paint when you have time and still leave yourself a few evenings to experiment with lighting and placement.

Many of these large outdoor Halloween projects are designed to be dismantled, folded or stored in sections. Build them properly once and they can become the backbone of your Halloween display for years.

If you usually stick to the smaller projects in our Halloween craft ideas roundup, consider this your invitation to go gloriously overboard.

Build a Giant Haunted Halloween Tree

A twisted tree can become the central feature of an entire haunted-yard display, particularly when it is large enough to loom above gravestones and skeletons. This DIY spooky Halloween tree uses an internal frame and sculpted outer surface to create the appearance of a gnarled old trunk.

This is exactly the sort of project worth beginning early because every layer needs time to dry before you add paint and weathering. Once finished, tuck lights behind the branches or place an uplight beneath the trunk to exaggerate every knot and hollow.

Create a Tree of Terror From Salvaged Materials

For something even more theatrical, this full Tree of Terror video tutorial transforms an old tree section, painter’s tarps, skeletons and lighting into a huge sculptural prop. The embedded bones make it look as though the tree has been collecting unfortunate visitors for centuries.

This build is ideal for anyone with access to branches, fallen timber or other yard debris. The finished prop has enormous presence, but much of its character comes from irregular materials that might otherwise have been discarded.

Make an Illuminated Life-Size Witch

A witch standing among the garden beds is unsettling enough during the day, but lighting the figure from within takes the effect to another level after dark. This illuminated life-size stick witch uses natural branches to create a tall, skeletal figure with a wonderfully wild silhouette.

Collecting and drying suitable branches can take time, so this is a clever project to begin several weeks ahead. Build a small coven at different heights if one lonely witch does not feel sufficiently dramatic.

Construct a Full-Size Outdoor Witch

Old clothes, a simple support structure and a carefully arranged cloak can become a surprisingly convincing human-sized prop. This life-size outdoor Halloween witch gives you the basic construction method needed to create a figure that can stand near a cauldron, porch or garden gate.

The face and hands are where you can really make the project your own. Create an ugly storybook witch, a shadowy faceless figure or a glamorous gothic sorceress who looks as though she owns the place.

Sculpt a Monster-Mud Grim Reaper

Monster mud is a mixture traditionally used by Halloween prop builders to stiffen fabric and create weather-resistant sculptural forms. This life-size DIY Grim Reaper uses a support frame, burlap and monster mud to form a substantial figure that looks like a stone cemetery statue.

Allow plenty of time for building, coating, drying and painting. A flickering lantern beneath the hood will illuminate the skull while keeping the rest of the figure broodingly dark.

Build an Eight-Foot Reaper

Once you are already constructing a Grim Reaper, you may as well make him tall enough to worry the neighbours. This eight-foot Grim Reaper project uses a Christmas-tree stand as part of the base, which is a brilliant example of repurposing supplies already tucked away in storage.

Because this design is built around a sturdy central support, it can be positioned as a focal point in a cemetery display. Place him behind the gravestones so visitors initially see only the hood and shoulders rising from the darkness.

Make a Giant Halloween Spider

A giant spider is one of the best large-scale Halloween props because it can fill a roofline, porch or entire section of garden. This giant spider Halloween build uses chicken wire, expanding foam and pipe insulation to create a wonderfully unpleasant creature with long, poseable legs.

It is a messy build, but the sculpting process is part of the fun. Start early so you have time to shape the body, apply texture, correct any wobbly legs and experiment with exactly where your new pet will cause the most alarm.

Construct a PVC Giant Spider

For a more structured build, this giant PVC Halloween spider tutorial creates a sturdy base with long pipe legs. PVC makes the finished spider easier to construct in separate pieces, which is extremely useful when Halloween is over and you need to fit the beast back into the garage.

Mount it above the porch, position it across the lawn or make it look as though it is climbing over the roof. Just remember that large outdoor props need proper anchoring—especially when eight legs are involved.

Stretch a Giant Rope Spiderweb Across the Yard

Once you have built a giant spider, naturally it requires an equally enormous web. This giant rope spiderweb tutorial shows how to create an oversized web that can be stretched between trees, posts or parts of the house.

The web fills a large area without requiring bulky materials, making it one of the most effective projects for a wide frontage. Add a few wrapped “victims” made from old clothes, plastic bags and white fabric for a scene that tells its own unfortunate little story.

Build a Cemetery Entrance With Pillars and Gates

A proper entrance instantly turns a collection of gravestones into a deliberate haunted cemetery. This Halloween cemetery gate tutorial walks through the construction of a substantial entrance complete with columns, an overhead arch and gates.

This is a multi-stage build involving measuring, cutting, assembly, surface treatment and painting, so beginning early is rather important. Design the sections so they bolt or slot together and you will have a much easier time storing the gate between Halloween seasons.

Create a Foam-Block Cemetery Archway

Large stonework does not need to involve actual stone—or the back injury that would come with moving it. This DIY foam cemetery archway uses lightweight blocks to create the appearance of an old crumbling entrance.

Carving uneven edges and painting several stone tones will make the structure far more convincing. Add moss, vines, cracks and dark washes gradually rather than trying to complete all the ageing in one sitting.

Make a Complete Halloween Cemetery Fence

A fence gives your yard display boundaries and makes even a small graveyard feel like a full installation. This DIY Halloween cemetery fence includes faux iron fencing and a large sign constructed from lightweight materials.

Build it in manageable panels that can be joined during installation. Modular sections are easier to paint, easier to repair and considerably less likely to become the object that prevents the shed door from closing for the next eleven months.

Build a Full-Size Halloween Crypt

A crypt is not a casual Saturday-afternoon craft, which is precisely why it belongs on a list of Halloween projects you need to start now. This full-sized Halloween crypt prop creates an imposing graveyard structure complete with a sculptural figure resting on top.

It works beautifully as the central feature of a home cemetery, particularly when surrounded by smaller foam gravestones. Paint and lighting will do much of the storytelling, so allow time to build up damp stains, cracks, moss and shadowed recesses.

Construct a Life-Size Wooden Coffin

A full-size coffin can be used upright as a photo backdrop, placed open in a graveyard or converted into spooky Halloween shelving. These free full-size Halloween coffin plans provide the measurements and basic woodworking guidance required to build the classic tapered shape.

This project needs careful measuring and cutting, so it is not something I would leave until Halloween week. Add hinges if you want an opening lid, or install internal shelves so the coffin can display potion bottles, candles and smaller props.

Make a Giant Pumpkin Arch for the Front Door

A pumpkin arch delivers enormous impact without being gruesome, making it particularly good for family-friendly displays. This over-the-top pumpkin arch tutorial uses affordable store-bought finds to create a large arrangement around an entrance.

Collecting enough pumpkins is often the slowest part, so begin buying them gradually rather than trying to find everything in one shopping trip. Black, cream and grey paint can transform a mismatched collection into a wonderfully cohesive gothic arch.

Build a Life-Size Scarecrow With Its Own Stand

A proper scarecrow should be able to stand independently rather than slowly folding over the minute the weather changes. This life-size scarecrow tutorial includes a supporting frame that makes the finished figure easier to pose and display.

Use thrifted clothing and stuff the body in stages so you can adjust its proportions. A carved foam pumpkin, burlap mask or featureless cloth head can take the same basic body from cheerful harvest decoration to deeply unsettling farmyard guardian.

Make a Giant Scarecrow That Towers Over the Garden

When life-size does not feel quite ambitious enough, try this giant DIY Halloween scarecrow. Its exaggerated proportions make it suitable for a large front yard where ordinary decorations tend to disappear into the landscaping.

Plan the support system before adding clothing and decorative layers. Wind catches fabric surprisingly well, and you do not want your towering scarecrow making an unscheduled journey into the neighbour’s hydrangeas.

Create a Life-Size Cheesecloth Ghost

A life-size ghost may be lighter and less complicated than a crypt or cemetery gate, but it still needs shaping and drying time. This life-size cheesecloth ghost tutorial creates a floating figure using layers of fabric stiffened over a temporary form.

Make several in different poses and place them together beneath a tree. Lit from below, their transparent layers catch the light beautifully and create an ethereal effect without requiring gore, motors or complicated electronics.

Choosing Which Large Halloween Project to Start First

Begin with the project that will anchor the rest of your display. For a haunted forest, build the tree first and add witches, spiders and ghosts around it. For a graveyard, start with the gate, fence or crypt before making individual tombstones.

Measure the display area before buying supplies, and think about storage before committing to a solid eight-foot structure. PVC frames, removable limbs, folding panels and numbered connection points can save a tremendous amount of frustration later.

Large props also need to cope with outdoor conditions. Use appropriate exterior paint and sealers, keep electrical components protected, and secure tall decorations against wind. Flame-free lights are the sensible choice around fabric, foam, paper and dried branches.

Most importantly, give yourself permission to take your time. These are not quick Halloween crafts; they are builds. Work on one stage at a time, let everything dry properly and keep adding details until the prop looks as though it has been haunting your garden for a hundred years rather than occupying your garage since Tuesday.

Explore

Bedrooms Christmas Craft Ideas Easter Garden and Yard Halloween Holidays Home Decor Kitchens Living Areas Makeovers and Redos More DIY's Organizing Outdoor Decor Porches, Patios and Decks Recycled Crafts Seasonal Trash to Treasure Windows and Walls Wreaths

RSS More Articles

  • Book Review: Fine Whitework by Jenny Adin-Christie
  • Learning Numbers for Preschoolers
  • 6 Free Celestial Coloring Pages
  • Happy Diwali Kids Elephant T-Shirt
  • Stitch a Colorful Cross Stitch Unicorn
  • Knit a Plaid Cowl with a Built in Pun
  • How To Make Bread Dough Jewellery – Craft Project Review
  • Free Halloween Crochet Patterns You Can Make in a Day
  • Best Chicken Ramen Broth Recipe: Rich, Golden And Full Of Flavour
  • Homemade Jewellery Cleaner Recipes Using Pantry Ingredients

Copyright © 2026 · CraftGossip | Start Here | Contact Us | Link to Us | Your Editors | Privacy and affiliate policy