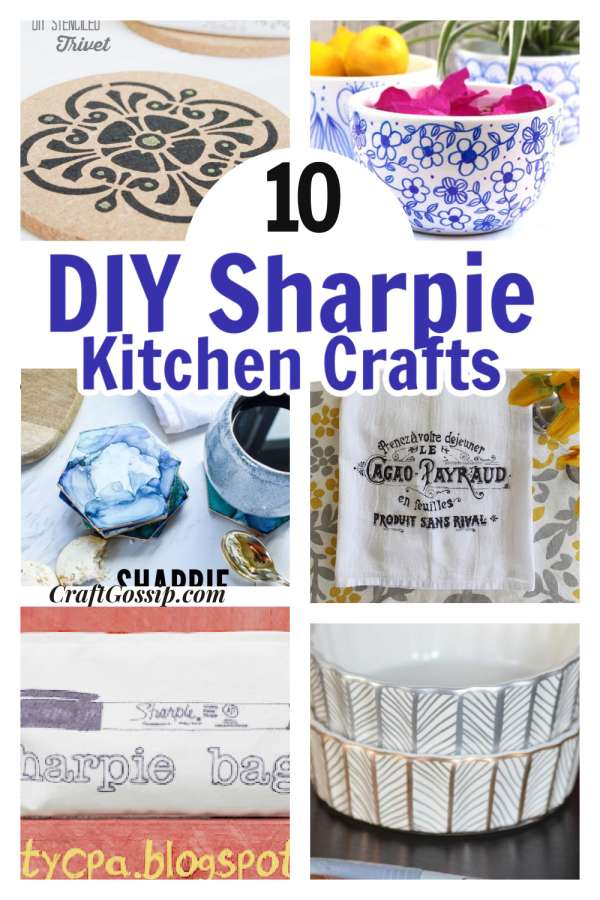
These Sharpie pen crafts are perfect for the kitchen from crockery mugs to kitchen decor. All of these handmade crafts use Sharpie pens to create inexpensive DIY decor for your kitchen. Use store-bought plates and bowls to create hand-designed crockery. white plates and mugs can be bought in any discount store or online. Add a sharpie and add some style to your kitchen decor.
So which sharpie pen should you use for which surface and how do you make it stick to that surface? Here are my top tips for using Sharpie pens in DIY Crafts.
Fabric
Sharpies require heat to set them into the fabric. Either place the item in the dryer for 15 – 20 minutes on high heat or use an iron. The iron should be on the highest setting; iron for five minutes on both sides with the steam turned off. The key is heat. I always use some baking paper or freezer paper between the design and my iron to protect my iron.
Sharpie does make fade-resistant fabric markers  if you want a bright long-lasting color grab.
Ceramic
I 100% prefer an oil-based sharpie for ceramics, but if you use regular Sharpies, you can still set it to the mug or the plate. Bake the mugs at 350 degrees for 30 minutes. These mugs and plates do not do well in the dishwasher so definitely handwash.
Metal and Glass
Use a can of clear acrylic sealer and spray over the top. For glass use the ceramic methods or use a glass paint pen
 .
.
Plastic
Plastic is shiny and hard for a pen to grab onto it. You can make the surface more “grabbable” by Sanding it with 120-grit sandpaper where you want your design to go. Then seal with sealer when dry.
Sharpie Pen Project – Coffee Cup Love — CraftBits.com
return on creativity: sharpie bag
Sharpie Valentine’s Day Mug — CraftBits.com
Easy DIY Coasters with Sharpies and Alcohol! – Jessica Welling Interiors
DIY Sharpie French Label Towel – Great Gift Idea! – Setting for Four
DIY Sharpie Dinnerware – The Sweetest Occasion
Sharpie® Your Season: Permanent Marker Embellished Dishes –
Sharpie pens are a versatile and essential tool for any artist, crafter, or student. They offer bold and vibrant colors that make it easy to create eye-catching designs and illustrations. However, sharpie pens are known for their tendency to dry out quickly, making them a bit of a hassle to use. Here are some tips to help you make your sharpie pens last longer and save you money in the long run.
Store your pens with the cap facing down
Sharpie pens are designed to be used with the tip facing downward. This ensures that the ink is always in contact with the tip, keeping it moist and ready to use. If you store your sharpie pens with the tip facing up, air will get inside the pen, which will cause the ink to dry out faster. To prevent this, store your sharpie pens with the cap facing downward.
Keep your pens capped
Leaving your sharpie pens uncapped for extended periods of time will also cause the ink to dry out. To keep the ink from drying out, make sure to keep your sharpie pens capped whenever you’re not using them. This will help keep the air from getting inside the pen and will preserve the ink for longer.
Use a damp cloth
If you find that your sharpie pens are already starting to dry out, you can use a damp cloth to revive them. Simply wipe the tip of the pen with a damp cloth, being careful not to soak it. This will help to hydrate the ink and make it flow more smoothly.
Refill the pens
Sharpie pens are designed to be disposable, but you can also refill them with ink to extend their lifespan. You can purchase refill bottles of sharpie ink online or at your local art supply store. Simply remove the tip of the pen, fill it with ink, and replace the tip. This is a great way to save money and help the environment by reducing waste.
Store your pens in a cool, dry place
Sharpie pens should be stored in a cool, dry place to prevent the ink from drying out. Do not store them in direct sunlight or in a hot car, as this can cause the ink to evaporate and the pen to dry out. Keeping your sharpie pens in a cool, dry place will help them last longer and preserve their vibrant color.
In conclusion, making your sharpie pens last longer is easy and can be done with just a few simple steps. By following these tips, you can save money and reduce waste by using your sharpie pens for longer. Whether you’re an artist, crafter, or student, these tips will help you get the most out of your sharpie pens and ensure that you have a supply of vibrant and long-lasting pens on hand.


I am not a fan of this article. Instead of telling how to use Sharpies on all these surfaces and then saying that it won’t be permanent, why not do an article on products that are made for these surfaces. Such as glass paint that can be put in the dishwasher. There are products made for fabric, glass, ceramic, plastic, metal,etc. And, the proper products are colorfast. Don’t misunderstand, I do like and use Sharpies.