• Home
  • Suggest A DIY
  • DIY Newsletter

Home and Garden

Ideas For DIY

  • About CraftGossip
  • Our Network
    • Bath & Body Crafts
    • Candle Making Ideas
    • Crochet Ideas
    • Cross Stitch
    • Edible Crafts
    • Felting Patterns
    • Glass Art
    • Home & Garden Ideas
    • Indie Crafts
    • Jewelry Making
    • Kids Crafts
    • Knitting Patterns
    • Lesson Plans
    • Needlework
    • Party Ideas
    • Polymer Clay
    • Quilting Ideas
    • Recycled Crafts
    • Scrapbooking
    • Sewing Patterns
    • Card Making
    • DIY Weddings
    • Not Craft Ideas
  • Giveaways
  • Roundups
  • Store
  • Search

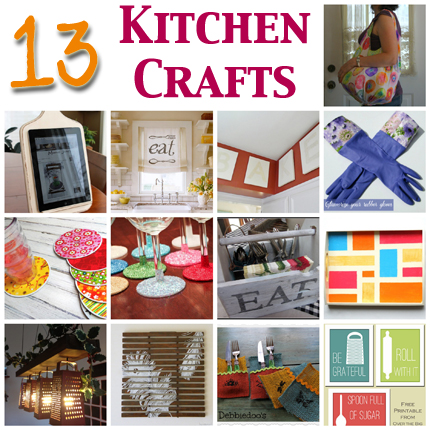
13 Kitchen Crafts You Will Love

March 26, 2013 by Amanda Formaro

13 Kitchen Crafts You Will Love @craftgossip

Kitchen crafts are really popular. I alone have made over 15 projects just for my kitchen! It’s probably because the kitchen is the heart of the home, so those of us that like to make our own home decor really want to dress it up with our own personalities. Well, here are 13 ways you can express your creativity by making kitchen crafts that are not only eye-catching, but useful as well.

Check out these Dollar Tree Kitchen crafts

DIY Vintage Farmhouse Kitchen Scales — CraftBits.com

DIY Farmhouse Fresh Eggs Kitchen Wall Art
Potholder Sewing Pattern


13 Kitchen Crafts You Will Love @craftgossip

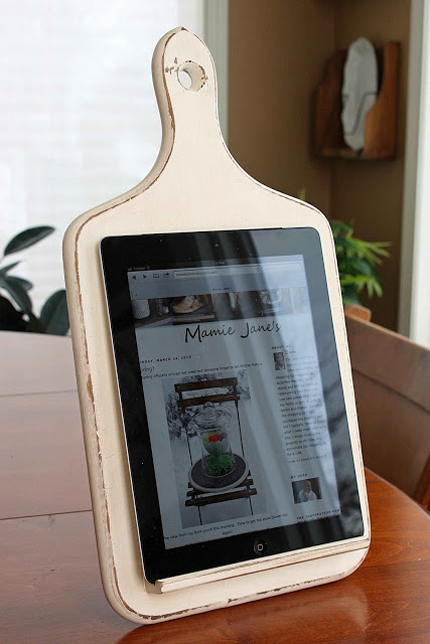
1. Cutting Board Tablet Holder – Mamie Jane’s
13 Kitchen Crafts You Will Love @craftgossip

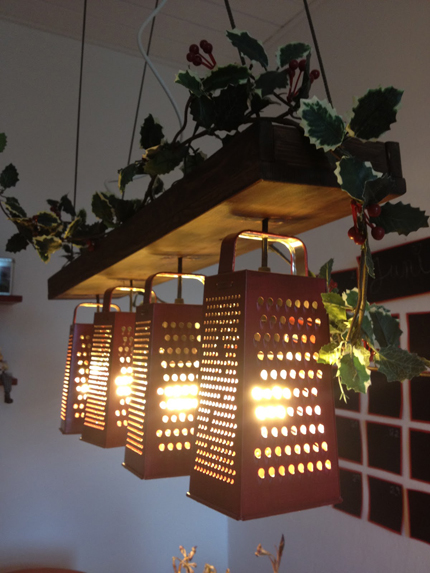
2. Box Grater Lighting – Violett Gerbera
13 Kitchen Crafts You Will Love @craftgossip

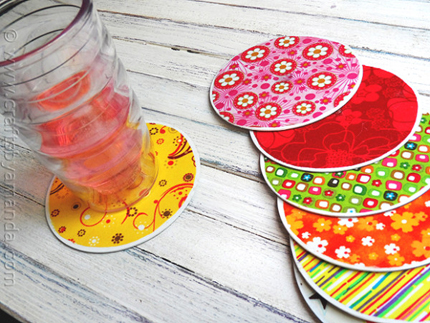
3. Recycled CD Coasters – Crafts by Amanda
13 Kitchen Crafts You Will Love @craftgossip

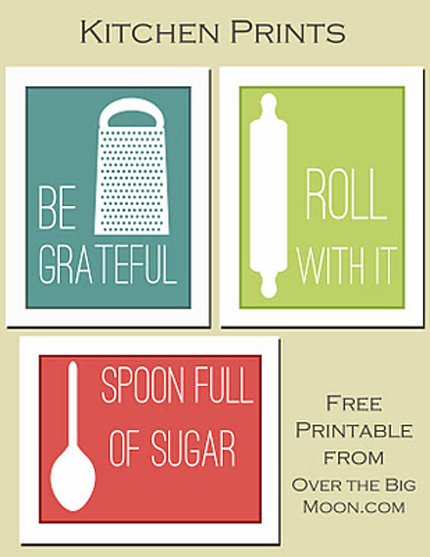
4. Kitchen Art Printables – Over the Big Moon
13 Kitchen Crafts You Will Love @craftgossip

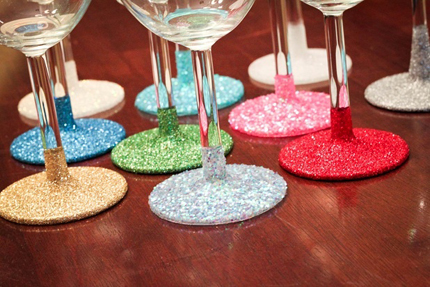
5. Glittered Wine Glasses – Inspire, Design & Create
13 Kitchen Crafts You Will Love @craftgossip

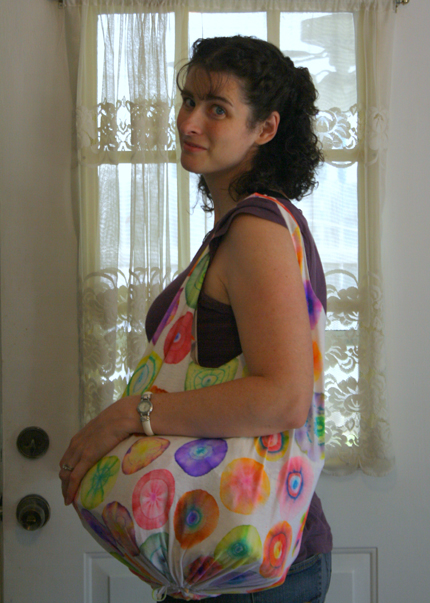
6. No Sew Grocery Bag – Saving with Shellie
13 Kitchen Crafts You Will Love @craftgossip

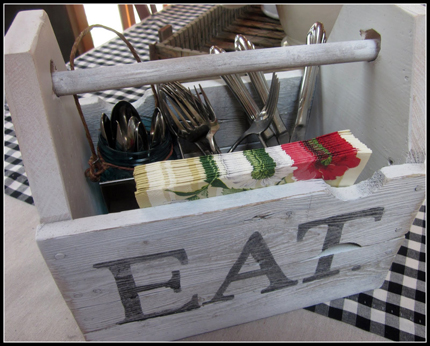
7. Wood Utensil Crate – Homeroad

13 Kitchen Crafts You Will Love @craftgossip

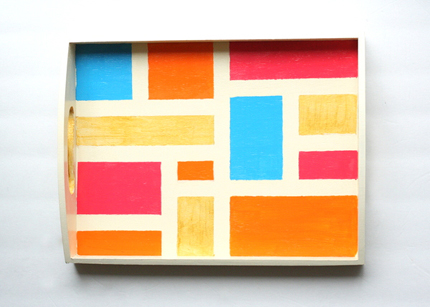
8. Colorful Serving Tray – Design, Dining & Diapers
13 Kitchen Crafts You Will Love @craftgossip

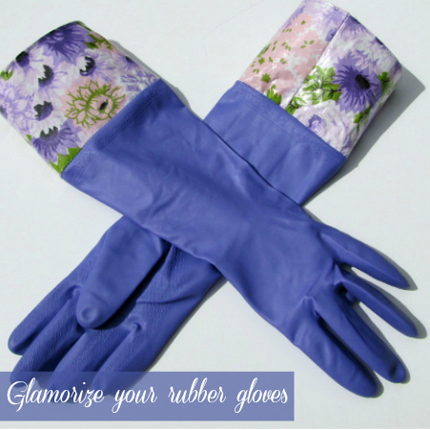
9. Rubber Gloves Glamorized – The Haby Goddess
13 Kitchen Crafts You Will Love @craftgossip

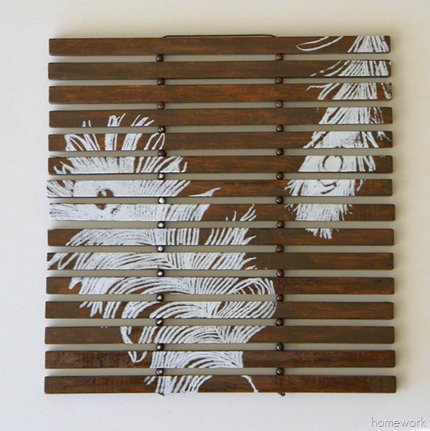
10. Painted Trivet – Homework

13 Kitchen Crafts You Will Love @craftgossip

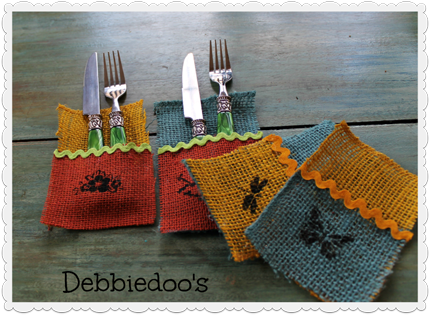
11. Burlap Utensil Holders – Debbie Doos
13 Kitchen Crafts You Will Love @craftgossip

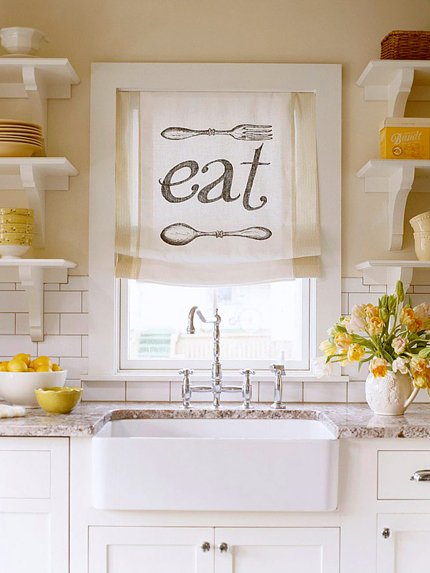
12. Printed Roman Shade – Better Homes & Gardens
13 Kitchen Crafts You Will Love @craftgossip

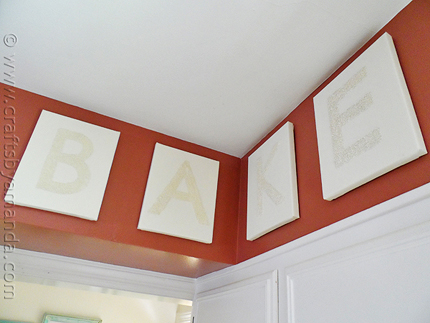
13. Epsom Salt Bake Sign – Crafts by Amanda
«
»

Comments

  1. debbiedoos says

    March 26, 2013 at 9:51 am

    Thank you for sharing!

  2. Nancy says

    March 3, 2014 at 3:55 pm

    I absolutely love the box grater light. I went to the site and have so far struck out. I have been looking for a light for over my baking table and this is it! Now, my only question is: can I get the instructions on how to make this?
    Any and all help appreciated. TY, Nancy

Have you read?

12 Ways To Make A Fake Skull For Halloween

There is something about a battered old skull that instantly makes a Halloween display look properly haunted. Pop one between a few dripping candles and dusty books, and suddenly the mantel looks as though it belongs to a witch who has been collecting questionable objects for several centuries.

The problem is that realistic Halloween skulls can become surprisingly expensive, particularly when you need several for a graveyard, catacomb wall or large outdoor display. Thankfully, creative makers have found ways to build fake skulls from cardboard, paper mache, foam, plaster and even plastic shopping bags.

Some of these tutorials begin completely from scratch, while others show you how to transform an inexpensive plastic skull into something far more realistic. There are beginner-friendly projects here, along with a few ambitious Halloween props for makers who enjoy disappearing into the craft room for an entire weekend.

Cheap Expanding Foam Prop Skull

This method uses a skull mould and expanding foam to create lightweight replica skulls. Once you own the mould, you can make multiple skulls for a Halloween graveyard, haunted-house display or faux catacomb wall without buying each one separately.

Expanding foam can be messy and continues to swell as it cures, so this project requires gloves, a protected work surface and a little experimentation. The finished skulls are light enough to hang, stack or attach to larger props, which makes this method especially useful when you need decorations in bulk.

Paper Mache Cow Skull

A long-horned animal skull creates a completely different Halloween look from the traditional human skull. It works beautifully for a haunted farmhouse, western graveyard, witch’s cabin or dark botanical display.

This tutorial builds the skull from paper mache, allowing you to make a large statement piece without the weight or cost of a cast replica. Paper mache is forgiving, too. Small bumps, cracks and uneven areas only make an aged Halloween skull look more convincing.

Rotten Corpsed Skull Prop

“Corpsing” is the prop-making technique of adding dried skin and tissue effects to a bare skeleton or skull. This version begins with an inexpensive plastic skull, then uses cotton, liquid latex and layered paint to turn it into something that looks unpleasantly realistic.

The cotton provides torn, uneven texture, while washes of brown, red, yellow and black create the appearance of dried flesh and decay. This is a fantastic option for haunted houses, horror displays and anyone who thinks a clean white skull looks just a little too cheerful.

Decaying Mummy Skull

This tutorial transforms a basic skull into an aged mummy-style prop. Rather than leaving the surface smooth, the technique builds wrinkled, dried texture across the face and around the eye sockets.

The result looks like something uncovered in an ancient crypt rather than something purchased beside the Halloween sweets. Try placing the finished skull inside a battered wooden box, wrapping it loosely in stained gauze or displaying it beside old bottles and battery-operated candles.

Paper Mache Corpse Skull Without Melted Plastic

Many traditional corpsing tutorials use heated plastic, which can produce unpleasant and potentially hazardous fumes. This alternative uses papier mache and tissue paper to create the dried-skin effect instead.

The layered tissue wrinkles naturally as it dries, producing wonderfully uneven texture over the skull. It is a useful method for makers who want the corpse look but would rather work with familiar paper-crafting materials. Allow plenty of drying time before adding paint washes and darker shading around the eyes, nose and teeth.

Hand-Sculpted Halloween Skull Decorations

These handmade skull decorations have a slightly primitive, folk-art quality that works beautifully with vintage Halloween décor. You can smooth the surface carefully for a polished finish or leave the skull rough and irregular so it looks old and handmade.

Smaller versions could be turned into ornaments, garland pieces or creepy little shelf decorations. Make several with slightly different faces rather than trying to reproduce one perfect shape. A crooked grin and uneven eye sockets give each skull its own personality.

Giant Halloween Skull Decoration

Sometimes a regular-sized skull simply does not provide enough neighbourhood drama. This giant skull project is intended as a large-scale Halloween statement piece that can dominate a porch, yard or haunted-house entrance.

Oversized props take more planning than tabletop decorations, but they are often made from lightweight structural materials rather than solid plaster. Paint and shadow do much of the work, so concentrate on creating recognisable eye sockets, cheekbones, nasal openings and teeth rather than chasing anatomical perfection.

Styrofoam Halloween Skull

Styrofoam can be carved into a lightweight decorative skull using basic shaping and cutting tools. This makes it useful for hanging decorations, costume pieces and displays where a heavy skull would be impractical.

The surface can be left relatively smooth or cut with fractures and dents for a damaged, weathered appearance. Use only tools and coatings that are suitable for foam, as some paints, solvents and adhesives can dissolve it. A water-based base coat makes a safer starting point before you begin adding aged-bone colours.

Bird Skull Puppet

This wonderfully theatrical project creates an oversized bird-like skull with a working jaw. The base is built from foam core and sturdy tape before being covered with paper mache clay and painted.

It was designed as a puppet, but the same construction could be adapted into a hanging raven skull, fantasy creature trophy or eerie wall decoration. This project is best suited to patient intermediate makers because the jaw mechanism and sculpted beak require more construction than a simple static skull.

DIY Cardboard Skull Mask

A cardboard skull mask can be worn as part of a Halloween costume or displayed as a lightweight wall decoration. The basic shape is cut and assembled from cardboard, with an optional paper mache layer added for strength and a more sculpted appearance.

Paint it in aged ivory and brown for a realistic bone effect, or turn it into a decorative sugar-skull-style piece with flowers, patterns and bright colours. Because it is lightweight, it could also be tied to a wreath or incorporated into a Halloween doorway display.

Crystal Skull Halloween Decoration

This project creates a sparkling crystal-covered skull rather than a battered bone prop. It is a good choice for a witch’s laboratory, magical Halloween party or glamorous gothic mantel.

Crystal-growing projects require preparation and patience, but watching the surface change is half the fun. Display the finished piece where light can catch the crystal texture, keeping it protected from moisture and curious hands.

Glowing Smoky Skull Prop

For makers who enjoy adding electronics to their Halloween decorations, this project upgrades an inexpensive skull with light and a smoky mist effect. The finished prop looks as though fog is pouring from inside the skull while coloured light illuminates the face.

This is a more technical project than paper mache or painted foam, but it creates an impressive centrepiece for a party table, porch or haunted display. Follow the electronics and power instructions carefully, and keep moisture-producing components separated from connections that are not designed to get wet.

Halloween Skull Candle Props

These skull candle decorations combine creepy bone shapes with the look of melted wax. They work particularly well on a Halloween mantel, dining table or altar-style display.

Use flameless lighting wherever possible, especially when working with foam, paper, glue and painted decorations. A group of skull candles at different heights will usually look more convincing than a single perfectly centred piece.

Faux Succulent Halloween Skulls

This project begins with a hollow decorative skull and turns it into a spooky succulent planter. Faux plants keep the arrangement easy to store and reuse, although the same idea could be adapted for dried flowers, artificial moss or black feather picks.

It is less gruesome than a corpsed skull and fits nicely with modern, botanical or gothic Halloween decorating. Try painting the skull matte black, aged cream or metallic gold before filling the opening.

How To Paint A Fake Skull So It Looks Like Old Bone

Even a very inexpensive plastic skull can look convincing once the bright factory-white finish has been toned down.

Begin with a matte ivory or warm cream base rather than pure white. When the base is dry, mix brown acrylic paint with water to create a thin wash. Brush it over the skull and wipe most of it away with a cloth, allowing the colour to remain in the eye sockets, around the teeth and inside the cracks.

Add a second, darker wash sparingly around the deepest areas. Small touches of grey, mossy green and muted yellow can make the finish look older, but restraint is important. Too many colours and your ancient skull may begin to resemble a craft-room accident.

Finish by dry-brushing a little pale cream across the forehead, cheekbones and teeth. This catches the raised areas and makes the darker recesses appear deeper.

Easy Materials For Making Fake Halloween Skulls

The best material depends on how large the skull needs to be and where it will be displayed.

Paper mache is inexpensive and ideal for handmade skulls, masks and oversized shapes. Expanding foam is useful when you have a mould and want to reproduce several lightweight skulls. Carved foam works well for very large props, while plaster produces a heavier, more solid result suitable for indoor displays.

For the quickest version, start with a cheap plastic skull and concentrate on altering the jaw, adding texture and improving the paint finish. Sometimes an afternoon of distressing and repainting makes a bigger difference than constructing the entire skull from scratch.

How To Use Fake Skulls In Your Halloween Decorating

Arrange several skulls between old books and flameless candles on a mantel. Half-bury lightweight versions in garden mulch to create a graveyard, or attach them to a board with faux bones for a catacomb wall.

Smaller skulls can be added to wreaths, floral arrangements, potion shelves and table centrepieces. Oversized animal skulls make striking wall decorations, while glowing and moving skull props are best positioned where guests will discover them unexpectedly.

Because apparently placing a skull quietly on the bookshelf is not enough. It needs lighting, dried moss and an entire fictional backstory.

Whether you sculpt yours from paper mache or begin with a bargain plastic prop, the most convincing fake Halloween skulls are rarely perfect. Uneven teeth, damaged edges, stained bone and crooked jaws help them look as though they have a history—and perhaps a small unfinished matter they would like to discuss.

Explore

Bedrooms Christmas Craft Ideas Easter Garden and Yard Halloween Holidays Home Decor Kitchens Living Areas Makeovers and Redos More DIY's Organizing Outdoor Decor Porches, Patios and Decks Recycled Crafts Seasonal Trash to Treasure Windows and Walls Wreaths

RSS feed: More Articles More Articles

  • 12 Cozy Fall Handmade Cards
  • Small Halloween Cross Stitch Patterns
  • 14 Halloween Bat Sewing Projects To Make This October
  • Go Back to the ’90s with this Set of Knitting Patterns
  • Inspired by the Stolen Neighbors Quilt? How to Organise a Community Quilt Project
  • Halloween Book Storage Boxes That Make a Coffee Table Look Spookily Good
  • 20 Kids Crafts That Use Upcycled Toilet Roll Tubes
  • Bundle Halloween ITH Toy Machine Embroidery Designs – Etsy Review
  • Resources for Teaching Cursive to Kids
  • 100 FREE Autumn and Fall SVG Cut Files and Printables

Copyright © 2026 · CraftGossip | Start Here | Contact Us | Link to Us | Your Editors | Privacy and affiliate policy