• Home
  • Suggest A DIY
  • DIY Newsletter

Home and Garden

Ideas For DIY

  • About CraftGossip
  • Our Network
    • Bath & Body Crafts
    • Candle Making Ideas
    • Crochet Ideas
    • Cross Stitch
    • Edible Crafts
    • Felting Patterns
    • Glass Art
    • Home & Garden Ideas
    • Indie Crafts
    • Jewelry Making
    • Kids Crafts
    • Knitting Patterns
    • Lesson Plans
    • Needlework
    • Party Ideas
    • Polymer Clay
    • Quilting Ideas
    • Recycled Crafts
    • Scrapbooking
    • Sewing Patterns
    • Card Making
    • DIY Weddings
    • Not Craft Ideas
  • Giveaways
  • Roundups
  • Store
  • Search

6 Statement Feature Wall Ideas You Can Make Yourself

March 17, 2014 by Kym Terranova

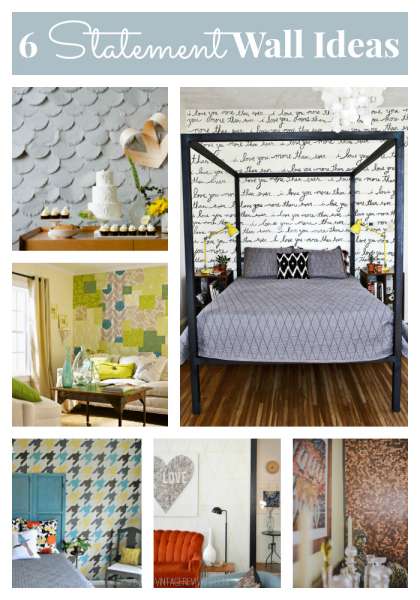
6 statement wall ideas

Creating a statement feature wall in your home can be a fun and rewarding DIY project. Not only does it add visual interest and impact to any room, but it also allows you to personalize your space and reflect your personal style. With so many different materials, techniques, and design options available, the possibilities are endless. Whether you’re looking to create a playful and whimsical wall for a child’s playroom, or a sophisticated and elegant wall for a formal living room, there is a statement wall idea for everyone.

In this roundup, we’ve gathered six unique and creative statement wall ideas that you can make yourself. Each of these ideas utilizes different materials and techniques, and is sure to inspire you to think outside the box and get creative with your next DIY project. From a bold and colorful chalkboard wall, to a sleek and modern penny wall, these ideas are sure to spark your imagination and inspire you to create your own statement wall.

So, whether you’re a seasoned DIY-er or a beginner looking to take on your first project, we hope this roundup of statement wall ideas will inspire you to create a beautiful and impactful statement wall in your own home. Remember, the possibilities are endless and the only limit is your imagination. Happy creating!
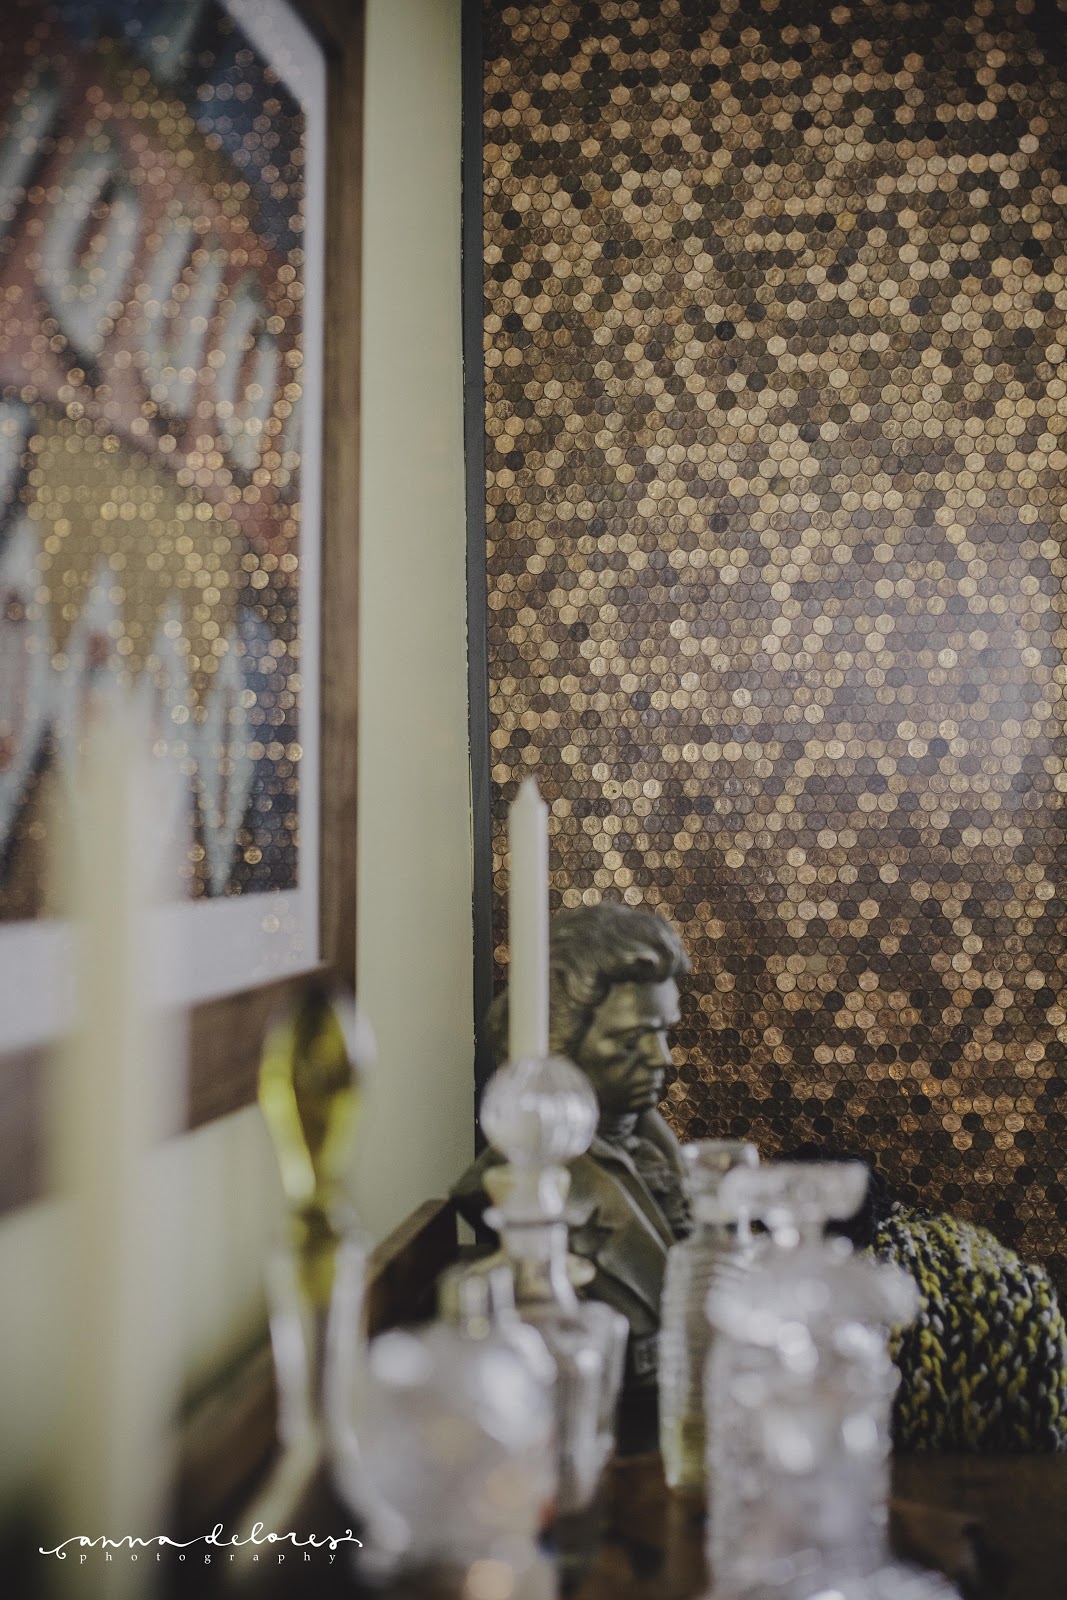


Home decor DIY for making an apartment a home - The Anna Delores Blog

Home decor DIY for making an apartment a home – The Anna Delores Blog – Are you tired of living in a bland and boring apartment? Are you looking for ways to inject some personality and style into your living space? Look no further than The Anna Delores Blog! This fantastic resource is packed with all sorts of home decor DIY projects that will help you transform your apartment into a warm and inviting space. From simple wall hangings to stylish furniture makeovers, you’ll find everything you need to create a home that truly reflects your unique personality and style.


Elsie's Handwriting Statement Wall - A Beautiful Mess

Elsie’s Handwriting Statement Wall – A Beautiful Mess – Do you love the idea of creating a statement wall in your home, but you’re not sure where to start? Look no further than A Beautiful Mess! This fantastic blog is home to Elsie’s Handwriting Statement Wall, a DIY project that will help you create a truly unique and personalized feature in any room of your home. Whether you choose to display your favorite quotes, song lyrics, or even your own handwriting, this project is sure to become a beloved focal point in your home.


DIY Fringed Scalloped Backdrop - Ruffled

DIY Fringed Scalloped Backdrop – Ruffled If you’re looking for a way to add a touch of whimsy and fun to your home decor, be sure to check out Ruffled! This delightful blog is home to a wide range of DIY projects, including the ever-popular DIY Fringed Scalloped Backdrop. With just a few simple supplies and a bit of creativity, you can create a stunning backdrop that’s perfect for parties, photoshoots, or even just as a fun and colorful addition to your home.


DIY Wallpaper Projects - C'est la fête!

DIY Wallpaper Projects – C’est la fête! If you love the look of wallpaper but you don’t want to commit to a full room makeover, then you’ll love the DIY Wallpaper Projects from C’est la fête! This fantastic blog is home to a wide range of wallpaper-inspired DIY projects that will help you add color, texture, and pattern to any room of your home. From simple wall hangings to stylish accent pieces, you’ll find plenty of inspiration and ideas to help you create a home that’s as unique as you are.
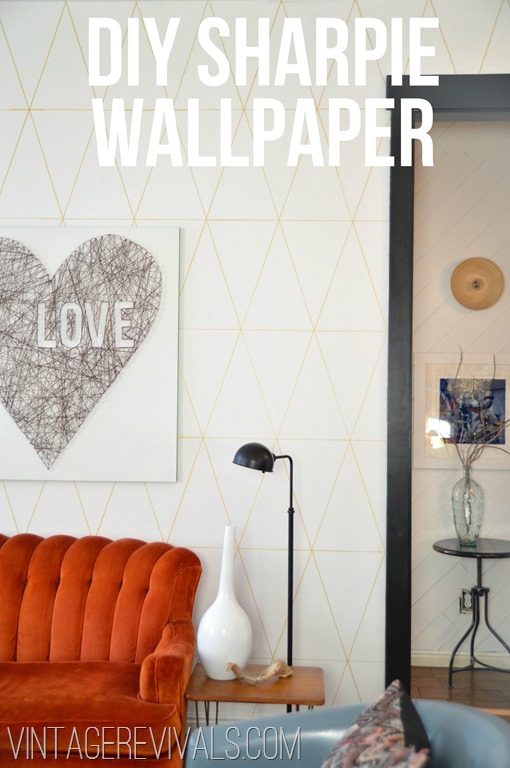


Sharpie Wallpaper

Sharpie Wallpaper – Vintage Revivals – If you’re looking for a truly unique and eye-catching way to add some personality to your home, then you won’t want to miss the Sharpie Wallpaper DIY project from Vintage Revivals. This fantastic blog is home to all sorts of creative DIY projects, but this one is truly something special. With just a few simple supplies and a bit of artistic talent, you can create a stunning and personalized wallpaper that will be the envy of all your friends and family.
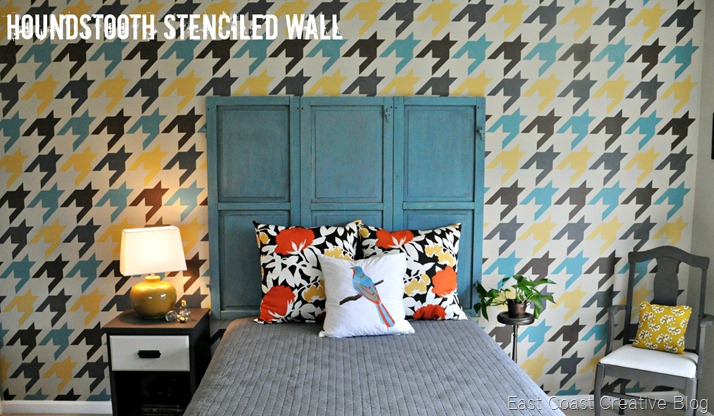


Modern Houndstooth Stenciled Wall - East Coast Creative

Modern Houndstooth Stenciled Wall – East Coast Creative – If you’re a fan of modern and minimalist home decor, then you’ll love the Modern Houndstooth Stenciled Wall project from East Coast Creative. This fantastic blog is home to a wide range of creative and inspiring DIY projects, but this one is sure to become a favorite. With just a few simple supplies and a bit of patience, you can create a stunning houndstooth pattern on any wall in your home, adding a touch of sophistication and style to any room.
 

«
»

Have you read?

DIY Giant Eyeball Lanterns – Creepy Halloween Decoration

When it comes to Halloween, bigger is always better—and these giant eyeball lanterns prove it! With nothing more than plain white paper lanterns, a little paint, and some imagination, you can create huge, spooky eyes that look like they’ve popped right out of a monster movie.

They’re perfect for hanging from ceilings, displaying on porches, or grouping together in a corner for an eerie effect. Best of all, paper lanterns are super inexpensive (you can grab them on eBay, Amazon, or even your local dollar store), which makes this a great budget-friendly craft for big impact Halloween décor.

Supplies You’ll Need

  • Large round white paper lanterns (various sizes look best) 
  • Acrylic paints or craft paints in black, brown, green, red, orange, or blue (for irises) 
  • Wide paintbrush for background color 
  • Small paintbrush for details 
  • Black construction paper or cardstock (optional for spiky “lashes” or accents) 
  • Hot glue gun or strong craft glue 
  • String or fishing line (if you want to hang them) 

Step-by-Step Instructions

Step 1: Prep the Lanterns

  1. Assemble your white paper lanterns according to the package directions. 
  2. Make sure they’re fully open and the wire insert is in place so the surface is taut for painting. 

Step 2: Paint the Iris

  1. Using a wide brush, paint a large circle in the center of the lantern to create the iris. 
  2. Choose spooky colors—green, red, orange, or blue work wonderfully. 
  3. Don’t worry about making it perfectly smooth; streaks and uneven textures add to the eerie, organic look. 

Step 3: Add the Pupil

  1. Once the iris paint is dry, use black paint to fill in the pupil at the very center. 
  2. Make it large enough to stand out against the iris. 

Step 4: Detail the Eye

  • Use a smaller brush to add darker or lighter streaks in the iris for a more realistic effect. 
  • You can even add thin vein lines in red around the iris to give it that bloodshot look. 

Step 5: Optional Spiky Lashes

  1. Cut long triangles from black construction paper or cardstock. 
  2. Glue them around one side of the lantern so they stick out like sharp monster eyelashes. 
  3. This makes the eyeballs look even more monstrous and stylized. 

Step 6: Display Your Giant Eyeballs

  • Hanging: Use string or fishing line to suspend them from ceilings, trees, or porch rafters so they look like floating eyeballs. 
  • Stacked: Place them in corners, along stairs, or even grouped on your lawn for a spooky display. 
  • Tabletop: Use them as oversized Halloween party props. 

Tips & Variations

  • Glowing Eyes: Insert battery-powered LED lights into the lanterns so they glow from the inside. 
  • Rainbow Eyes: Mix up the colors and make a whole rainbow of creepy eyes. 
  • Monster Cluster: Group multiple eyeballs together in different sizes for a scarier effect. 

This DIY Giant Eyeball Lantern craft is quick, cheap, and gives you maximum Halloween spook factor with minimal effort. Whether you make one or a whole creepy collection, your haunted house setup will definitely be eye-catching!


Explore

Bedrooms Christmas Craft Ideas Easter Garden and Yard Halloween Holidays Home Decor Kitchens Living Areas Makeovers and Redos More DIY's Organizing Outdoor Decor Porches, Patios and Decks Recycled Crafts Seasonal Trash to Treasure Windows and Walls Wreaths

RSS More Articles

  • 4 Crayon Cutable or Printable Files for Back to School
  • How to Make a Crochet Vision Board – Plan the Crochet Projects You Actually Want to Make
  • What to Serve with Rotisserie Chicken: 21 Delicious Sides You’ll Want on Repeat
  • Etsy Feature – Moth Pottery Template for Slab Building
  • Hubcap Creatures: Transforming Roadside Finds into Sculptural Wildlife
  • Learning about Georgia for Kids
  • How to Make a Moth Birthday Card
  • DIY Giant Eyeball Lanterns – Creepy Halloween Decoration
  • Designer Spotlight: Artmishka Cross Stitch
  • Freebie Friday – Grungy Pumpkins and Fall Tags Junk Journal Printables

Copyright © 2026 · CraftGossip | Start Here | Contact Us | Link to Us | Your Editors | Privacy and affiliate policy