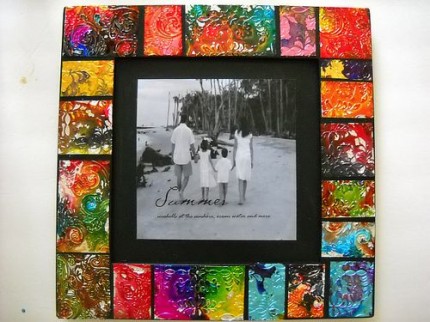
 Wow. I love this, I really do. The colors are fabulous and I have to admit I haven’t seen this technique before. I know, I’ve probably been living under a rock, right? No matter. I’ve seen it now and think it’s gorgeous! You can see the tutorial for this alcohol inked frame over at Mel Designs — Alcohol Inked Metal Mosaic Frame.
Comments
Have you read?
DIY Faux Popcorn Garland That Looks Real and Lasts for Years
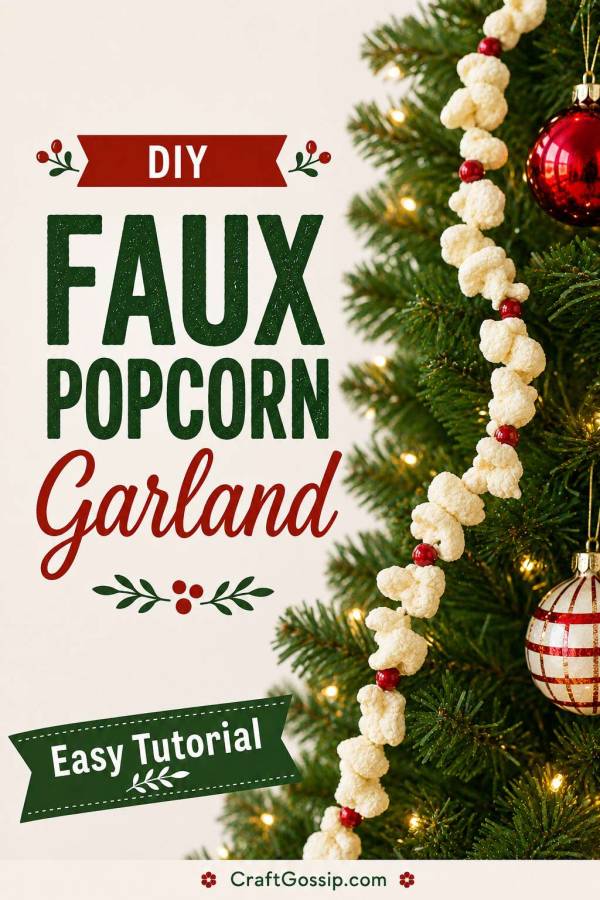
There is something wonderfully nostalgic about a popcorn garland draped around a Christmas tree. It has that old-fashioned, handmade look that feels as though it belongs beside wooden ornaments, dried orange slices and the slightly wonky decorations the children made at school.
Real popcorn garlands are charming, but they are not always particularly cooperative.
The popcorn cracks while you are stringing it, crumbs work their way into the carpet, and by the end of Christmas it can become brittle enough to shed every time someone walks past the tree. Add pets or curious little fingers to the equation and your beautiful garland may not even survive until Christmas morning.
This DIY faux popcorn garland gives you the same traditional Christmas look, but it can be packed away and reused year after year.
The secret material is expanding insulation foam. Once dispensed in tiny dollops, the foam puffs into wonderfully irregular shapes that look surprisingly similar to freshly popped corn. A little cream and golden paint adds the toasted detail, and fishing line creates the illusion that the popcorn is floating around the tree.
It is one of those crafts where the first few pieces look slightly questionable, then suddenly you have a whole tray of popcorn and begin wondering why you did not make it years ago.
Why Make a Fake Popcorn Christmas Garland?
A reusable faux popcorn garland is:
- Lightweight enough for delicate Christmas tree branches
- More durable than real popcorn
- Easy to customise with faux cranberries or wooden beads
- Suitable for trees, mantels, shelves and banisters
- Reusable for many Christmas seasons
- Less tempting to pets than an edible garland
- A lovely match for vintage, farmhouse and traditional Christmas décor
Traditional popcorn garlands have long been associated with nostalgic, homemade Christmas decorating. Modern versions often combine popcorn with cranberries, dried fruit, nuts or wooden beads for extra colour and texture.
This faux version keeps that homespun appearance without asking you to thread several bowls of increasingly stale popcorn.
Supplies
- One can of low-expansion gaps-and-cracks insulating foam
- Parchment paper, freezer paper or a silicone craft mat
- Disposable nitrile gloves
- Protective eyewear
- Old clothing or a protective apron
- Cream or warm-white acrylic craft paint
- Golden beige, tan or pale yellow acrylic paint
- Small stiff-bristled paintbrush
- Clear fishing line or strong transparent beading line
- Large, sharp embroidery or upholstery needle
- Needle-nose pliers
- Scissors
- Cardboard box or covered tray for carrying the pieces
- Optional red wooden beads for faux cranberries
- Optional clear matte craft sealer
A can of low-expansion foam sealant, inexpensive paintbrushes and fishing line are all useful supplies to order together if your local hardware store does not carry the smaller cans.
Important Expanding Foam Safety
Expanding insulation foam is a building product rather than a children’s craft material, so it needs to be treated with respect.
Work outdoors or in a very well-ventilated area. Wear gloves, protective eyewear and old clothes, cover the surrounding surface, and keep the product away from flames and ignition sources. Do not breathe the spray or vapour, and always follow the directions and curing time printed on your particular can.
The manufacturer’s safety information advises using the product outdoors or in a well-ventilated space and wearing protective gloves. It also warns against spraying near flames or ignition sources.
Keep children and pets away from the foam while it is being dispensed and while it cures. Once finished, this garland is decorative only. It should not be eaten or placed where young children may mistake it for food.
Step 1: Prepare the Work Area
Cover a large table or flat surface with parchment paper, freezer paper placed shiny-side up, or a silicone craft mat.
Do not use newspaper directly beneath the foam. The foam can adhere to porous paper and may pull pieces of print away when lifted.
Place the can, gloves, eye protection and rubbish bag within easy reach before you begin. Expanding foam becomes extremely sticky, and this is not the moment to discover the bin is in another room.
Shake and prepare the can exactly as directed by the manufacturer.
Step 2: Make a Few Test Pieces
Attach the dispensing straw or nozzle securely.
Press the trigger very gently and dispense the smallest possible dot of foam onto your covered surface. A blob around the size of a pea may expand considerably, although the final size depends on the foam formula.
Wait and watch how far the first piece expands before making a full tray.
If the piece becomes too large, use less pressure and make a smaller dot. If it stays too small, increase the amount very slightly.
Do not aim for perfect round shapes. Real popcorn is lumpy, folded and gloriously inconsistent. Uneven dollops usually look more convincing than neat spheres.
Step 3: Create the Faux Popcorn Pieces
Once you have found the correct amount of pressure, continue dispensing small, separated dollops across the prepared surface.
Leave enough room between each piece for expansion. If the foam touches while growing, the pieces may join into one enormous popcorn mutant—which is amusing, but not terribly useful for garland making.
Vary the direction of the nozzle and occasionally add a tiny second dot beside the first. This creates lobes and folds similar to real popped corn.
Continue until you have enough pieces for the desired length of garland.
As a rough guide, allow approximately:
- 70 to 90 pieces for a 6-foot garland
- 100 to 130 pieces for a 9-foot garland
- More if you prefer tightly packed popcorn
- Fewer if you are alternating the pieces with wooden cranberry beads
These quantities will vary because no two foam popcorn pieces are quite the same size.
Step 4: Allow the Foam to Cure Completely
Leave the pieces undisturbed for the full curing time specified on the can.
The surface may feel dry before the centre has completely cured, so do not rush this step. Partially cured foam may compress, tear or stick to the needle.
Once fully cured, peel the pieces gently from the paper or mat.
Inspect each one and set aside any pieces that are too large, flat or oddly shaped. Large pieces can sometimes be trimmed carefully with small scissors, although most irregular pieces will look perfectly acceptable once they are mixed into the garland.
Step 5: Add Realistic Toasted Colour
Plain cured foam can appear slightly too white and uniform. Dry brushing adds the buttery shadows that make each piece look like real popcorn.
Place a tiny amount of cream or warm-white paint on a palette.
Dip the tips of a stiff brush into the paint, then wipe almost all of it away on scrap paper. Lightly brush over any areas that need evening out.
Next, use a very small amount of golden beige or pale tan paint. Dab it into the deeper creases and around the underside of each piece.
The trick is restraint. You are adding a toasted shadow, not turning the popcorn into caramel corn.
If the paint looks too strong, immediately soften it with a clean, dry brush or a piece of paper towel.
Leave the painted pieces to dry completely.
Step 6: Prepare the Garland Line
Cut a length of fishing line approximately 12 inches longer than your planned finished garland.
For a long tree garland, I recommend making several shorter sections rather than one enormous length. Sections between 6 and 9 feet are much easier to make, store and arrange.
Tie a temporary bead, button or large knot at one end so the popcorn pieces cannot slide off while you work.
Thread the other end through a large embroidery or upholstery needle.
Step 7: String the Faux Popcorn
Push the needle through the thickest part of the first foam piece.
Do not pierce too close to a thin edge because the foam may tear. If the needle is difficult to grip, use needle-nose pliers to pull it through gently.
Slide the piece along the fishing line and continue adding popcorn.
Rotate each piece as you work so the shapes sit in different directions. This keeps the garland loose and natural rather than looking like a row of identical beads.
Leave a small amount of movement between pieces. Packing them too tightly can make the garland stiff and difficult to drape.
Step 8: Add Faux Cranberries
For a traditional popcorn and cranberry garland, add red wooden beads at regular intervals.
Try one of these arrangements:
- One red bead after every 8 to 12 popcorn pieces
- Groups of three red beads every 12 inches
- Alternating red, burgundy and natural wooden beads
- Small felt balls instead of wooden beads
- Matte red beads for a primitive farmhouse look
- Glossy red beads for a brighter vintage Christmas style
Wooden beads can be purchased already coloured or painted with red acrylic paint before stringing.
A soft yarn variation is also possible using knotted chenille yarn and red wooden beads. That method produces a reusable garland without spray foam and has also been used for large-scale traditional Christmas decorating.
Step 9: Finish the Ends
When the garland reaches the desired length, thread the fishing line back through the final three or four popcorn pieces.
Pull it gently until secure, then trim the excess line.
Repeat at the opposite end after removing the temporary stopper.
Alternatively, tie a small loop at each end. These loops are useful for attaching the garland to tree branches, removable hooks or a mantel.
Step 10: Style the Garland
Drape the finished garland loosely around the tree rather than pulling it tight.
For the most natural effect:
- Add the lights to the tree first.
- Drape the popcorn garland next.
- Add ribbon or a second garland.
- Finish with baubles and ornaments.
The faux popcorn also looks lovely:
- Draped along a mantel
- Layered over evergreen garland
- Hung across open shelving
- Wound around a staircase banister
- Displayed in a vintage wooden bowl
- Added to a Christmas kitchen shelf
- Used as part of a nostalgic holiday tablescape
For another easy recycled decoration, pair it with this scrap fabric and ribbon Christmas garland. The mix of homespun fabric and old-fashioned popcorn works beautifully on a farmhouse-style tree.
You could also tuck in a few Scandinavian fabric stars made from Christmas fabric scraps. They add colour without overwhelming the lovely simple garland.
How to Store a Faux Popcorn Garland
The biggest advantage of making fake popcorn is being able to use it again next Christmas.
To prevent the garland from tangling or crushing:
- Wind each section loosely around a piece of cardboard
- Place tissue paper between overlapping layers
- Store it in a rigid plastic container rather than a soft bag
- Keep it away from excessive heat
- Do not place heavy decorations on top
- Label the container so nobody mistakes it for packing material
Avoid folding the garland sharply. Fishing line can kink, and tightly folded sections are more difficult to drape the following year.
Troubleshooting Common Problems
The foam pieces expanded too much
Use considerably smaller dots. Expanding foam can grow far beyond the original amount dispensed, so test each new can before creating a full batch.
The pieces stuck to the work surface
Use parchment paper, freezer paper with the shiny side facing up, or a silicone mat. Avoid porous paper and fabric coverings.
The pieces look like plain blobs
Add tiny secondary dots beside the first dollop while the foam is being dispensed. Painting the creases with pale tan paint also adds much-needed definition.
The needle tears through the foam
Make sure the foam is completely cured. Pierce through the thickest central area and use a sharp needle rather than forcing a blunt one through.
The garland looks too white
Dry brush the creases with a tiny amount of warm beige paint. Real popcorn is usually cream rather than bright white.
The pieces slide around too much
Add a small wooden bead occasionally or thread the line back through selected pieces to create gentle anchor points.
The fishing line is visible
Use clear, fine line and keep the pieces reasonably close together. Once the garland is on a tree, the line should virtually disappear among the branches.
Foam-Free Faux Popcorn Garland Alternatives
Not everyone wants to work with expanding foam, and that is perfectly reasonable. You can create a similar look using:
- Knotted cream chenille yarn
- White pom-poms pinched into irregular shapes
- Packing peanuts
- Air-dry clay
- Wool felt balls
- Scrunched cotton batting tied with thread
CraftBits has an older tutorial for making a Christmas garland from packing peanuts, which is a particularly useful option if you already have clean packing materials waiting to be reused.
For something more rustic, this flannel pine cone garland would sit beautifully beside faux popcorn on a woodland or cabin-style Christmas tree.
More Ways to Personalise the Garland
Once you have mastered the basic popcorn pieces, there are plenty of ways to change the design.
Primitive Farmhouse Garland
Use tea-stained-looking paint, burgundy wooden beads and jute loops at the ends.
Colourful Retro Garland
Alternate popcorn with red, turquoise, pink and lime wooden beads.
Natural Woodland Garland
Mix the popcorn with small pinecones, wooden stars and dried orange slices.
Movie-Night Christmas Garland
Add miniature red-and-white striped paper popcorn boxes or tiny movie-ticket decorations.
Gingerbread Kitchen Garland
Combine the faux popcorn with cinnamon sticks, gingham ribbon and small gingerbread ornaments.
Snowy White Garland
Skip the toasted paint and alternate the popcorn with frosted silver beads and white wooden snowflakes.
For more reusable seasonal inspiration, browse these recycled Christmas craft ideas. Christmas crafting is always far more enjoyable when you start before December and avoid that familiar last-minute glue-gun panic.
Is It Worth Making?
Absolutely—particularly if you love nostalgic Christmas decorations but do not want to remake a real popcorn garland every year.
The project does require a little preparation and sensible handling of the expanding foam, but the finished garland is lightweight, realistic and easy to reuse. It is also wonderfully customisable, whether your Christmas style leans primitive farmhouse, colourful retro or traditional red and green.
Make it in manageable sections, store it carefully, and this cheerful faux popcorn garland can become one of those decorations you look forward to unpacking every Christmas.
And unlike the real thing, it should arrive at the end of the season without half of it scattered beneath the tree.
Its very nice. it is very useful craft for mentally challenged children.it is very easy to learn.i am also having a challenged female child (24 yrs)and i am also having a vocational center for them. i need more ideas. thank you.