• Home
  • Suggest A DIY
  • DIY Newsletter

Home and Garden

Ideas For DIY

  • About CraftGossip
  • Our Network
    • Bath & Body Crafts
    • Candle Making Ideas
    • Crochet Ideas
    • Cross Stitch
    • Edible Crafts
    • Felting Patterns
    • Glass Art
    • Home & Garden Ideas
    • Indie Crafts
    • Jewelry Making
    • Kids Crafts
    • Knitting Patterns
    • Lesson Plans
    • Needlework
    • Party Ideas
    • Polymer Clay
    • Quilting Ideas
    • Recycled Crafts
    • Scrapbooking
    • Sewing Patterns
    • Card Making
    • DIY Weddings
    • Not Craft Ideas
  • Giveaways
  • Roundups
  • Store
  • Search

DIY Burlap Christmas Tree

August 22, 2018 by Shellie Wilson

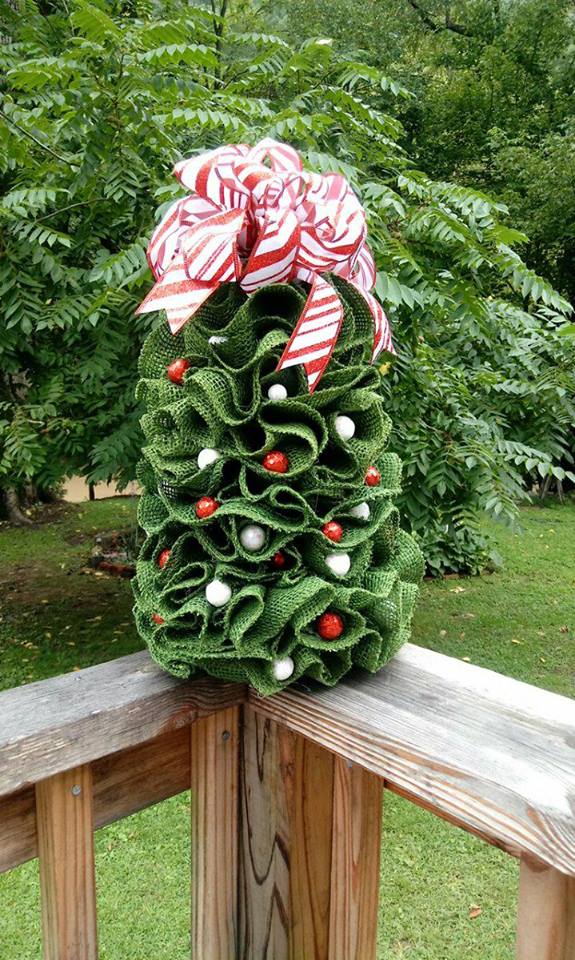
This little tree, takes about 3 rolls of burlap and was done on a 17″ green styrofoam cone( I removed 2″ of the top).

Also a 6″ styrofoam disc that I painted to match the burlap.  It’s 5’5″ rolls in the darker green( check your shades against each other) I used floral pins and hot glue and little glitter balls( from HL). Using the “pull thread” method in the tutorial below

I started at the bottom of the cone, and wrapped, pinned and hot glued it to the structure. Continue in that manner, pressing each row close together…stop when you reach about 1 inch from the top. this will leave you space to attach a bow or star…whatever makes you happy. Take hot glue and attach the glitter balls ( color of your choice) here n there throughout the ruffle.

Have fun…make it your own!!! Make Happy Little Trees!

This fun little tutorial was created by Melissa from On the Porch Designs.  Make sure you like her facebook page for more designs.

Looking for DIY Christmas tree decorations and crafts? Check these out

Mini Felt Christmas Tree 

Twig Christmas Tree

3D wood Christmas tree 

Christmas Tree Tee-Pee Play tent

Upcycled Book Page Christmas Tree

Fabric Balls Christmas Tree 

Plastic placemat hack Tree

Funky Fabric Tree

Felt Tree


https://www.facebook.com/DIYnKY/videos/991052704398203/

Related Posts:

  • Get Creative with This DIY Christmas Tree Fabric…
  • Create Your Own Cozy Hygge Mini Christmas Tree for…
«
»

Comments

  1. Melissa Prater says

    August 24, 2018 at 10:29 am

    Thank you, Shellie!!!! I hope this little tree is fun for EVERYone!!! <3

Have you read?

The 5 Outlet Placement Mistakes You Don’t Want to Make

Planning your home’s electrical outlets might seem like a small detail, but getting it wrong can lead to daily frustration. Have you ever wished there was an outlet right where you needed it? Or realized too late that your furniture blocks an important plug? Avoid those headaches with these 5 must-know tips for placing electrical outlets in your home!

From convenience hacks to smart placement strategies, this guide covers everything you need to know before making final decisions. Whether you’re building a new home or just renovating a space, these tips will save you time, money, and future regrets.

Don’t miss these essential outlet placement tips!

Explore

Bedrooms Christmas Craft Ideas Easter Garden and Yard Halloween Holidays Home Decor Kitchens Living Areas Makeovers and Redos More DIY's Organizing Outdoor Decor Porches, Patios and Decks Recycled Crafts Seasonal Trash to Treasure Windows and Walls Wreaths

RSS More Articles

  • Everything You Need to Know About Embroidery Hoops
  • Needle Felting Fairy Tutorial by Santa Meada
  • Printable Stickers for Journals and Planners – Self Care
  • Stitch Your Favorite Fruit on a Sweater
  • 12 Color Wheel Inspired Scrapbook Layouts
  • Crafts With Old Bricks: Creative Ways To Upcycle Leftover Bricks
  • How To Make A Milk Mache Molding Compound
  • The 5 Outlet Placement Mistakes You Don’t Want to Make
  • Celebrate the Spirit of the Southwest with These Stunning Indian Navajo Tribal Quilt Patterns
  • Pricing Handmade Sewing Items Without Undervaluing Yourself

Copyright © 2026 · CraftGossip | Start Here | Contact Us | Link to Us | Your Editors | Privacy and affiliate policy