• Home
  • Suggest A DIY
  • DIY Newsletter

Home and Garden

Ideas For DIY

  • About CraftGossip
  • Our Network
    • Bath & Body Crafts
    • Candle Making Ideas
    • Crochet Ideas
    • Cross Stitch
    • Edible Crafts
    • Felting Patterns
    • Glass Art
    • Home & Garden Ideas
    • Indie Crafts
    • Jewelry Making
    • Kids Crafts
    • Knitting Patterns
    • Lesson Plans
    • Needlework
    • Party Ideas
    • Polymer Clay
    • Quilting Ideas
    • Recycled Crafts
    • Scrapbooking
    • Sewing Patterns
    • Card Making
    • DIY Weddings
    • Not Craft Ideas
  • Giveaways
  • Roundups
  • Store
  • Search

DIY Healing Crystal Garden Tutorial – A Pretty, Peaceful Craft for Crystal Lovers

March 16, 2026 by Shellie Wilson

This DIY Healing Crystal Garden is one of those crafts that instantly catches your eye because it feels equal parts home decor, gift idea, and relaxing creative project. The tutorial shows how to build a miniature crystal arrangement using a small bowl, coffee cup, or plate, then layer it with colored moss, faux succulents, gemstone chips, and statement crystals for a soft, decorative finish.

What makes this project especially appealing is that it is simple without looking basic. You are not dealing with lots of complicated steps or specialty techniques. The tutorial keeps the process easy: start with moss, add filler if your vessel is deep, place the succulents, then arrange the crystals, stones, and extra embellishments until the design feels right. That makes it a nice option for beginners or anyone wanting a low-stress craft with a polished result.

I also like that this project leaves plenty of room for personal style. The tutorial uses crystals such as rose quartz and amethyst, and it encourages choosing stones based on intention or intuition, which gives the finished piece a more thoughtful feel. Even if you are not deeply into crystal meanings, the mix of textures and colors makes this a really pretty display for a shelf, desk, bedside table, or craft room.

Another nice touch is how adaptable it is. You could make this as a calming decor piece for your own home, turn it into a handmade gift, or even use it for a group craft session. The base materials are approachable, and the design can be changed depending on the vessel, crystal colors, or overall mood you want to create. The tutorial even shows additional variations made with different crystals and containers, which helps spark more ideas.

This is a lovely little project for anyone who enjoys DIY crystal crafts, miniature garden ideas, or creative decor that feels personal and peaceful. It is pretty, flexible, and easy to customize, which is exactly the kind of project that works well when you want something handmade that still looks gift-worthy.
«
»

Have you read?

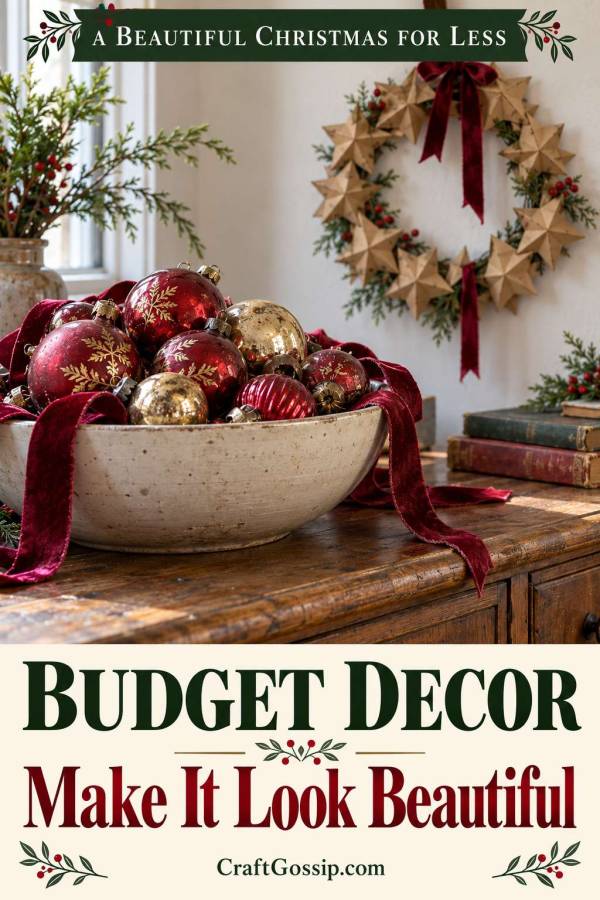
Christmas on a Budget – How to Decorate for Christmas Without Buying More Decorations

Every year, the shops manage to make a new Christmas colour scheme look essential.

One year it is all soft neutrals. Then suddenly we are supposed to need oversized bows, a miniature village and enough matching ornaments to decorate a small hotel.

Meanwhile, there are perfectly good decorations in the cupboard.

If you are saving money this Christmas, start there.

A fresh look can come from rearranging, grouping and making a few small changes. Your decorations do not have to be new to feel special.

Unpack everything before shopping

Bring the boxes out and see what you actually own.

Sort ornaments by colour. Gather ribbons together. Check lights according to their instructions and set aside damaged items for appropriate repair or disposal.

Look for duplicates and forgotten pieces.

It is difficult to make sensible shopping decisions when half your collection is still hidden under tangled tinsel.

Take a photograph of the usable supplies. You can check it if temptation strikes later.

Choose a few places to decorate well

You do not have to put something festive on every surface.

Choose two or three focal points, such as:

  • The Christmas tree.
  • A sideboard or entrance table.
  • The dining area.

A generous display in one place can feel more effective than isolated decorations scattered through every room.

It also means fewer things to move when you need the kitchen bench.

Group by colour rather than by shopping trip

Decorations bought years apart can work together when they share a colour.

Put red and gold pieces in one display. Try silver and blue elsewhere. Let colourful sentimental ornaments have their own cheerful corner.

You are allowed to leave some pieces in the box.

Choosing what to display is part of decorating, not a failure to use everything.

Give familiar pieces a different job

Spare tree ornaments can fill a bowl. A small wreath can move to an interior door. A tray can become the base for a seasonal arrangement.

Our Christmas bauble centrepiece offers inspiration for using ornaments away from the tree.

Keep arrangements stable and avoid placing fragile decorations where bags, elbows or wagging tails are likely to find them.

Moving an object can make it feel fresh without altering it.

Make one new feature from leftovers

If you want the pleasure of making something new, choose a project that uses existing supplies.

These paper-bag Christmas stars can provide a larger decorative feature from simple materials.

Or try Christmas tin-can decorations with napkin decoupage using cans with safe, smooth rims.

Check your supplies before committing. A “free” recycled project stops being particularly free when it requires paint, glue, brushes and several decorative trims.

Connect the displays with ribbon

Repeat one ribbon colour on the tree, the wreath and the dining table.

You do not need bows on everything. A few repeated touches are enough.

Fabric strips, twine or ribbon saved from gifts may work.

If ribbon is the only missing detail, compare reusable fabric ribbon on Amazon. Choose a colour you can use again rather than something that needs a new collection around it.

Try a temporary decoration swap

A friend may have exactly the colour or style you want to try.

Agree on what is being borrowed, take photographs and keep precious or fragile family pieces out of the exchange.

A short-term swap gives both homes a change without another shopping bill.

Make next Christmas cheaper too

Before packing away, photograph arrangements you like.

Store related pieces together, wind ribbon neatly and write a short list of genuine replacements needed.

Be specific. “Replace one damaged light set” is more useful than “buy more Christmas things.”

Your decorations can hold family memories, show a little wear and still make the house feel lovely.

There is no need to replace that history every time a shop window changes.

Explore

Bedrooms Christmas Craft Ideas Easter Garden and Yard Halloween Holidays Home Decor Kitchens Living Areas Makeovers and Redos More DIY's Organizing Outdoor Decor Porches, Patios and Decks Recycled Crafts Seasonal Trash to Treasure Windows and Walls Wreaths

RSS feed: More Articles More Articles

  • Christmas on a Budget – 10 Christmas Gifts You Can Sew Using Scrap Fabric
  • Christmas Tree Pot Holder Free Crochet Pattern
  • Christmas on a Budget – How to Decorate for Christmas Without Buying More Decorations
  • How to Make a Basket of Kittens Fall Card
  • Cross Stitch Patterns for Trucks with Christmas Trees
  • Stitch a Simple Sack Hat that Looks Like a Turkey
  • Free Christmas Holly Tablecloth Embroidery Pattern Review
  • Free Felting Tutorial Friday: Happy Little Felted Christmas Trees
  • Poppy Crafts for Remembrance Day
  • FREE Layered “Enter if You Dare” Halloween Die Cut

Copyright © 2026 · CraftGossip | Start Here | Contact Us | Link to Us | Your Editors | Privacy and affiliate policy