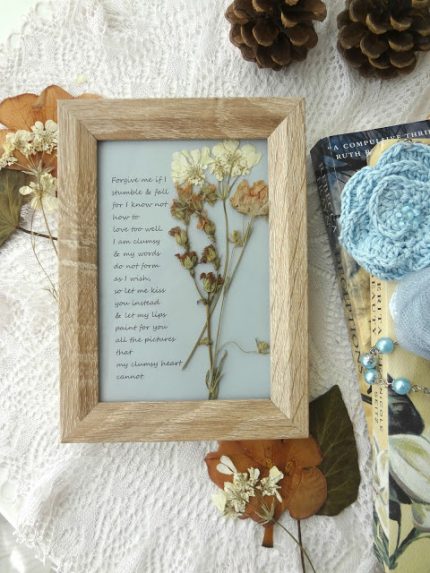
This is a lovely idea to make a personalized and unique home decoration in the shape of framed poem, adorned with pressed and dried flowers. Read the full tutorial here.
Ideas For DIY
This is a lovely idea to make a personalized and unique home decoration in the shape of framed poem, adorned with pressed and dried flowers. Read the full tutorial here.
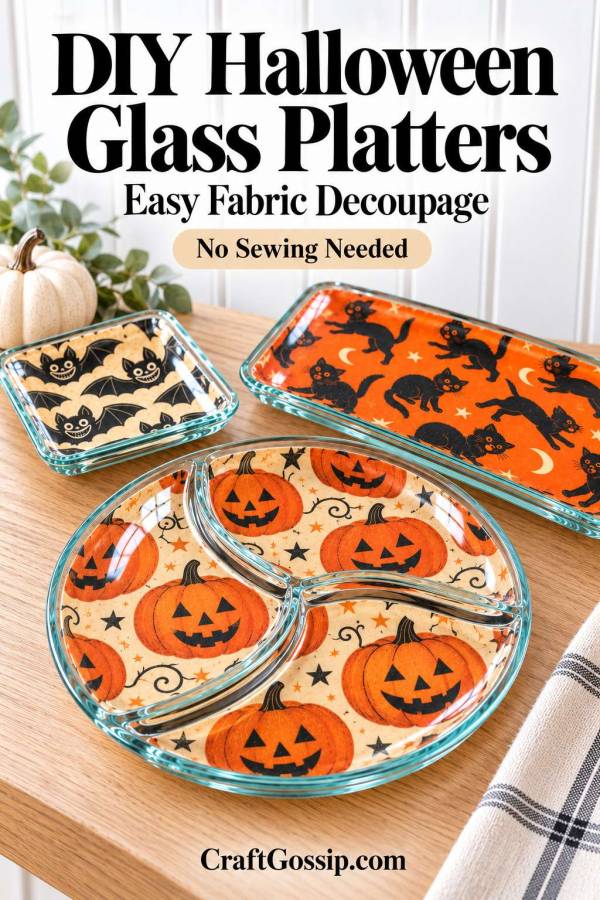
If you’ve ever spotted a plain glass platter at a thrift store and thought it needed a little personality, this is a lovely way to give it a seasonal makeover. A piece of Halloween fabric attached to the underside turns an ordinary glass dish into a colourful platter, with the design showing through the glass.
For this version, we’re using vintage-style Halloween prints from the fabric bundle pictured with this tutorial. The orange fabric with black cats, moons and stars makes a striking larger platter, while the smiling bat print suits a smaller square dish. Add a flat glass tray and you have a coordinated set without needing to sew a stitch.
I particularly like how the glass changes the appearance of the fabric. The cotton texture remains visible underneath, but the upper surface stays smooth and glossy. Those clear glass edges also give the finished pieces a more polished look.
The technique is called reverse decoupage. You work on the back of the platter, placing the printed side of the fabric against the glass so the pattern faces upwards when you turn it over.
A flat tray is the easiest place to start. Once you’re comfortable smoothing the fabric, you can try a shallow platter with gently curved sides.
Skill level: Beginner
Hands-on time: Approximately 45–60 minutes per platter, plus drying and curing
Suitable surfaces: Clear glass plates, shallow platters and flat glass trays
Choose a medium appropriate to how you intend to clean the finished piece. A dishwasher-safe decoupage formula is an option for glass projects, but follow its application and curing instructions. For this tutorial, gentle cleaning is the preferred approach.
Keep the top and rim clear: Mod Podge is not food safe. Its manufacturer permits decoration on the back of plates, provided the medium stays away from food-contact surfaces and the rim. All fabric, glue and sealing coats in this project belong on the underside.
Look for glass with a smooth underside and minimal moulded detail. A heavily textured base makes it harder to achieve a close bond between the fabric and glass.
Check secondhand pieces carefully for chips, cracks and sharp edges. Choose sound glassware originally intended for serving if you plan to use the uncovered upper surface for food.
Lightweight cotton is a practical choice because it follows gentle curves more easily than thick upholstery fabric. Avoid stretchy fabrics, bulky seams and prints that shed glitter.
The pictured Halloween bundle offers several combinations:
Check that each fabric piece is large enough for your chosen glassware before cutting.
Wash the platter thoroughly with dishwashing liquid. Remove labels and any sticky residue, then rinse and dry.
If your decoupage medium recommends cleaning with rubbing alcohol, wipe the underside as directed and let it evaporate completely.
Once clean, avoid touching the area you’ll decorate. Place the platter upside down on a folded towel so it sits securely without rocking.
Prewash washable fabric without fabric softener, then dry and press it flat. Check a small scrap for colour bleeding before using it.
Cut a piece slightly larger than the underside of the platter, allowing approximately 2–3 cm extra around the edges for positioning and trimming.
For a directional print, decide which way you want the cats, bats or lettering to face when the platter is right side up.
Lay the fabric over the underside for a dry fit, with its printed side facing the glass. Look through the front to check the arrangement.
Lift away the fabric.
Brush a thin, even coat of decoupage medium onto the underside of the glass, covering the area where the fabric will sit.
Avoid puddles, which can make smoothing difficult. Keep the outermost rim and all upper surfaces free of medium.
Work within the application time recommended for your product.
Position the fabric over the wet medium with the printed right side against the glass. The plain reverse side should be facing you while you work.
Lower it into place gradually, starting near the centre.
Gently smooth outwards with clean fingers, helping the cloth make contact with the glass. Avoid stretching the fabric, which can distort the print.
Carefully lift the platter to inspect it from the front. Look for bubbles, pale gaps or folds before the medium starts to set. Support the piece securely while checking.
On a flat tray, smoothing from the centre towards the perimeter may be all you need.
For a shallow platter, work gradually around the sloping sides. Ease the fabric into place rather than forcing it all down at once.
If excess cloth gathers near a corner, make small relief cuts in the surplus fabric, stopping short of the area already bonded to the glass. Fit the sections carefully, keeping any overlap minimal and towards the outer edge.
Deep dishes and steep corners may require visible joins. For your first project, choose a flatter shape that allows the print to remain continuous.
Leave the platter upside down and supported so the wet fabric does not touch the table or towel.
Allow the adhesive layer to dry according to the product instructions. Avoid moving or trimming the fabric while it is still loose.
The medium may look cloudy while wet. Judge the result once it has dried.
Once the fabric is firmly attached, use sharp scissors to trim the excess close to the underside’s perimeter.
Keep the fabric slightly back from the outermost glass edge. It should not wrap onto the rim or upper surface.
Cut carefully without pulling on the bonded cloth. Remove loose threads for a tidy finish.
If a small section lifts, brush a little medium underneath, press it back into place and allow it to dry.
Brush a thin sealing coat over the exposed reverse side of the fabric, paying attention to the trimmed edges.
Allow it to dry before adding further coats as directed by your chosen product. Keep every coat on the underside.
Set the platter on supports that do not touch the wet coating. Avoid placing it flat on a surface where it could stick.
Drying and curing are different stages. Even when the coating feels dry, it may need considerably longer before washing or regular use.
Follow the curing time on your bottle. Mod Podge Dishwasher-Safe, for example, requires a 28-day cure before gentle top-rack dishwashing. That guidance does not make the medium food safe or apply automatically to other formulas.
For these fabric-backed platters, gentle hand cleaning will help protect the handmade finish.
Once fully cured, use the platter within the limits of the original glassware and your chosen finish.
Keep food on the uncovered upper glass surface, away from any decorated edges. Alternatively, use the pieces for wrapped treats, jewellery or seasonal display.
Clean the upper glass gently with a damp cloth and mild detergent, keeping the decorated underside as dry as practical. Do not soak, scrub the fabric backing or use the piece in an oven or microwave.
Check the backing occasionally. If it begins lifting or flaking, set the platter aside for repair.
Test a scrap first. A small trial on spare glass helps you check colour bleeding, adhesion and how the fabric looks through the dried medium.
Choose a flatter platter. Gentle curves are much easier to cover neatly than deep corners.
Keep the print facing the glass. This is the detail that makes reverse decoupage work.
Use thin coats. Heavy layers can take longer to dry and make it harder to achieve a clear finish.
Check from the front as you work. A bubble is easier to correct before the fabric has set.
What I enjoy about this project is how much variety you can get from a small bundle of fabric. The same technique works with Christmas prints, spring florals or a favourite piece left over from another project.
For Halloween, I’d pair the orange cat platter with the vintage bat dish and a matching flat tray. Styled beside a cream pumpkin and a simple linen cloth, they make a cheerful little collection that lets the fabric do most of the decorating.