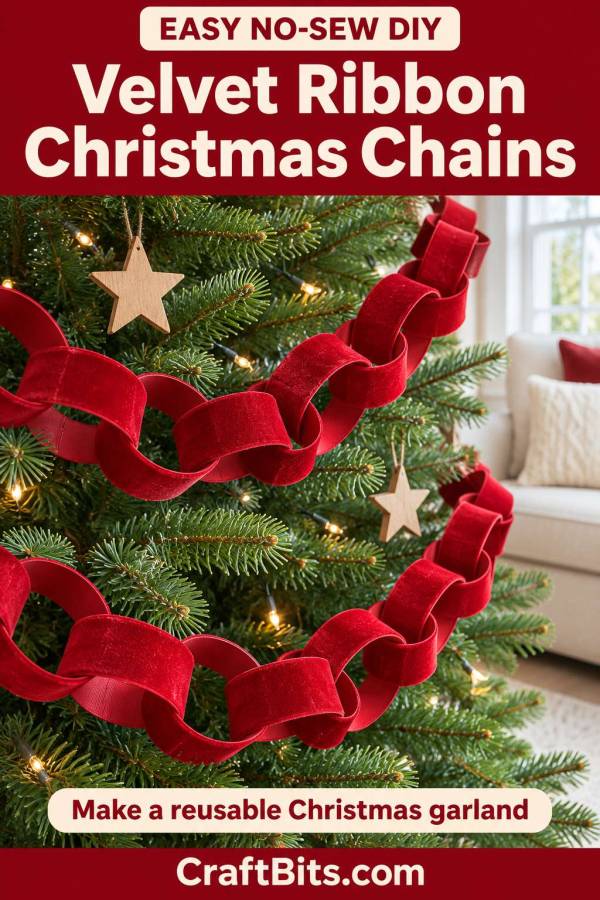
There are some Christmas decorations that take you straight back to childhood, and paper chains are definitely on that list. Sitting at the table, joining colourful strips and watching a pile of scraps turn into something festive was half the fun.
This velvet ribbon Christmas chain tutorial from our sister site, CraftBits, gives that familiar decoration a lovely grown-up finish. It keeps the simple interlocking loops but swaps paper for velvet ribbon, creating a soft garland you can bring out again next Christmas.
And yes, it is a no-sew project. Craft glue suitable for fabric or a hot glue gun does the joining, which makes this an approachable Christmas craft even if your sewing supplies are currently buried beneath another unfinished project.
A Christmas Paper Chain with a Velvet Makeover
What appeals to me most is how much the material changes the finished look. The construction is wonderfully familiar, but the velvet adds texture and richness without needing glitter, elaborate embellishments or a trolley full of supplies.
The all-red version is particularly lovely against green Christmas tree branches. Add a few wooden stars and warm white lights, and you have a nostalgic handmade Christmas look that feels welcoming rather than overly coordinated.
You could also alternate burgundy and green, combine jewel tones or try pink and olive for something softer. If you already enjoy making ribbon Christmas trees, this is a pretty way to repeat those colours elsewhere in the room.
What the CraftBits Tutorial Covers
The tutorial walks you through choosing ribbon, cutting consistent strips, testing your adhesive and building the linked garland.
It uses 8-inch ribbon strips, approximately 1 inch wide, with a 2 cm overlap at each glued join. There is no paper or cardboard hidden inside the links. The ribbon itself forms each loop.
One detail worth paying attention to is ribbon stiffness. A firmer backing helps the loops hold their shape, while very soft ribbon produces a more relaxed chain. That is the sort of small supply choice that can make a noticeable difference to the finished decoration.
The instructions also include troubleshooting for opening joins, visible glue and twisted links. Testing the glue on a spare piece first is sensible, especially when you have bought ribbon you would rather see on the tree than stuck to the work mat.
How Much Velvet Ribbon Will You Need?
The tutorial includes a useful section on how much velvet ribbon you need to make a garland, which is worth reading before buying supplies.
As an approximate planning allowance, it suggests 20–25 links per metre of finished garland, using around 4–5.1 metres of ribbon. Buying approximately 5.5 metres allows a little extra for testing and trimming.
The finished length depends on how the loops sit, so making a short sample is still helpful. You will also need extra chain if you want generous swags across a mantel or shelf.
That is an easy detail to overlook. A one-metre shelf and a one-metre garland do not leave much room for those lovely dips.
A Pretty Addition to Your Handmade Christmas Decorations
I like this project for anyone who wants a handmade Christmas decoration without tackling a complicated pattern. The repeated loops keep the construction manageable, and changing the ribbon colours gives you plenty of room to make it your own.
Pair it with ribbon weave Christmas ornaments for a coordinated tree, or use a short length across a dresser with a few favourite festive pieces. If you have suitable wired ribbon left in the stash, these little ribbon gift bags make another sweet seasonal project.
The velvet chain has all the charm of an old-fashioned paper garland, with a finish that feels special enough to keep. A familiar craft, a little glue and some lovely ribbon make a rather appealing Christmas combination.


Leave a Reply