 In continuing our month’s worth of giveaways for National Craft Month, Lark Crafts has offered several book titles we know you will love! There will be a new book giveaway each week, as well as other fun prizes throughout the month, so make sure you watch daily.
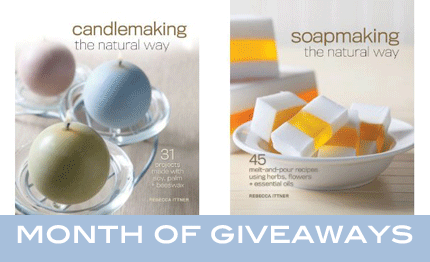
This week Lark brings us two beautiful and practical books by Rebecca Ittner: Candlemaking the Natural Way and Soapmaking the Natural Way
 . I recently did a review of the candlemaking book and shared some of its beautiful contents. If ever you wanted to get started in soap making or candle making, these are both excellent resources.
HOW TO ENTER
Simply leave a comment on this post and tell us if you make candles or soaps or if you have wanted to! Share the types of candles or soaps that you make, and if you have an etsy shop or tutorial blog, feel free to tell us about it! Tell us all about it before March 15th at midnight CST!
ELIGIBILITY
As much as we would love to include our Canadian and international friends I’m afraid this giveaway is restricted to those with a U.S. mailing address. If you live outside of the U.S. but have an address within the U.S. that we can ship to then you’re in! Otherwise, we truly apologize. You must be 18 or older to enter. Winner will be randomly selected on March 16th and notified via email. Winner will have 72 hours to respond with their shipping address, otherwise an alternate winner will be drawn. Good luck!
Please note, all prizes will be shipped at the conclusion of our National Craft Month celebration. Winners should allow 4-6 weeks for delivery after April 1, 2011.
Be sure to visit our new blog here at Craft Gossip, Candle Making with Sandra Williams. Don’t forget we have a Bath & Body blog too edited by Nellie Lurhmann!
Keep your eyes peeled for more fun to celebrate National Craft Month!
Definately my bedroom needs a makeover! It’s the least inspiring and boring room in my house!
My closet… woe is me. It has so much potential, so much wasted space, so much inefficiency, so boring. Definately could benefit from a makeover!
I’ve never made soap before but have always had the intention of learning to do so. When I was 10, I was given a candle making kit which I had a great time with making fun colored candles. I’d like to make some more now that I’m old enough to actually burn them! 😀
I make glycerine soap–but have always wanted to try lye soap and I love recycling old candles into new ones!
I really want to make soaps, but I’ve always felt overwhelmed on how to do so!
I’ve made both before. I plan on making egg shaped candles for Easter again this year, by pouring the wax into a hollow egg shell.
I am just starting to get into soapmaking; so far, I’ve only done m & p, working with a castile base. I would love to win the soapmaking book!
I have been wanting to try and make my own soaps. Candlemaking is fun, but I always make a huge mess in doing it.
I really want to make soap! That way I know what my babies are bathing with!
I would love to make soap in the future. Candles, maybe not so much.
I’ve made candles once but never soap. I think that would be fun. maybe I’ll win and then I can learn now!
I have never made my own soap or candles, but these books sure would be a good start to helping my husband and I live a more self-sustaining lifestyle. Thanks for the opportunity to win!
I am interested in trying both candlemaking and soapmaking. I have not tried either. I have done stamping on candles but never made them from scratch. I’d love to get good enough to sell them.
I love candles but lately have felt like buying them is wasteful. I’d like to make my own natural candles so that I can reuse the same containers.
I have never made either but would love to!
I have made some soaps, but never candles. Thanks for a lovely giveaway.
I’ve always wanted to learn how to make soaps.
I’ve never made these but have always wanted to! Thanks for the chance to win these lovely books!
I’ve made candles and would love to try soapmaking. They look like beautiful books!
hi, i have made both before and make soaps every few months. Have been wanting to get into candle making again as well as expand knowledge on soapmaking.
I make soy candles and melts using essential oils to fragrance. I live on the Isle of Arran and would like to use local seaweed in soapmaking!
I made soap for a biology class in college and LOVED IT! I always wanted to keep it up but got sidetracked (life, kids…). I would love to get into it once again 🙂
these pretty books would be great to get me started in soap making!
I’ve always wanted to try making both soap and candles…but find the process intimidating.
I’ve never made either, but I would love to know how to make wonderful candles. I love them! Always lit at my house 🙂
I have made M&P Soap but not in a while.
melodyj(at)gmail(dot)com
I have never made either, but I have been looking for the right time to try. This could be it!!!
Hi! I am a stay at home Mom and a new crafter! I would love to learn and experiment with making soap and candles! Not only for my kiddos but maybe as gifts?
Thanks
I have done some soap and candle making and would love to take it to a higher level!
http://www.VioletOrange.etsy.com
I used to make soaps when I was younger to give as gifts to family. I remember how much I loved to do it. I’ve been wanting to learn how to make candles. Thanks for chance.
I’ve made candles before, but it’s been awhile. I’ve been dying to try my hand at soaps!
I use to make candles and made some for my neighbors Christmas gifts but haven’t made any for more than 3 years. I really miss it and want to get back into it again. I’ve experimented with soap but it never came out right.
I never have but I really want to
I made candles and soap with my mom as a little girl. I am almost knocked over with nostalgia when I think of how fun it would be to work through these books.
Hi, I have wanted to try both crafts, but have been too scared to try.
I have made candles before but really want to try soapmaking… it looks like so much fun to do…
i have not crafted these yet but would like to add thes to my never ending love of crafting
Difficult question. Hv made candles, so I guess I would/should try making soaps.
These are 2 things I’ve been wanting to try but am so turned off in that isle of the craft store when I see how artifial all of the ingredients are. I’m intrigued that these titles are for making both “the natural way.”
Many years ago I made candles and I enjoyed making them, so, I am not sure why I stopped making them. I have never made soaps but I enjoy all kinds of crafting so I’m sure that I would enjoy that craft also. Thanks for this giveaway.
I’ve not made candles/soaps, but I have always wanted to do it. I’m such a sucker for both at craft fairs/art shops… Thanks for a chance to win!
kmassmanATgmailDOTcom
I have been wanting to learn how to make both of these. I started researching last year how to make candles, so I could give them as gifts. 🙂
Would love to learn to make soaps!
I’ve always wanted to try soapmaking. Maybe this will be my chance!
I’ve made soap with glycerin before but haven’t made candles. I would like to win either of them.
I make both candles and soap and have even made lotion for my family and friends. I would love to win the great books and make some of the items in the books…. Good Luck to everyone….
Hi!! I have made candles, but never soaps. I would LOVE to learn to do those!! Thanks for the opportunity!! I DO have a USA mailing address (I live in Ecuador for now) so YAY I’m in!!!
I would love to try candlemaking And soapmaking. Would be great to win considering I promised my daughter some time ago we would try making soap.
Paula
[email protected]
I make scented soy container candles, as well as other produts, and have an etsy shop called Beach In A Box
I’ve rebatched soap and made a few melt&pours with my daughter–lots of fun. I haven’t tried candles yet, but I sure I’d like it too.
I unfortunatly have not tried either but I would love to try them both. I love pretty scented candles and also the awesome shapes that you can make with the soap molds.
I make soy candles they last longer and don’t smoke as bad. As for soap I would really like to make some. I want to thank you for the book giveaway.
i have always wanted to make candles! i would love to learn how to do it! thanks for the opportunity!!
I made gel candles once – my dining room table was consumed, the smell of “cinnamon spice” almost killed a loved one :), and I vowed never to do it again. Knowing there’s a far better way…wow. I’d love to try making soy candles or candles using organic products and essential oils. Could use them anywhere or make gifts!
I make beeswax candles from our bees and goats milk soap from our nubian goats and sell them at the farmer’s market. I’d love to learn some new techniques!
these are something i have wanted to try
I made candles as a kid but have been wanting to make some more sophisticated ones now!
I used to make simple candles when I was a kid (a looooong time ago) but never soap. I’ve checked into doing both at times as I’d like something to bring in a bit extra money since I’m on disability. These books look like they would answer my questions. Thanks for the chance to win!
Been making candles for about 50 years. still enjoy making a good sand candle now and then. Haven’t tried soap yet. Never too young to try new things.
I’ve made soap before but haven’t made any for a really long time. I want to try candles sometime in the future.
i have tried making candles and soap. my candles dont turn out to good,i amke a lot of hand and body soap. i also make laundry soap it really pays off.
I made candles when I was younger (the hippie thing to do! lol) I would love to learn to make soap for our family and friends…naturally! Thanks for the chance to win!
I have made soaps before but never candles…would love to increase my knowledge on both!
I have never made candles but have always checked out the supplies and things when I am in the craft shop. If I had the book I know I would give it a whirl. Love the front cover!
I have always wanted to try both candlemaking and soapmaking.
Since I’m a science major in college, making candles and soap had always been interesting to me though I’ve only made soap in class before.
I have done a bit of candle making but no soap making as yet. I have been studying herbal combinations for soaps and want to learn more, especially milk-based recipes.
I just started my at home spa product company and I think that adding handmade soaps and candles to my line of products would definitely add to the spa at home experience.
Thanks for the giveaway and the possibility of a chance to win.
I made glycerin soaps and beeswax candles what seems like a hundred years ago 🙂 and just was thinking recently about a trip to A I Root Co in Medina OH where I grew up. They had all kinds of bee products and with bees environmentally threatened, wanted to learn more about their work&harvesting as they change and work to preserve the bee population. They have evrything! Sheet wax for lil bits to make roll candles, etc. In fact, that was the first candle I ever made.
Long ago I made candles, but I’ve been given handmade soaps and I love them. This would be such a fun project to do with the kids!
I’d LOVE to win the soap book particularly….as I’ve gotten older, my skin has become so sensitive to everything! 🙁 I’d love to learn how to make some pure/organic soap products for my house…and the skin I’m in! 🙂
Thanks for the chance to win!
I am going to make candles and soap in the future.Right now I am in the process of learning.
I would love to make both to sell at the farmers market this year. Thanks for the chance to win.
I have mades candles once or twice, but never soap, I have thought about it though!
I’ve always wanted to try and make soap but am a little bit afraid. I’ve been given handmade soap and loved them.
I would LOVE to make soap on a rope. We always joke about it…but this would push us to actually do it. 🙂
I have collected all kinds of candle-making and soap-making supplies — I’m dying to get going on these projects!
My daughter and I make soaps, but we want to try candles.
I have tried melt and pour soap before and it’s fun. Just made it for fun for the family. I would love to learn more techniques though.
As for candle, haven’t tried it yet but would like to try. I like soy candles that are aromatherapeutic. Would love to learn how to make those.
I would LOVE to win the soap making, candle making and other craft books!!! Thanks, Jennifer
Having made both candles and soap, I love both making and using the fruits of my labor. These are two of the oldest crafts and almost a lost art. Thanks for introducing it to crafters.
Have made candles for years and still am inspired by books and new styles that I see in the stores. Just getting into soap making, this book looks awesome!
The only types of candle I have made have been re-purposed candles that I have melted down. I have not made soap before but have wanted to try. These books look very interesting.
I would love to try making soap and candles 🙂
Thanks!
I made candles with my aunt as a child, and I’ve made M&P soaps as an adult, but I’ve always wanted to dive into soap and candlemaking.
I would love to make soap for my family.
I’ve made both soap and re-purposed candles and i think I love creating the soap most.
I would love to make both soap and candle ^-^
always wanted to try soap making, but never have
Making soap is fun and makes a great gift. I have only done this a few times and would love to experiment some more. Thanks.
I want to start making my own soaps. I have a limited number of commercially availible soaps I can use due to perfume allergies and it’s time to try the homemade route!
My family made candles when I was a kid and soap too, but I haven’t done either since I grew up. I would love to try both with my girls.
I have never made candles or soaps, but I really really want to!
hisprincess886(at)yahoo(dot)com
Never made candles before, but always wanted to. I’m always buying candles for my place.
I have friends that make candles every year for Christmas. I’ve always wanted to make soap, but the whole lye business scares me.
I have made candles in the past for friends who are getting married and I have even done my own unity candles at my wedding….the next conquest is soap making….I have always had a fear that I would make it wrong and cause someone to “break out”…I would love to learn how to make soap and be confident I know what I am doing. There are so many beautiful organic soaps…and I think to my self,”I can do that but how?” I guess even if I do not win I will still resolve to teach my self soap making.
I have been wanting to make soap for some time, this would be great. Use to make candles with my mom when I was a little girl but have not made any in a very long time, would be nice to do some with the grandkids.
I haven’t ever done soap or candle making, but I would love to! Thanks for the chance to win!
I am yet to make soap, but candle making is a favorite hobby of mine. I always recycle old candle hollows and melt them down and re-pour them to make recessionista candles.
I’ve made candles, but not very well. I’d like to try soap.
I want to learn to make soap! I’ve done candles a couple of times, but just haven’t been able to get them quite right. Would love some help in making them better.