• Home
  • Suggest A Craft
  • DIY Newsletter

Home and Garden

Ideas For DIY

  • About CraftGossip
  • Our Network
    • Bath & Body Crafts
    • Candle Making Ideas
    • Crochet Ideas
    • Cross Stitch
    • Edible Crafts
    • Felting Patterns
    • Glass Art
    • Home & Garden Ideas
    • Indie Crafts
    • Jewelry Making
    • Kids Crafts
    • Knitting Patterns
    • Lesson Plans
    • Needlework
    • Party Ideas
    • Polymer Clay
    • Quilting Ideas
    • Recycled Crafts
    • Scrapbooking
    • Sewing Patterns
    • Card Making
    • DIY Weddings
    • Not Craft Ideas
  • Giveaways
  • Roundups
  • Store
  • Search

Halloween Macrame Wall Art

September 6, 2017 by Shellie Wilson


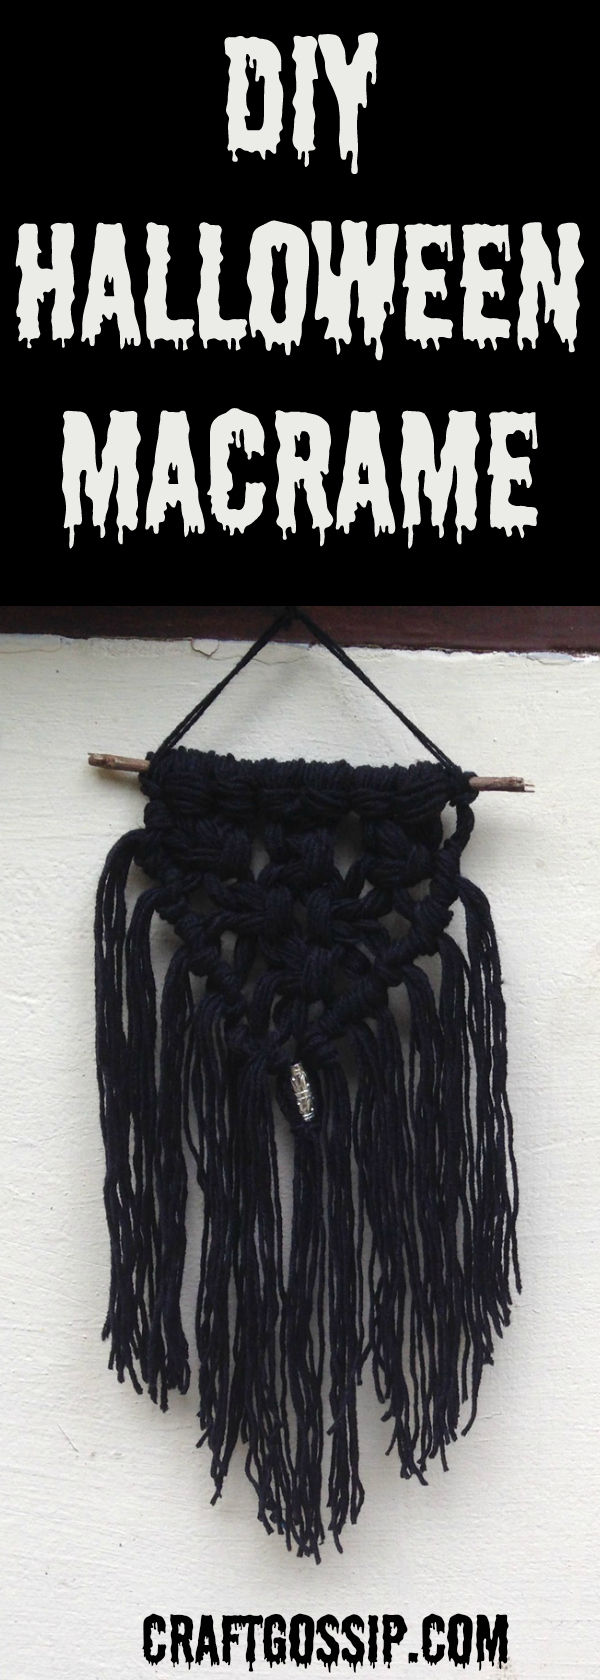
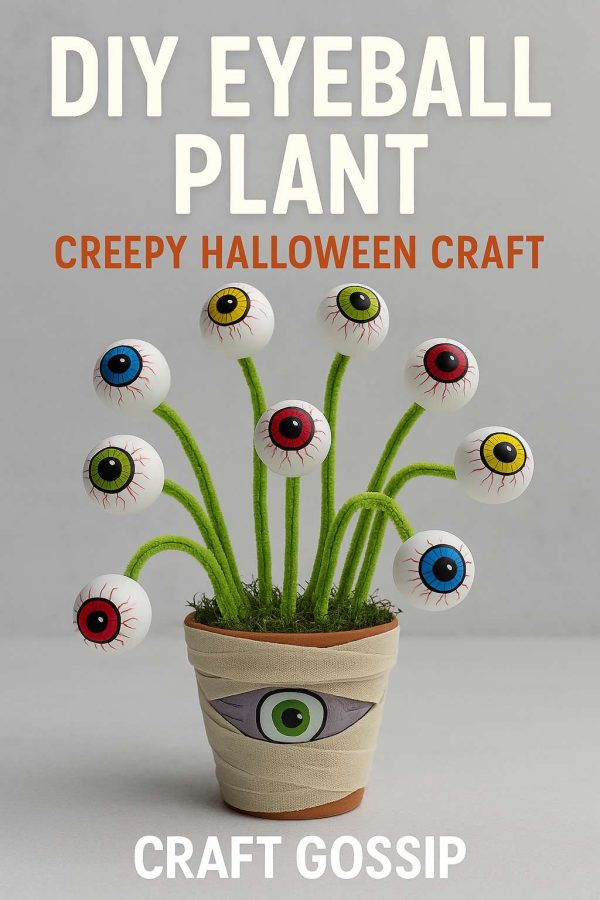
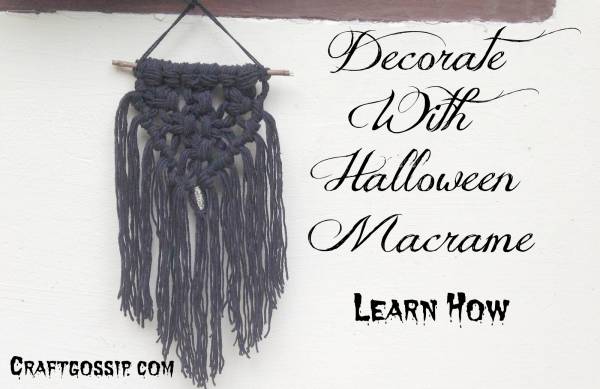
Macrame has become quite popular in the DIY world. Using black yarns or dyed ropes to make a macrame this Halloween wouldn’t be so bad. Check out this tutorial and give it a try.


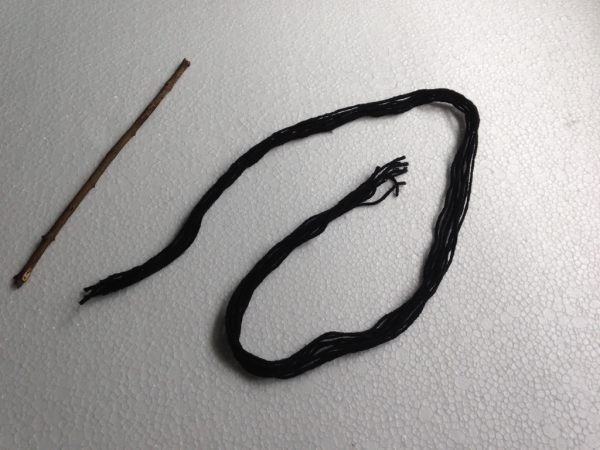
Step-1: First of all, prepare a dry log or twig as you wish. You can use thick ropes but I used the basic yarn threads, in that case you’ll need a couple of strands and count them as  a group. I counted 4 strands of yarn as group. Make sure the strands are at least 30 inches long.


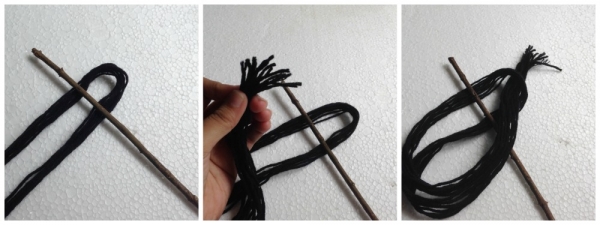
Step-2: Take a group of yarn strands and fold them into half. Place the closed (folded) part of the strands under the twig. Grab the other end of the group and draw them through the loop created between the closed end and the twig. Pull the lose ends and tighten the knot.

Step-3: Attach 5 more groups of strands to the twig following step 2. Position all groups in the centre of the twig.

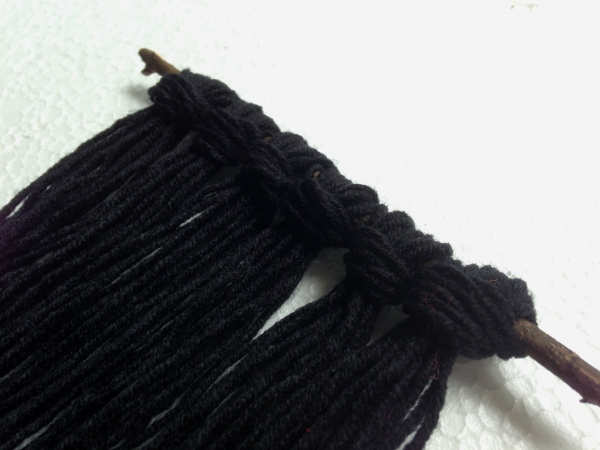
Step-4: Divide each group into 2 parts and use 2 groups (totaling 4 parts) to create a square knot. As we have 6 groups we can create 3 square knots.

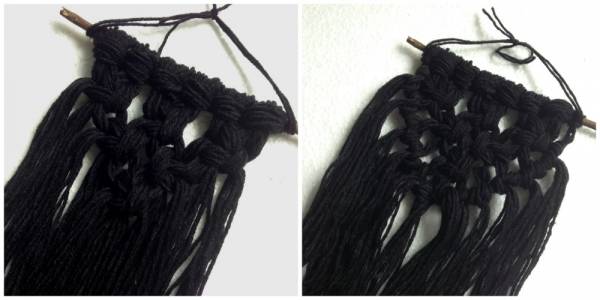
Step-5: For the 2nd line, leave 1 group from each side. So now we have 4 groups. Again we’ll create 2 square knots with these 4 groups.

For 3rd line, Leave 2 groups from each side and use the 2 centre groups to create 1 square knot.

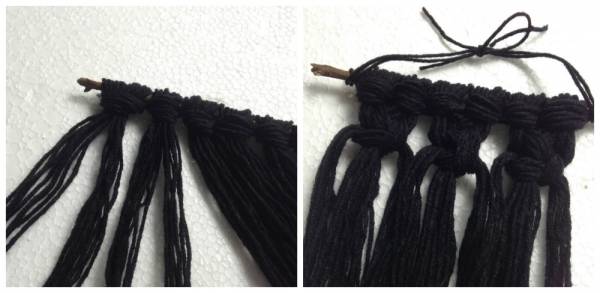
Starting from any one side move towards the centre by doing half hitches.

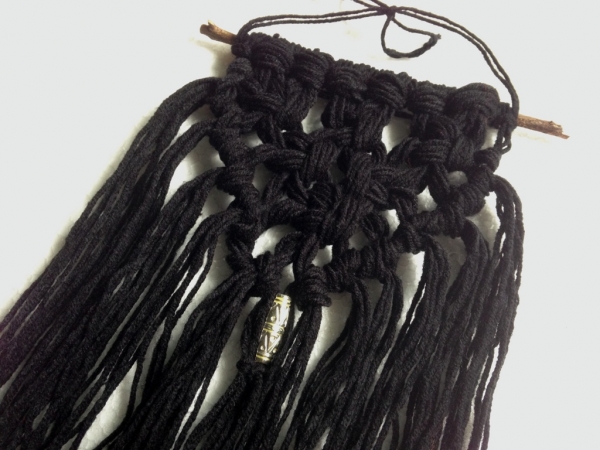
Step-6: Once you’ve reached the centre insert a bead into the centre strands and tie a knot to secure the bead.

You can do more knots if you wish to. You can also trim the open ends of the yarn strands into any pattern you want.

Attach a hanging mechanism and enjoy!

Related Posts:

  • 11 Easy To Follow Macrame Leaf Tutorials
  • Roundup of DIY Macrame Hat Hangers: Knot Your…
«
»

Have you read?

How to Build Your Own Stylish Patio Cooler – A Perfect Summer DIY

Not

Looking for a way to keep your drinks cool and your guests impressed at your next outdoor gathering? This DIY Patio Cooler project is a fantastic way to add both function and style to your backyard or patio. Not only will you have a custom cooler that fits perfectly with your outdoor décor, but you’ll also have a convenient spot to keep drinks chilled all summer long.

With just a few materials and simple steps, you can create a stunning, practical piece of furniture that doubles as a cooler – perfect for those hot days when you’re entertaining family and friends. From the wood finish to the clever storage solution, this project adds both charm and utility to your outdoor space.

Ready to cool down in style?  Learn how to make your own DIY patio cooler here!

15 DIY Rolling Planters On Wheels For Your Patio

Patio Makeover Before & After

Make Your Own Patio Lights

Explore

Bedrooms Christmas Craft Ideas Easter Garden and Yard Halloween Holidays Home Decor Kitchens Living Areas Makeovers and Redos More DIY's Organizing Outdoor Decor Porches, Patios and Decks Recycled Crafts Seasonal Trash to Treasure Windows and Walls Wreaths

RSS More Articles

  • The Secret to Perfect Topstitching (No More Frayed Thread!)
  • Flower Cross Stitch Kits
  • Etsy Spotlight – Girls A-Line Dress Sewing Pattern
  • 4 FREE Mother’s Day Scrapbook Titles
  • Duality Blanket Crochet Kit – Beginner Crochet Blanket kit
  • How to Build Your Own Stylish Patio Cooler – A Perfect Summer DIY
  • Free Sewing Pattern – Sew A Flattering and Versatile Tiered Skirt Pattern
  • Spring Outdoor Activities for Kids
  • Time Flies — And Sometimes It Has Wings Made of Vintage Paper and Buttons
  • 7 Unexpected Ways to Customize The Lowink Blanket (Beyond the Kit!

Copyright © 2025 · CraftGossip | Start Here | Contact Us | Link to Us | Your Editors | Privacy and affiliate policy

Copyright © 2025 · Sprinkle Theme on Genesis Framework · WordPress · Log in