• Home
  • Suggest A DIY
  • DIY Newsletter

Home and Garden

Ideas For DIY

  • About CraftGossip
  • Our Network
    • Bath & Body Crafts
    • Candle Making Ideas
    • Crochet Ideas
    • Cross Stitch
    • Edible Crafts
    • Felting Patterns
    • Glass Art
    • Home & Garden Ideas
    • Indie Crafts
    • Jewelry Making
    • Kids Crafts
    • Knitting Patterns
    • Lesson Plans
    • Needlework
    • Party Ideas
    • Polymer Clay
    • Quilting Ideas
    • Recycled Crafts
    • Scrapbooking
    • Sewing Patterns
    • Card Making
    • DIY Weddings
    • Not Craft Ideas
  • Giveaways
  • Roundups
  • Store
  • Search

Hawthorne Hill Farm Craft Fair

June 20, 2012 by Amanda Formaro

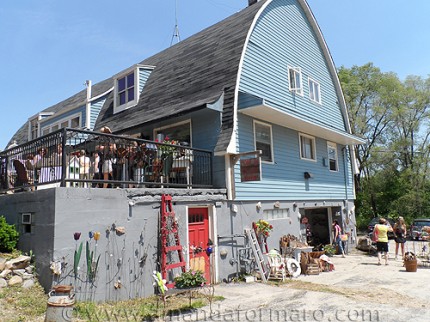
Hawthorne Hills Farm Craft FairLast month I headed out to Hawthorne Hill Farm where throughout the season you will find a variety of hand crafters selling their wares. Hawthorne Hill Farm is located in southeast Wisconsin, not far from Milwaukee in the town of New Berlin. It’s a neat story actually. Wisconsin artist Bonnie Lynn turned an old barn that once housed horses and cows into a thriving shopping market and venue for art workshops and women’s retreats.

Each shopping market centers around a theme as do the art workshops. For example, the market I attended in May was called “Farmhouse Chic” while the market scheduled for this weekend is named “Rust, Ruffles, Restore” and I think I better carve out some time to attend that!

[I have to apologize ahead of time here. I had business cards for all of the artists I am featuring and cannot for the life of me find them anywhere. :-/ Most of the vendors I spoke with didn’t have an internet presence but did state that they attend many of the local shows and usually return to Hawthorne as often as they can. If there’s something in particular that interests you, let me know and I will see if I can contact the venue for more information.]

Click each photo to view larger.
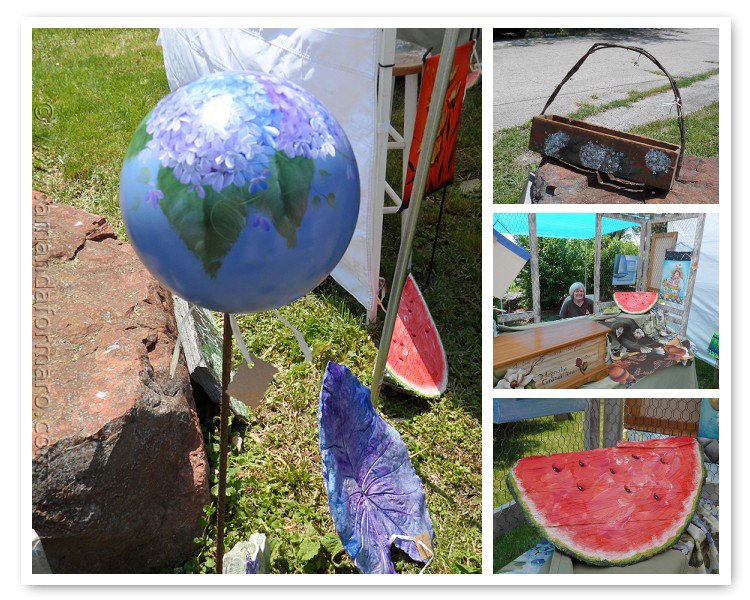
Hawthorne Hills Farm Craft FairThere’s quite an array of different artists showcased, including this talented painter who turns bowling balls into beautiful lawn ornaments and boxes into works of art. See that watermelon? She told me that when someone cuts down a tree and does that initial V-cut into the trunk it creates a wedge of wood. She takes those wedges and paints them to look like watermelons.
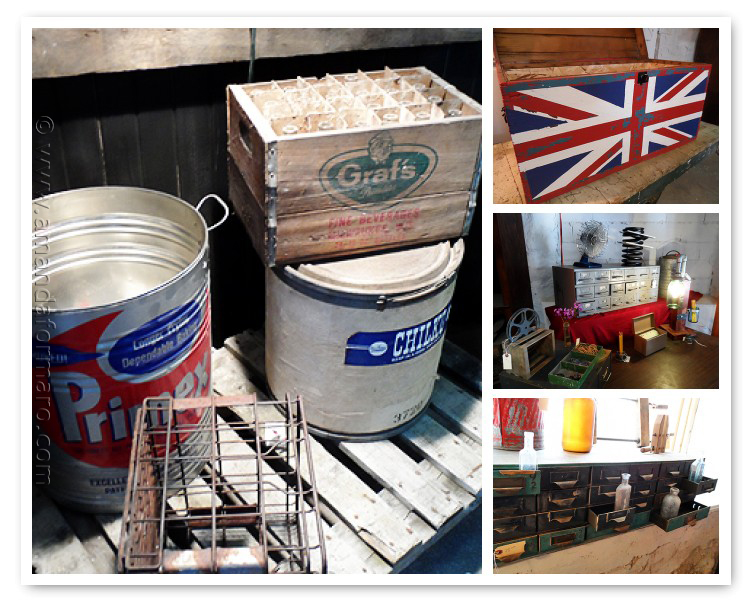
Hawthorne Hills Farm Craft FairArtists and crafters aren’t the only vendors, there are also pickers. This particular gentleman not only had a great eye, he also was very good at staging his area. The Union Jack trunk was fabulous!
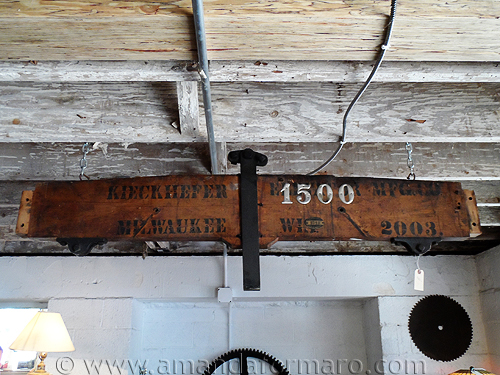
Hawthorne Hills Farm Craft FairI think this sign hanging in his booth was my favorite of the day.
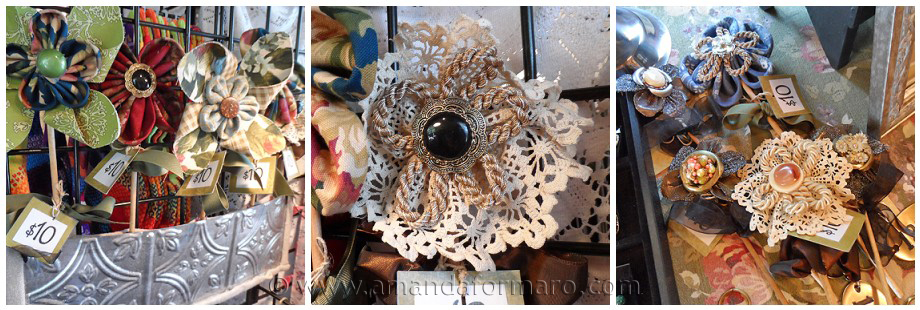
Hawthorne Hills Farm Craft FairYou’ll find pretty crafts such as these lacey fabric flowers…
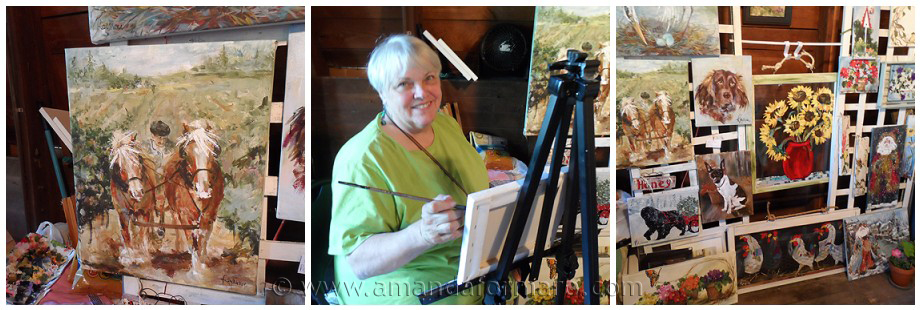
Hawthorne Hills Farm Craft Fairand beautiful oil paintings like this plow horse picture I knew I should have bought!
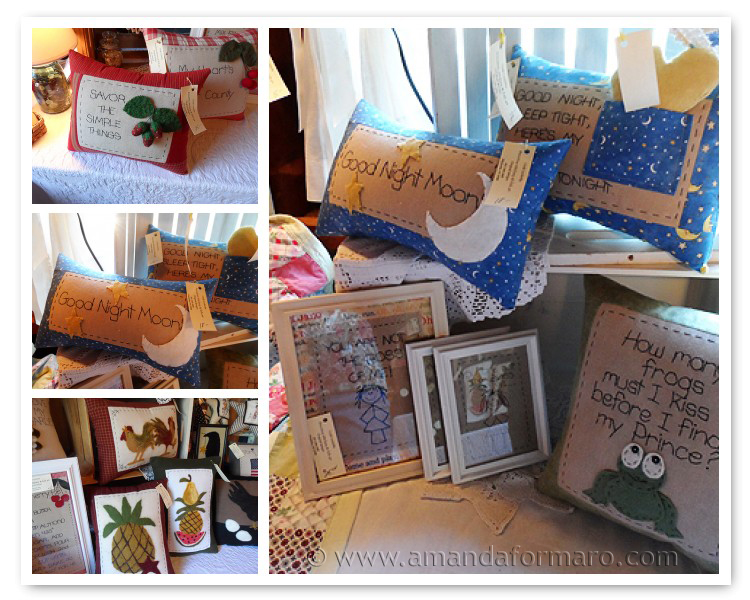
Hawthorne Hills Farm Craft FairFelting and needlepoint were on hand as well, the craftsmanship was beautiful.
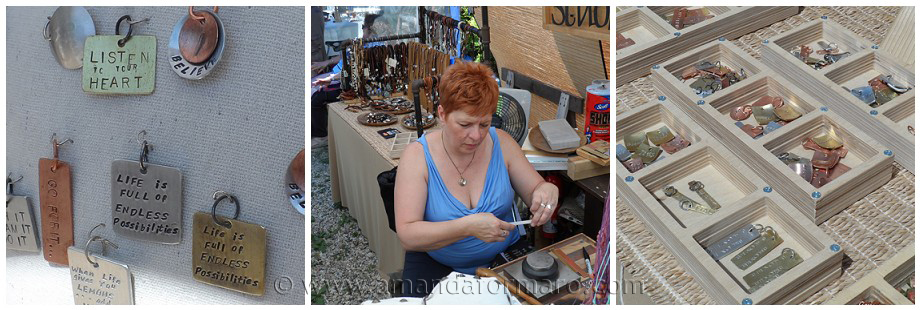
Hawthorne Hills Farm Craft FairThis jewelry booth was so busy it was hard to actually get in and take pictures!

I really enjoyed my visit to Hawthorne Hill Farm, but I did notice that quite a few of the vendors were not the actual artists. Everything pictured above is handmade (besides the picker’s booth), but there were a lot of buy/sell type vendors in attendance. So if it’s truly handmade you are looking for, ask first.

Definitely worth a look, so if you’re in the neighborhood! 😉

To find out more about Hawthorne Hill Farm go to their website.
«
»

Comments

  1. Suz says

    June 21, 2012 at 7:13 pm

    We have been to these events and they are spectacular. Great vendors in a beautiful setting, super shopping and a fun time.

    Rust and Ruffles is going to be great tomorrow, so make plans to visit if you can.

  2. bonnie lynn says

    June 21, 2012 at 8:05 pm

    Thankyou, Thankyou, Thankyou! What a wonderful article and I am so flatered! Thanks for your interest. Bonnie Lynn

    • Amanda Formaro says

      June 21, 2012 at 9:29 pm

      You’re absolutely welcome Bonnie! I’m hoping I can make it there this weekend.

Have you read?

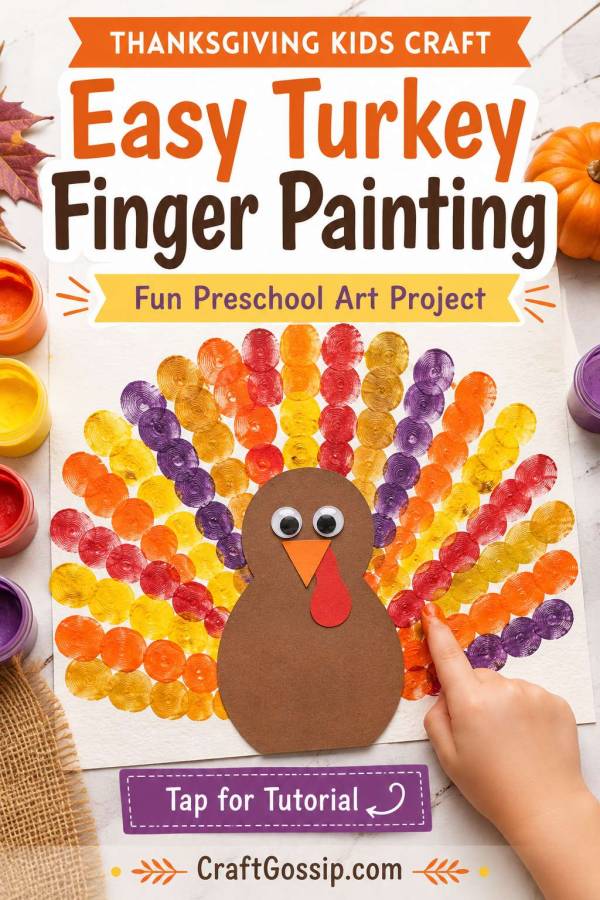
Easy Thanksgiving Turkey Finger Painting Craft for Kids

Thanksgiving crafts have a habit of sneaking up on us. One minute we are still finding fake spiderweb stuck behind the sofa, and the next minute someone needs a turkey craft for preschool by tomorrow morning.

This easy Thanksgiving turkey finger painting craft is colorful, wonderfully messy and simple enough for toddlers and preschoolers to enjoy with a little adult help. Instead of painting individual feathers, children use their fingertips to create a bright fan of dots, swirls and overlapping colors around the turkey’s body.

The finished artwork looks surprisingly impressive, even when the young artist has enthusiastically ignored every instruction you gave them. Honestly, those slightly wonky feathers are usually the best part.


Why This Turkey Painting Works So Well

This is more than another paper turkey covered in feathers.

Finger painting gives children the freedom to experiment with color mixing, patterns, pressure and movement. The circular feather design also means there is no single “correct” way for the finished turkey to look.

It is a particularly good Thanksgiving craft for:

  • Toddlers and preschoolers
  • Kindergarten art activities
  • Thanksgiving classroom projects
  • Homeschool fall art lessons
  • Daycare activity tables
  • Handmade Thanksgiving decorations
  • Grandparent gifts and keepsakes

For even more projects to keep little hands occupied, take a look at these easy Thanksgiving crafts for kids. You may want to save a few now before the Thanksgiving-week craft panic begins.

Supplies

  • White heavyweight cardstock, watercolor paper or a small canvas panel
  • Washable finger paints or washable tempera paints
  • Brown cardstock or construction paper
  • Small scraps of orange, yellow and red cardstock
  • Googly eyes
  • Child-safe scissors
  • Washable craft glue
  • Pencil
  • Paper plate or washable paint palette
  • Damp cloths or baby wipes
  • Protective table covering
  • Child-sized art smock or old shirt

A pack of washable tempera paints is handy if you make children’s crafts regularly. Choose several warm Thanksgiving colors, such as red, orange, yellow, gold, purple and a small amount of green or blue.

Cardstock works for a quick classroom project, but heavyweight watercolor paper or an inexpensive canvas panel will create a sturdier piece that families can display each year.

Before You Begin

Cover the table before opening the paint. Finger painting has a remarkable ability to travel well beyond the original piece of paper.

Place a small amount of each paint color onto a paper plate rather than giving children the entire bottle. This reduces waste and helps prevent every bottle from becoming the same mysterious shade of brown.

Dress children in an art smock or an old oversized shirt and keep damp cloths nearby. Washable paint is wonderfully forgiving, but it is much easier to wipe a painted elbow immediately than discover it on the curtains later.

How to Make a Thanksgiving Turkey Finger Painting

Step 1: Mark the Turkey’s Position

Place the white paper or canvas vertically on the work surface.

Lightly draw a small oval in the lower center of the page. This marks where the turkey’s body will eventually sit.

Do not glue the body down yet. Keeping the center clear makes it easier for children to paint the feather fan without covering the turkey.

Step 2: Begin the Inner Feather Row

Ask the child to dip one fingertip lightly into the first paint color.

Starting just outside the penciled oval, press painted fingerprints in a curved row around the upper half of the turkey’s body.

The prints do not need to be perfectly spaced. A mixture of dots, short swipes and little circular marks will give the feathers more movement.

Step 3: Add More Colorful Feather Rows

Use additional colors to create larger curved rows around the first one.

Encourage the child to work outward, creating a rainbow or fan shape behind the turkey. Try to leave a little space between some of the colors so the painting remains bright.

Warm colors such as red, orange, yellow and gold create a traditional fall turkey. Purple, pink and turquoise can be added for a brighter modern version.

If your child loves turkey crafts, our roundup of 20 Thanksgiving turkey crafts for kids has plenty of additional ideas using paper, recycled materials, puppets and handprints.

Step 4: Create the Soft Aura Effect

While the paint is still slightly wet, use a clean fingertip to pull a few colors gently outward from the turkey’s body.

You can also add tiny fingertip dots between the larger marks to fill empty spaces.

The aim is not to blend every color completely. Too much rubbing will create muddy brown paint, which is practically a Thanksgiving craft tradition but not quite the look we are chasing today.

For younger children, simply let them stamp fingerprints around the page. The curved feather shape can be loosely guided by an adult, but the finished painting should still look like their work.

Step 5: Let the Painting Dry

Place the artwork somewhere flat and allow the paint to dry completely.

Drying time will depend on how enthusiastically the paint was applied. Thin fingerprints may dry quickly, while glorious toddler-sized blobs will need considerably longer.

Do not attach the paper turkey body until the background is dry.

Step 6: Make the Turkey’s Body

Cut a large oval from brown cardstock for the body and a smaller brown circle for the head.

You can also cut one long bowling-pin-style shape that combines the head and body.

Cut the following pieces:

  • One small orange triangle for the beak
  • Two orange legs
  • Two small orange feet
  • One curved red piece for the wattle

Glue the head, body, beak, wattle and feet together. Add two googly eyes.

No googly eyes in the craft cupboard? Draw the eyes with a black marker. I have bought enormous bags of googly eyes over the years and can still never find the correct size when I need them.

For another lovely keepsake idea, try this Thanksgiving handprint turkey, which uses a child’s traced hand as the turkey shape.

Step 7: Assemble the Turkey Artwork

Position the completed paper turkey over the unpainted oval in the center of the feather fan.

Glue it in place and press gently.

Allow the glue to dry before lifting or displaying the artwork.

Add a Thanksgiving Gratitude Activity

Turn the painting into a simple gratitude craft by asking the child what they are thankful for.

An adult can write the answers around the painted feathers, or older children can add one word to each feather section.

Ideas might include:

  • My family
  • My friends
  • My pets
  • My home
  • My teachers
  • My favorite food
  • Playing outside
  • Books and stories

You could also pair the artwork with this Thankful Gratitude Turkey Bucket and create a complete Thanksgiving gratitude activity for a classroom or family gathering.

Easy Turkey Finger Painting Variations

Use a Child’s Handprint for the Body

Paint the child’s palm and thumb brown, then press the hand onto the center of the page. Once dry, add an eye, beak and feet.

The painted fingerprints can then be added around the handprint to create an extra-full feather display.

Make a Family Turkey Painting

Give every family member a different paint color.

Each person adds a curved row of fingerprints to the turkey’s tail. Write each person’s name beside their section when the paint is dry.

This would make a sweet Thanksgiving tradition, particularly if you create a new family turkey painting every year.

Create Mini Thanksgiving Place Cards

Use small folded pieces of cardstock instead of a large sheet.

Add a tiny turkey body and a semicircle of fingerprints, then write each guest’s name underneath. These make cheerful handmade Thanksgiving place cards without requiring expensive supplies.

Paint on a Wooden Panel

Older children can create the design on an unfinished wooden panel using washable acrylic craft paint and sponge daubers.

Lightly sand rough edges before beginning and seal the finished artwork only after the paint has completely dried. Sealing should always be completed by an adult in a well-ventilated area using a product appropriate for the chosen paint and surface.

Make a Process-Art Turkey

Skip the traditional feather colors and let children choose their own palette.

Try:

  • Pink, lilac and turquoise
  • Blue, green and silver
  • Red, pink and gold
  • Earthy terracotta, mustard and cream
  • Neon rainbow colors

There is no rule saying a Thanksgiving turkey must be brown and orange. Somewhere out there is a turkey just waiting for a hot-pink feather makeover.

How to Prevent Muddy Finger-Paint Colors

The most common problem with this project is overmixing.

Children understandably want to swirl all the colors together. Unfortunately, beautiful red, yellow, blue and green paint can quickly become one enormous brown puddle.

Use these simple tricks:

  • Offer three or four colors at a time.
  • Begin with neighboring colors such as red, orange and yellow.
  • Wipe fingers before changing to a contrasting color.
  • Use a separate finger for each paint color.
  • Leave small white spaces between some of the prints.
  • Allow one painted layer to dry before adding contrasting details.
  • Put only a spoonful of each color on the palette.

Of course, if the child deliberately creates a brown turkey explosion and proudly declares it finished, it is finished. Children’s process art does not need to match the sample to be successful.

Tips for Making This Craft With Toddlers

Toddlers may not follow a curved feather pattern, and that is perfectly fine.

Prepare the paper turkey body in advance and let them focus on pressing, stamping and smearing the paint. You can rotate the paper as they work to help distribute the colors around the center.

Use a large sheet of paper so they have plenty of room and tape it to the table to stop it sliding.

Keep the session short. Ten happy minutes of painting is much better than stretching the activity until everyone is tired, the paint water has been tipped over and someone is wearing the paper plate as a hat.

Classroom Preparation Tips

For a preschool or kindergarten Thanksgiving craft, prepare the following pieces before the children arrive:

  • Brown turkey bodies
  • Turkey heads
  • Orange beaks and feet
  • Red wattles
  • Individual paint palettes
  • Labeled drying sheets

Write each child’s name on the back of the paper before painting begins.

Set up one table for painting and another for assembling the dry turkey pieces. A few inexpensive divided paint trays can make classroom color management much easier.

You can also combine this art project with one of these turkey learning activities for a Thanksgiving lesson that includes fine-motor skills, counting, science or early literacy.

Displaying the Finished Turkey Artwork

Once dry, the turkey painting can be:

  • Framed as seasonal wall art
  • Displayed on a Thanksgiving mantel
  • Attached to the refrigerator
  • Used as a classroom bulletin-board display
  • Given to grandparents
  • Turned into the front of a large Thanksgiving card
  • Mounted onto kraft cardstock
  • Photographed and printed onto family thank-you cards

Add the child’s name and the year to the back. It takes only a moment, and you will be glad you did when you pull it out several Thanksgivings from now and cannot remember which small artist created it.

This colorful Thanksgiving turkey finger painting is easy enough for young children but still produces something genuinely display-worthy. More importantly, it gives children room to experiment and create their own version rather than trying to copy an adult-made sample perfectly.

Set out the washable paints, embrace the fingerprints and remember that the table covering is not optional.

Explore

Bedrooms Christmas Craft Ideas Easter Garden and Yard Halloween Holidays Home Decor Kitchens Living Areas Makeovers and Redos More DIY's Organizing Outdoor Decor Porches, Patios and Decks Recycled Crafts Seasonal Trash to Treasure Windows and Walls Wreaths

RSS More Articles

  • Halloween Sampler Cross Stitch Patterns
  • Video Ribbon Embroidery Tutorials for French Knots
  • Book Review: Knits for Little Ones
  • Book Review: Crochet Goomis – 50 Amigurumi Critters and Characters
  • 12 Halloween Quilting Patterns with a Skull Theme
  • Free Ghost Crochet Pattern: Easy No-Sew Halloween Ghost
  • Free Charity Knitting Pattern: Premature Baby Beanie
  • 10 Decorative Pie Crust Ideas That Make Homemade Pies Look Beautiful
  • Junk Journalers, You Need These 2 New Sticker Books
  • 12 Elegant Autumn Handmade Card Ideas

Copyright © 2026 · CraftGossip | Start Here | Contact Us | Link to Us | Your Editors | Privacy and affiliate policy