• Home
  • Suggest A Craft
  • DIY Newsletter

Home and Garden

Ideas For DIY

  • About CraftGossip
  • Our Network
    • Bath & Body Crafts
    • Candle Making Ideas
    • Crochet Ideas
    • Cross Stitch
    • Edible Crafts
    • Felting Patterns
    • Glass Art
    • Home & Garden Ideas
    • Indie Crafts
    • Jewelry Making
    • Kids Crafts
    • Knitting Patterns
    • Lesson Plans
    • Needlework
    • Party Ideas
    • Polymer Clay
    • Quilting Ideas
    • Recycled Crafts
    • Scrapbooking
    • Sewing Patterns
    • Card Making
    • DIY Weddings
    • Not Craft Ideas
  • Giveaways
  • Roundups
  • Store
  • Search

How To Make Resin Door Knobs And Pulls

August 8, 2020 by Shellie Wilson

If you are new to resin casting then check out this detailed article on Basic resin casting over at our sister site. 

The basic materials you need will be resin ofcourse. I highly recommend starting out with a craft resin and then as you progress you can purchase in larger quantities.  This is the same resin that can be used for resin-pouring projects too.

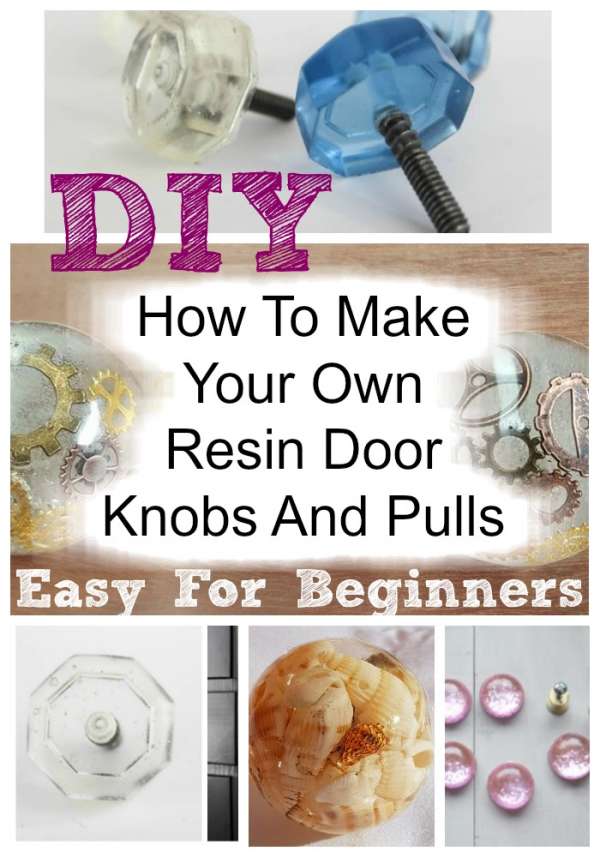
Resin doorknobs or drawer pulls are the perfect way to add your own style to a cupboard or door. Bohemian style drawer pulls are very popular right now and you can pick them up in stores such as Anthropologie but they will cost you a small fortune. These DIY pulls are easy to make and lots of fun too.

Resin Doorknobs

Make Your Own Chic Clear Knobs

Easy-DIY: Möbelknöpfe aus Kunstharz mit Muffin-Silikonform

Pink Glitter Resin Knobs DIY

DIY Resin Drawer Knobs

Polyester Resin: is a liquid plastic that hardens when a few drops of the catalyst are added to create a chemical reaction. Polyester Resin is durable and is the resin of choice for industrial applications and serious crafters who are experienced in resin casting. This resin is highly toxic and should be used in a well-ventilated area using protective masks to avoid inhalation. One main advantage of Polyester Resin is the depth in which it can be poured for larger embed projects. Polyester Resin is cheaper to buy than Epoxy resin as it is generally purchased in larger quantities such as 1lt + tins.

Epoxy Resin: These resins are more frequently used in the crafting and hobby world, they are easy to use with a low toxicity, making them suitable for ventilated craft rooms and work areas. Epoxy resin is perfect for jewelry casting as it has a shallow setting depth, so it will cure quickly when used correctly.

For complete instructions on casting with resin read these Basic resin casting techniques

Here are our favorite supplies for using resin when casting

Casting Resin
Measuring Tools
Disposable Mixing bowl or cup
Disposable tools
Suitable resin molds
Spray oil Cooking Spray
Straw
Items for Embedding

Related Posts:

  • 37% off Bulk Resin This Weekend
  • How To Make A Shell Door Wreath
«
»

Have you read?

How to Make Textured Wall Art: Easy DIY Canvas Art

There’s something magical about textured wall art. It’s got depth, personality, and that “I spent a fortune at a boutique gallery” vibe—without the boutique price tag. And the best part? You don’t need to be a trained artist to create it. If you can spread butter on toast, you can make this.

I made my first DIY textured canvas art on a rainy Saturday afternoon, with a cup of tea on the table and a curious dog sniffing my paint tray (Aloo was very unimpressed). A couple of hours later, I had a statement piece that looked like it belonged in a high-end décor magazine—except it cost me less than a takeaway dinner. Since then I have been obsessed and even made a Halloween Ghost one which you can see over here on our sister blog.

Whether you want a calming neutral piece for above the sofa or a bold modern texture for a gallery wall, this technique works for all styles.

Why You’ll Love Making Your Own Textured Canvas Art

  • Budget-Friendly: Store-bought textured art can cost hundreds—yours will cost a fraction. 
  • Custom Colours: Match your décor exactly (no more “almost” shades). 
  • Therapeutic Process: There’s something soothing about smoothing plaster and watching your art take shape. 
  • One-of-a-Kind: No one else will have the exact same piece hanging on their wall. 

Supplies You’ll Need

Canvas – Any size you like; larger canvases make a bigger impact.

Joint compound, spackle, or lightweight plaster – This is what creates the texture. You’ll find it in the hardware store’s paint aisle.

Putty knife or palette knife – For spreading and sculpting the texture.

Acrylic paint – Choose your main colour(s). Matte paints give a modern, designer look.

Paintbrush or sponge – For applying your colour after the texture dries.

Drop cloth or old sheet – To protect your workspace.

Optional:

  • Metallic paint for highlights 
  • Sandpaper for a smoother finish 
  • Stencils or combs for patterned textures 

Step-by-Step: How to Make Textured Wall Art

1. Prepare Your Workspace

Spread out your drop cloth and set your canvas on a flat surface. This can get a little messy, so old clothes are a must.

2. Apply the Texture

Scoop some joint compound or spackle onto your putty knife. Spread it over the canvas in sweeping motions, as if you’re frosting a cake.

  • For a smooth, modern look, keep your strokes even. 
  • For a rustic, organic feel, let the plaster peak and ripple naturally. 
  • For patterned textures, press in stencils, combs, or even bubble wrap for an imprint. 

3. Let It Dry Completely

Depending on how thick you applied the texture, this can take anywhere from 12–24 hours. Patience is key here—painting too soon can ruin the effect.

4. Paint Your Design

Once dry, use acrylic paint to cover the texture. Neutrals like beige, ivory, or warm grey work beautifully for a minimalist look.

  • Want a bold statement? Go for deep navy, charcoal, or even emerald green. 
  • For a luxe finish, lightly dry-brush metallic gold or bronze over the raised areas to make the texture pop. 

5. Hang and Admire

Once the paint is dry, your art is ready for its gallery debut—aka your living room wall.

Tips for Gorgeous Results

  • Mix Texture Heights: Add thicker plaster in some areas and thinner layers in others for depth. 
  • Use Two Tones: Layer a darker base coat, then brush a lighter shade over the raised texture for a dimensional effect. 
  • Practice First: Try a small canvas before committing to a large statement piece. 

Creating your own textured wall art is a satisfying, budget-friendly way to bring designer style into your home. The process is relaxing, the materials are affordable, and the result is a unique piece that looks far more expensive than it is.

So next time you’re tempted to scroll online for pricey wall décor, grab a canvas, some plaster, and your favourite paint colours—you might just surprise yourself with how chic your creation turns out.


Explore

Bedrooms Christmas Craft Ideas Easter Garden and Yard Halloween Holidays Home Decor Kitchens Living Areas Makeovers and Redos More DIY's Organizing Outdoor Decor Porches, Patios and Decks Recycled Crafts Seasonal Trash to Treasure Windows and Walls Wreaths

RSS More Articles

  • Leaf Learning Activities for Kids
  • The Easiest 2-Ingredient Cupcake Hack (Plus 10 Delicious Variations!)
  • 2 Hour Crochet Sippers Pattern – Fast Rectangle Crochet Slippers – Cozy Feet in a Flash
  • Book Review: Upcycle: 24 Sustainable DIY Projects – Eco-Friendly Design Meets Crafty Creativity
  • How to Make a Funny Relaxing Summer Card
  • DIY Reusable Bowl Covers: Eco-Friendly and Stylish Kitchen Essential
  • Super Cute Ghost Cross Stitch Patterns
  • Knit a Sweet Striped Vest for Kids
  • DMC American Football Embroidery Pattern – A Fun and Sporty Stitch for Game Day Fans
  • Disney Scrapbook Mini Album Project

Copyright © 2025 · CraftGossip | Start Here | Contact Us | Link to Us | Your Editors | Privacy and affiliate policy