• Home
  • Suggest A Craft
  • DIY Newsletter

Home and Garden

Ideas For DIY

  • About CraftGossip
  • Our Network
    • Bath & Body Crafts
    • Candle Making Ideas
    • Crochet Ideas
    • Cross Stitch
    • Edible Crafts
    • Felting Patterns
    • Glass Art
    • Home & Garden Ideas
    • Indie Crafts
    • Jewelry Making
    • Kids Crafts
    • Knitting Patterns
    • Lesson Plans
    • Needlework
    • Party Ideas
    • Polymer Clay
    • Quilting Ideas
    • Recycled Crafts
    • Scrapbooking
    • Sewing Patterns
    • Card Making
    • DIY Weddings
    • Not Craft Ideas
  • Giveaways
  • Roundups
  • Store
  • Search

No Sew Tee Pee Pattern

April 23, 2018 by Shellie Wilson


This is super easy to make and didn’t take too long. You can also customize it to make it fit your space and needs and if your kid gets tired of it, you can change out the fabric, the lights, or the pillows.


What You Need

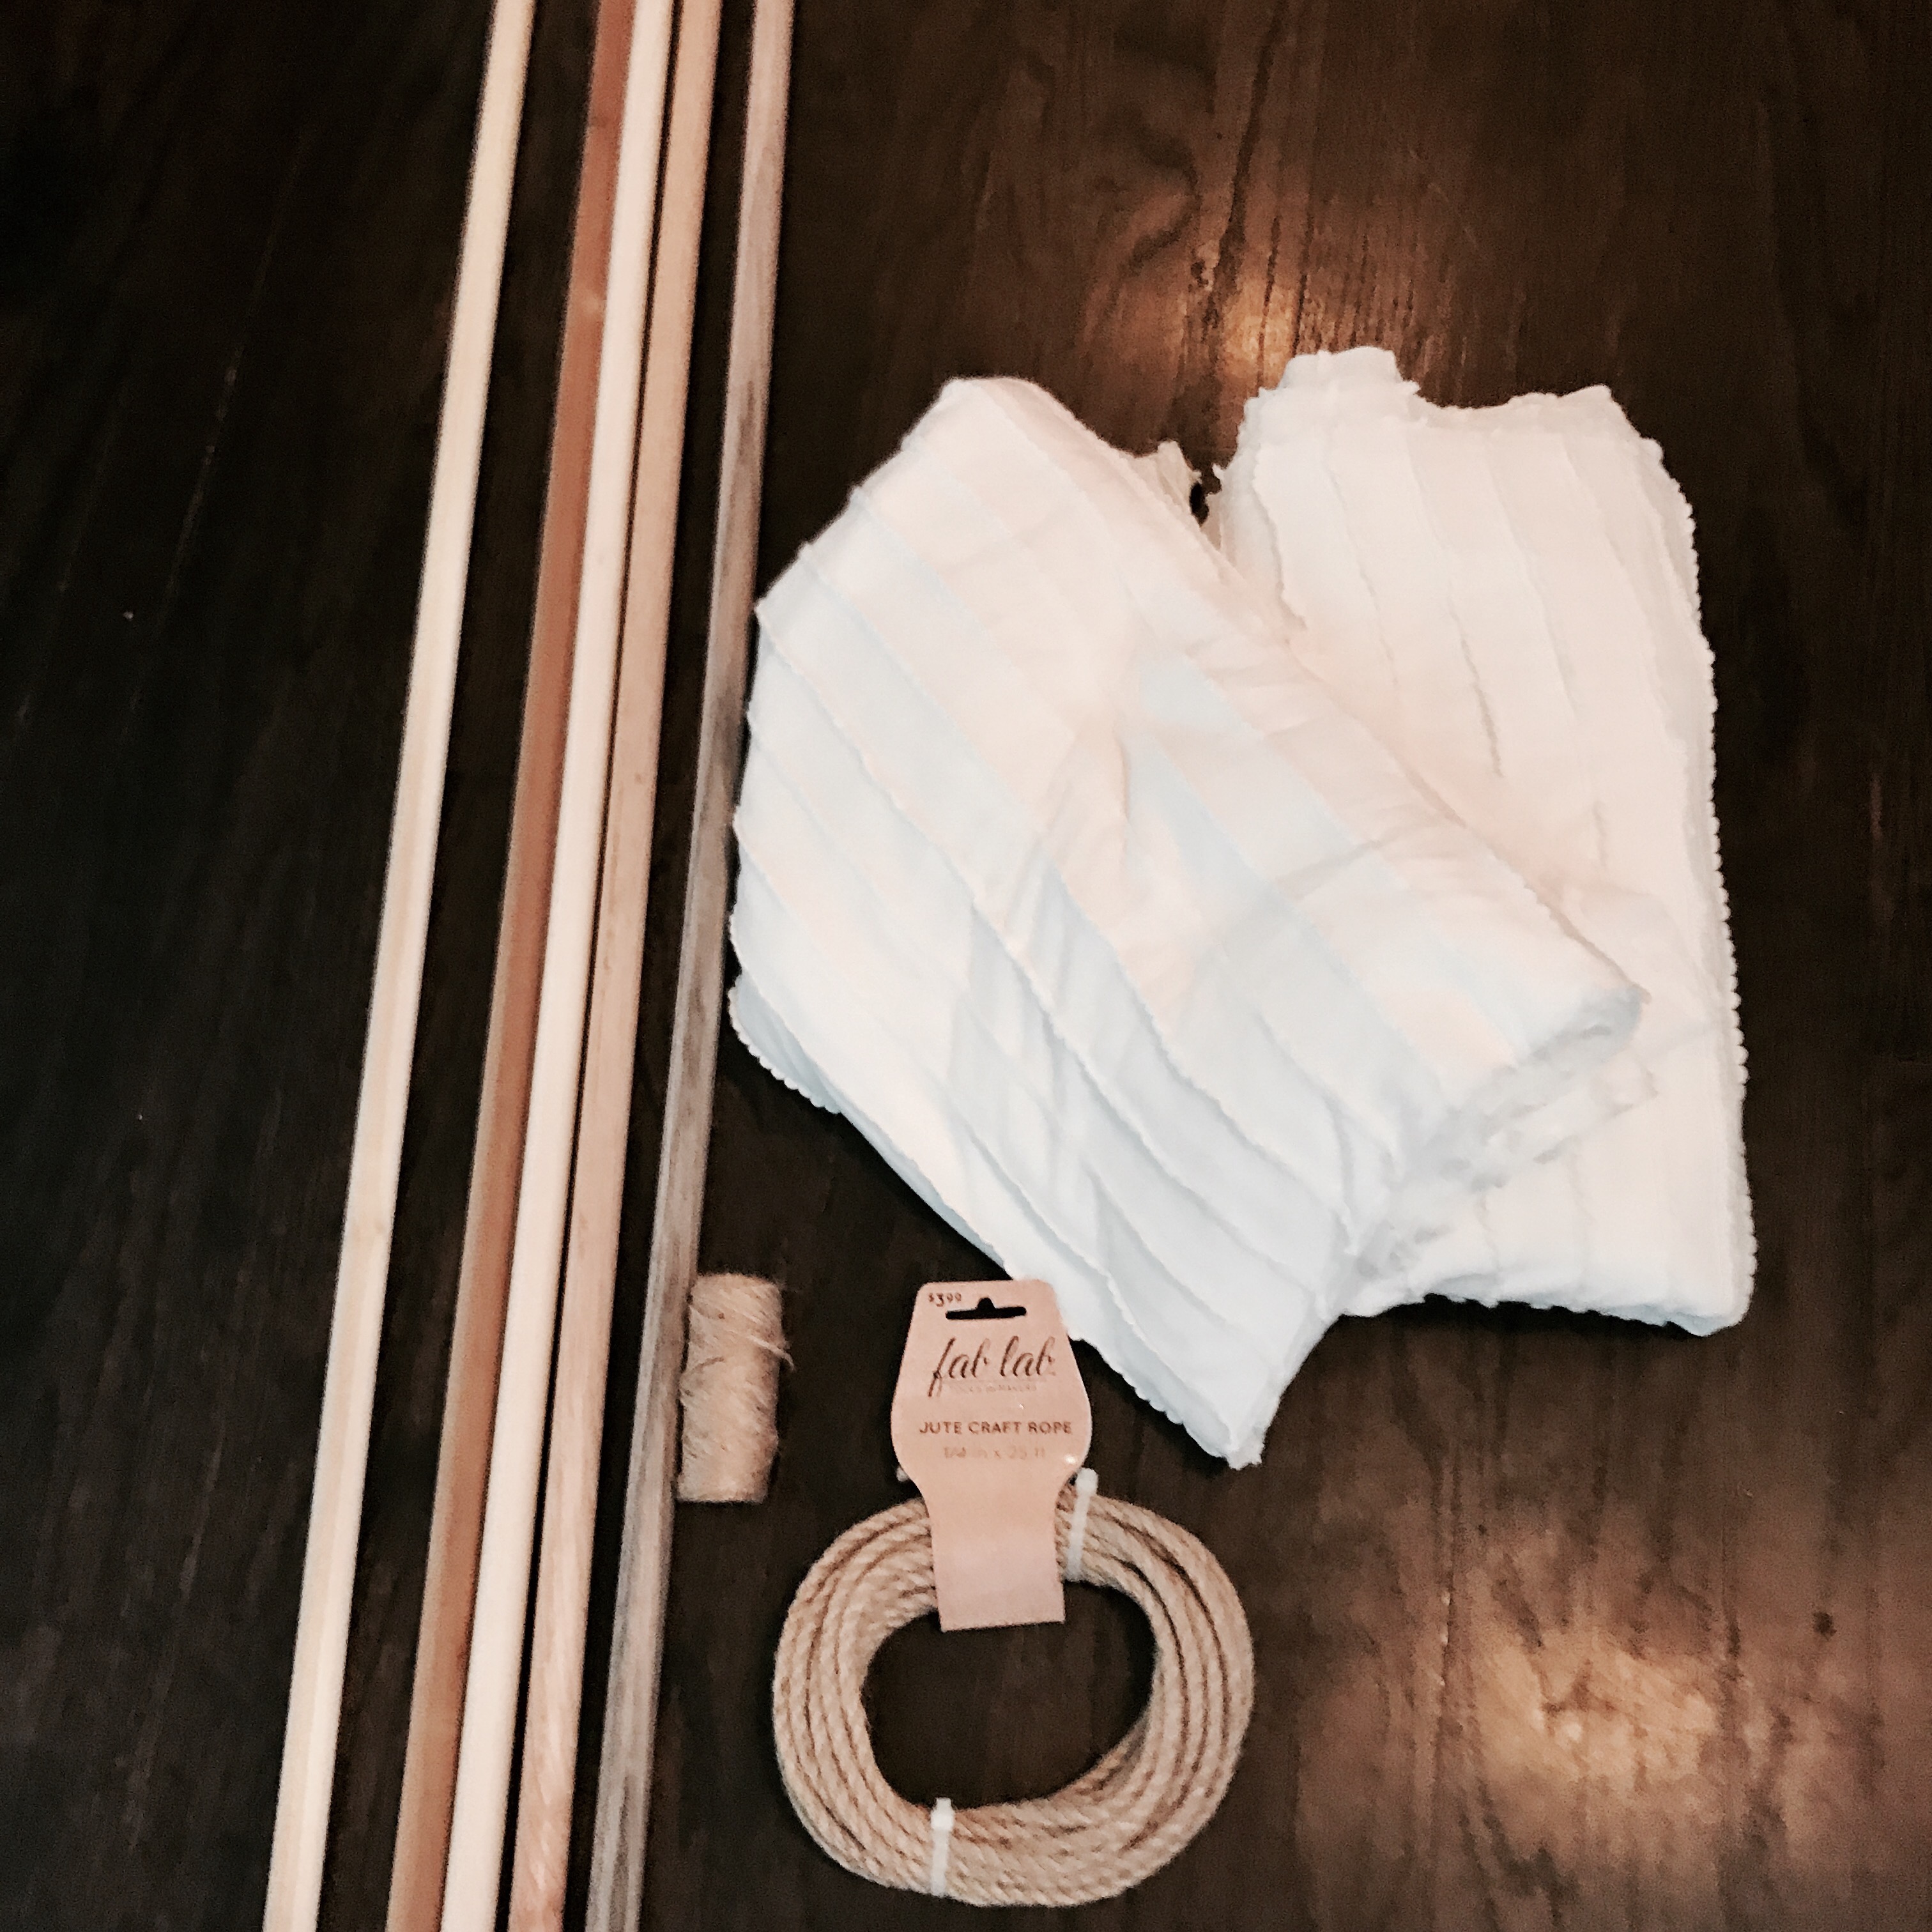
  • 5 – 6′ Dowels (3/4” diameter – bought at Home Depot)
  • Jute Twine (Need both thick and thin)
  • Ruler
  • Pencil
  • Drill
  • ~3 1/2 yards of fabric (I used a lightweight polyester fabric with scallops found at the fabric store, you can even use a white bed sheet if you don’t want to buy new fabric)
  • Elastic (Rubber band or hair ties)
  • Optional: faux ferns and flowers
  • Optional: string lights

Instructions

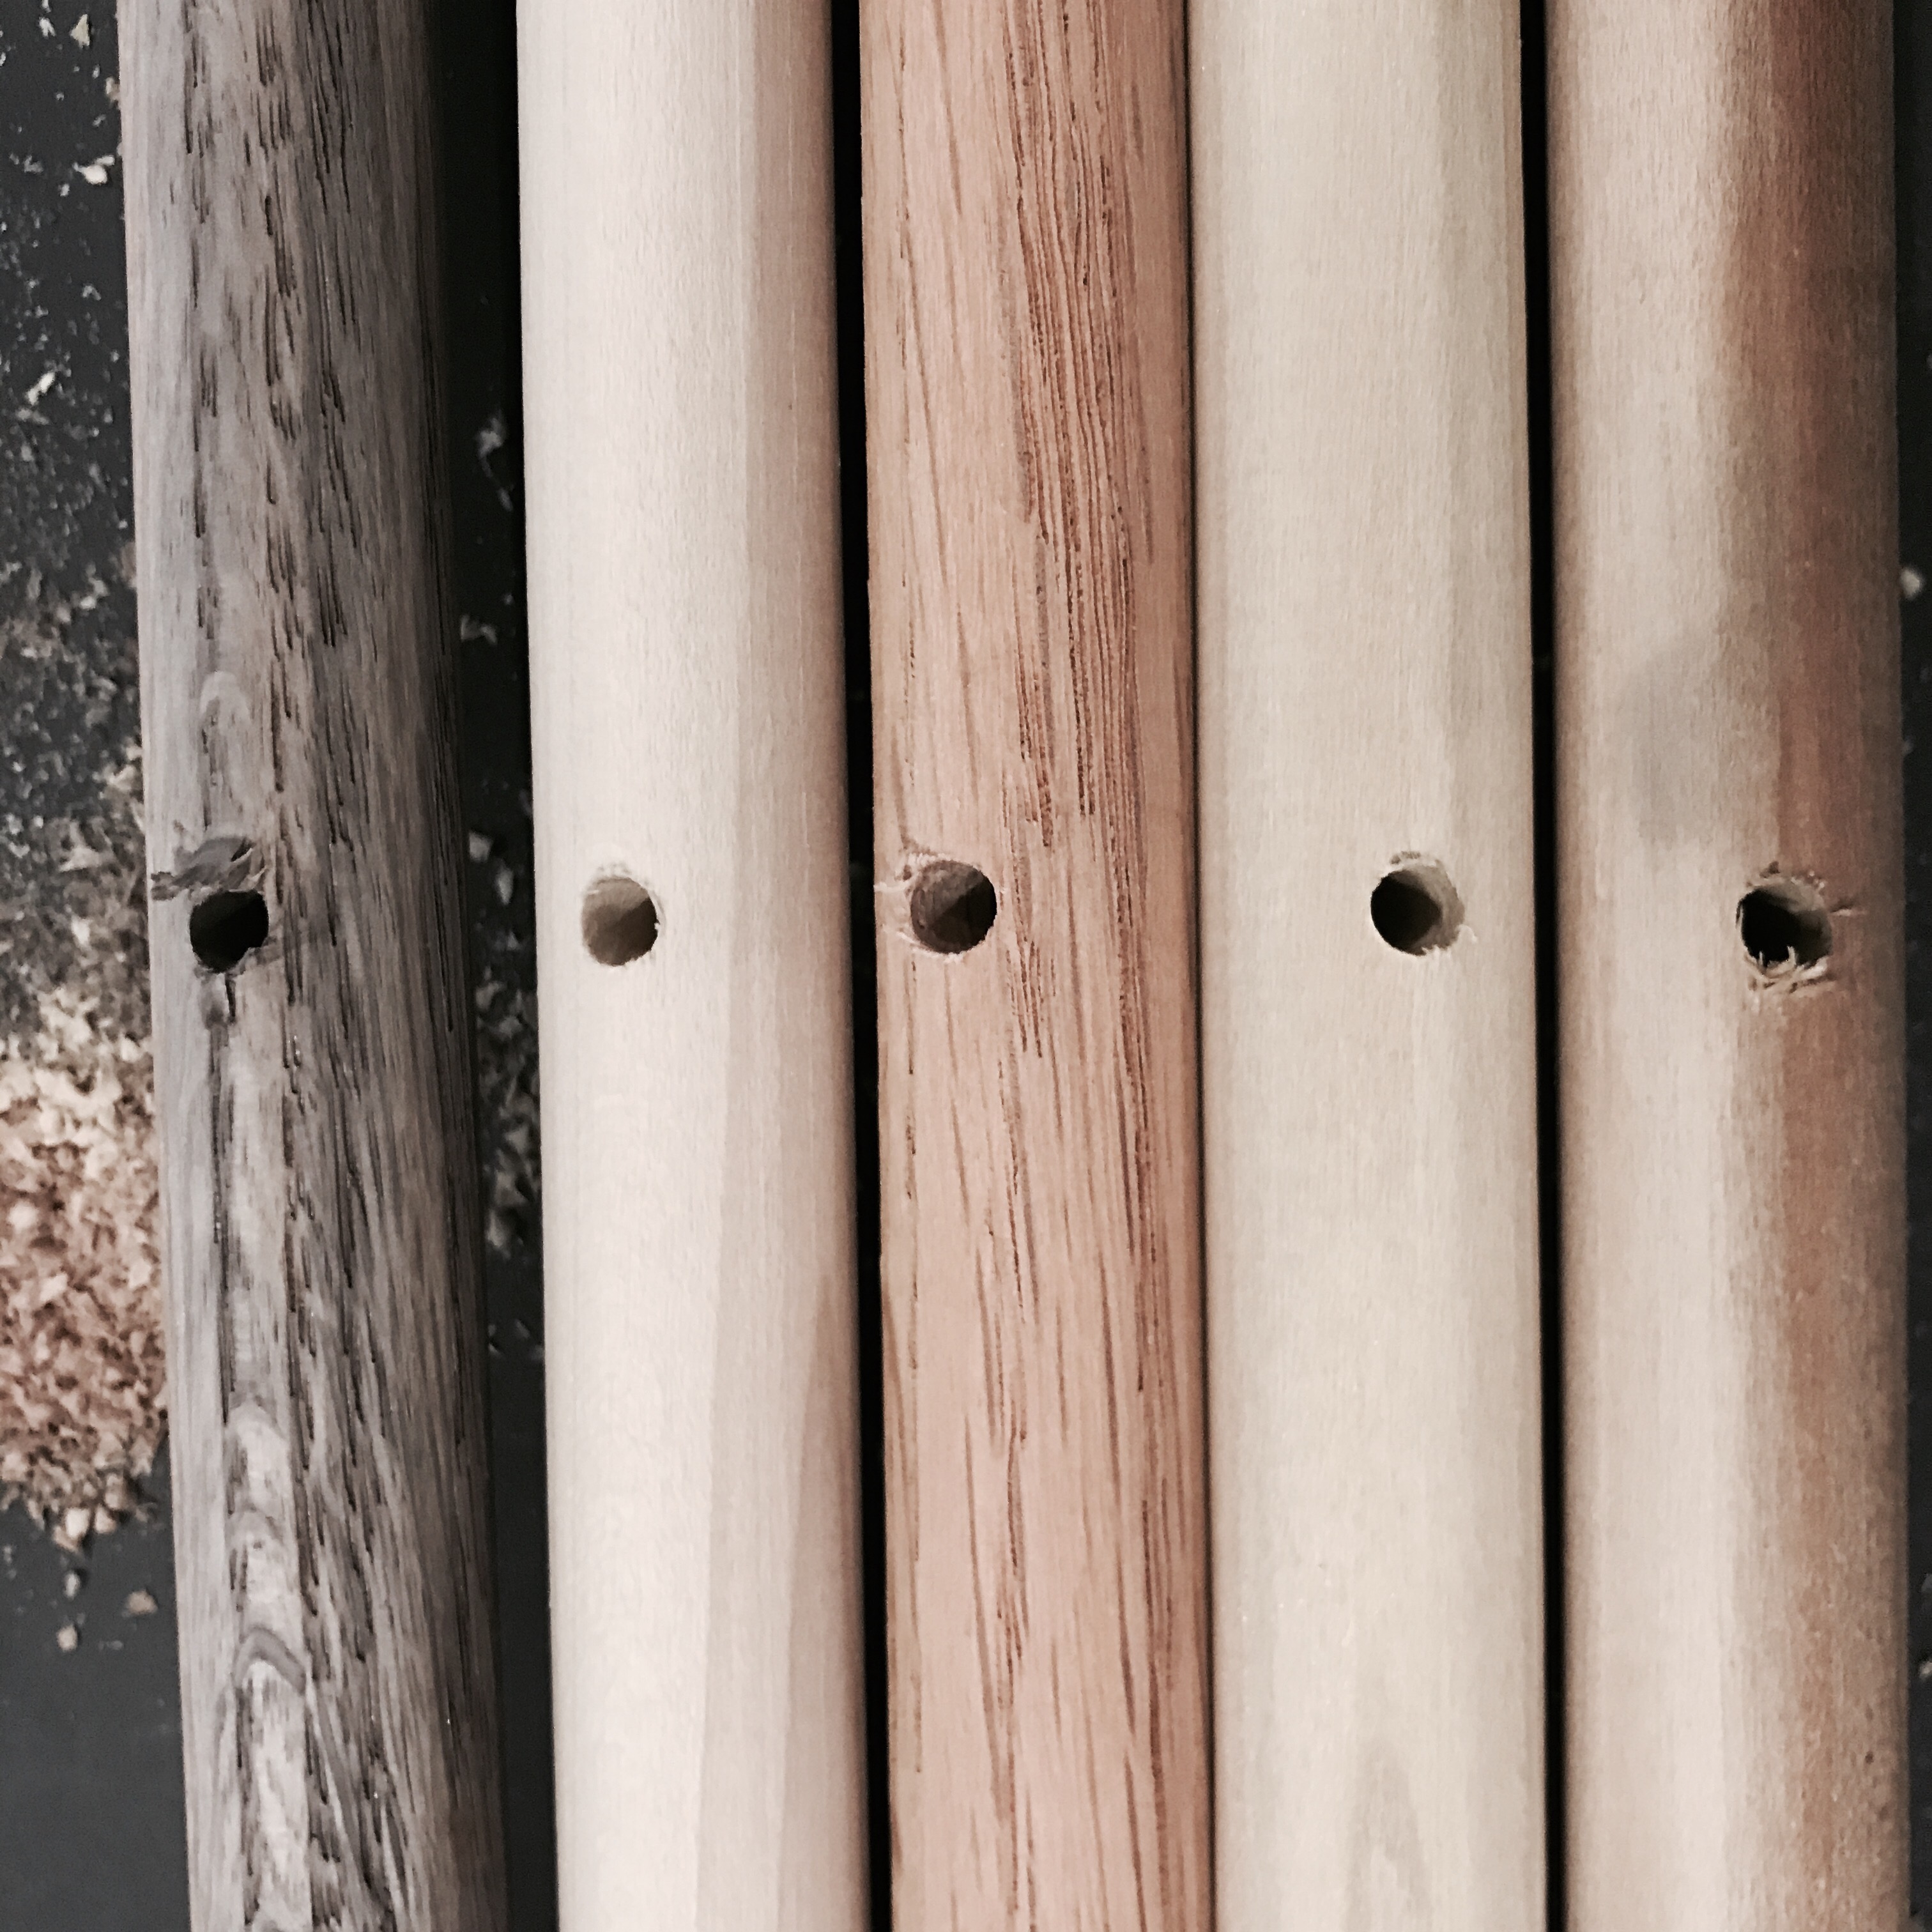
Step 1. First, take your ruler and measure 12 inches from the top of each of the 5 dowels. Mark it with a pencil.

Step 2.  Next, drill a hole on your marking of each dowel. And yes I drilled these myself 🙂

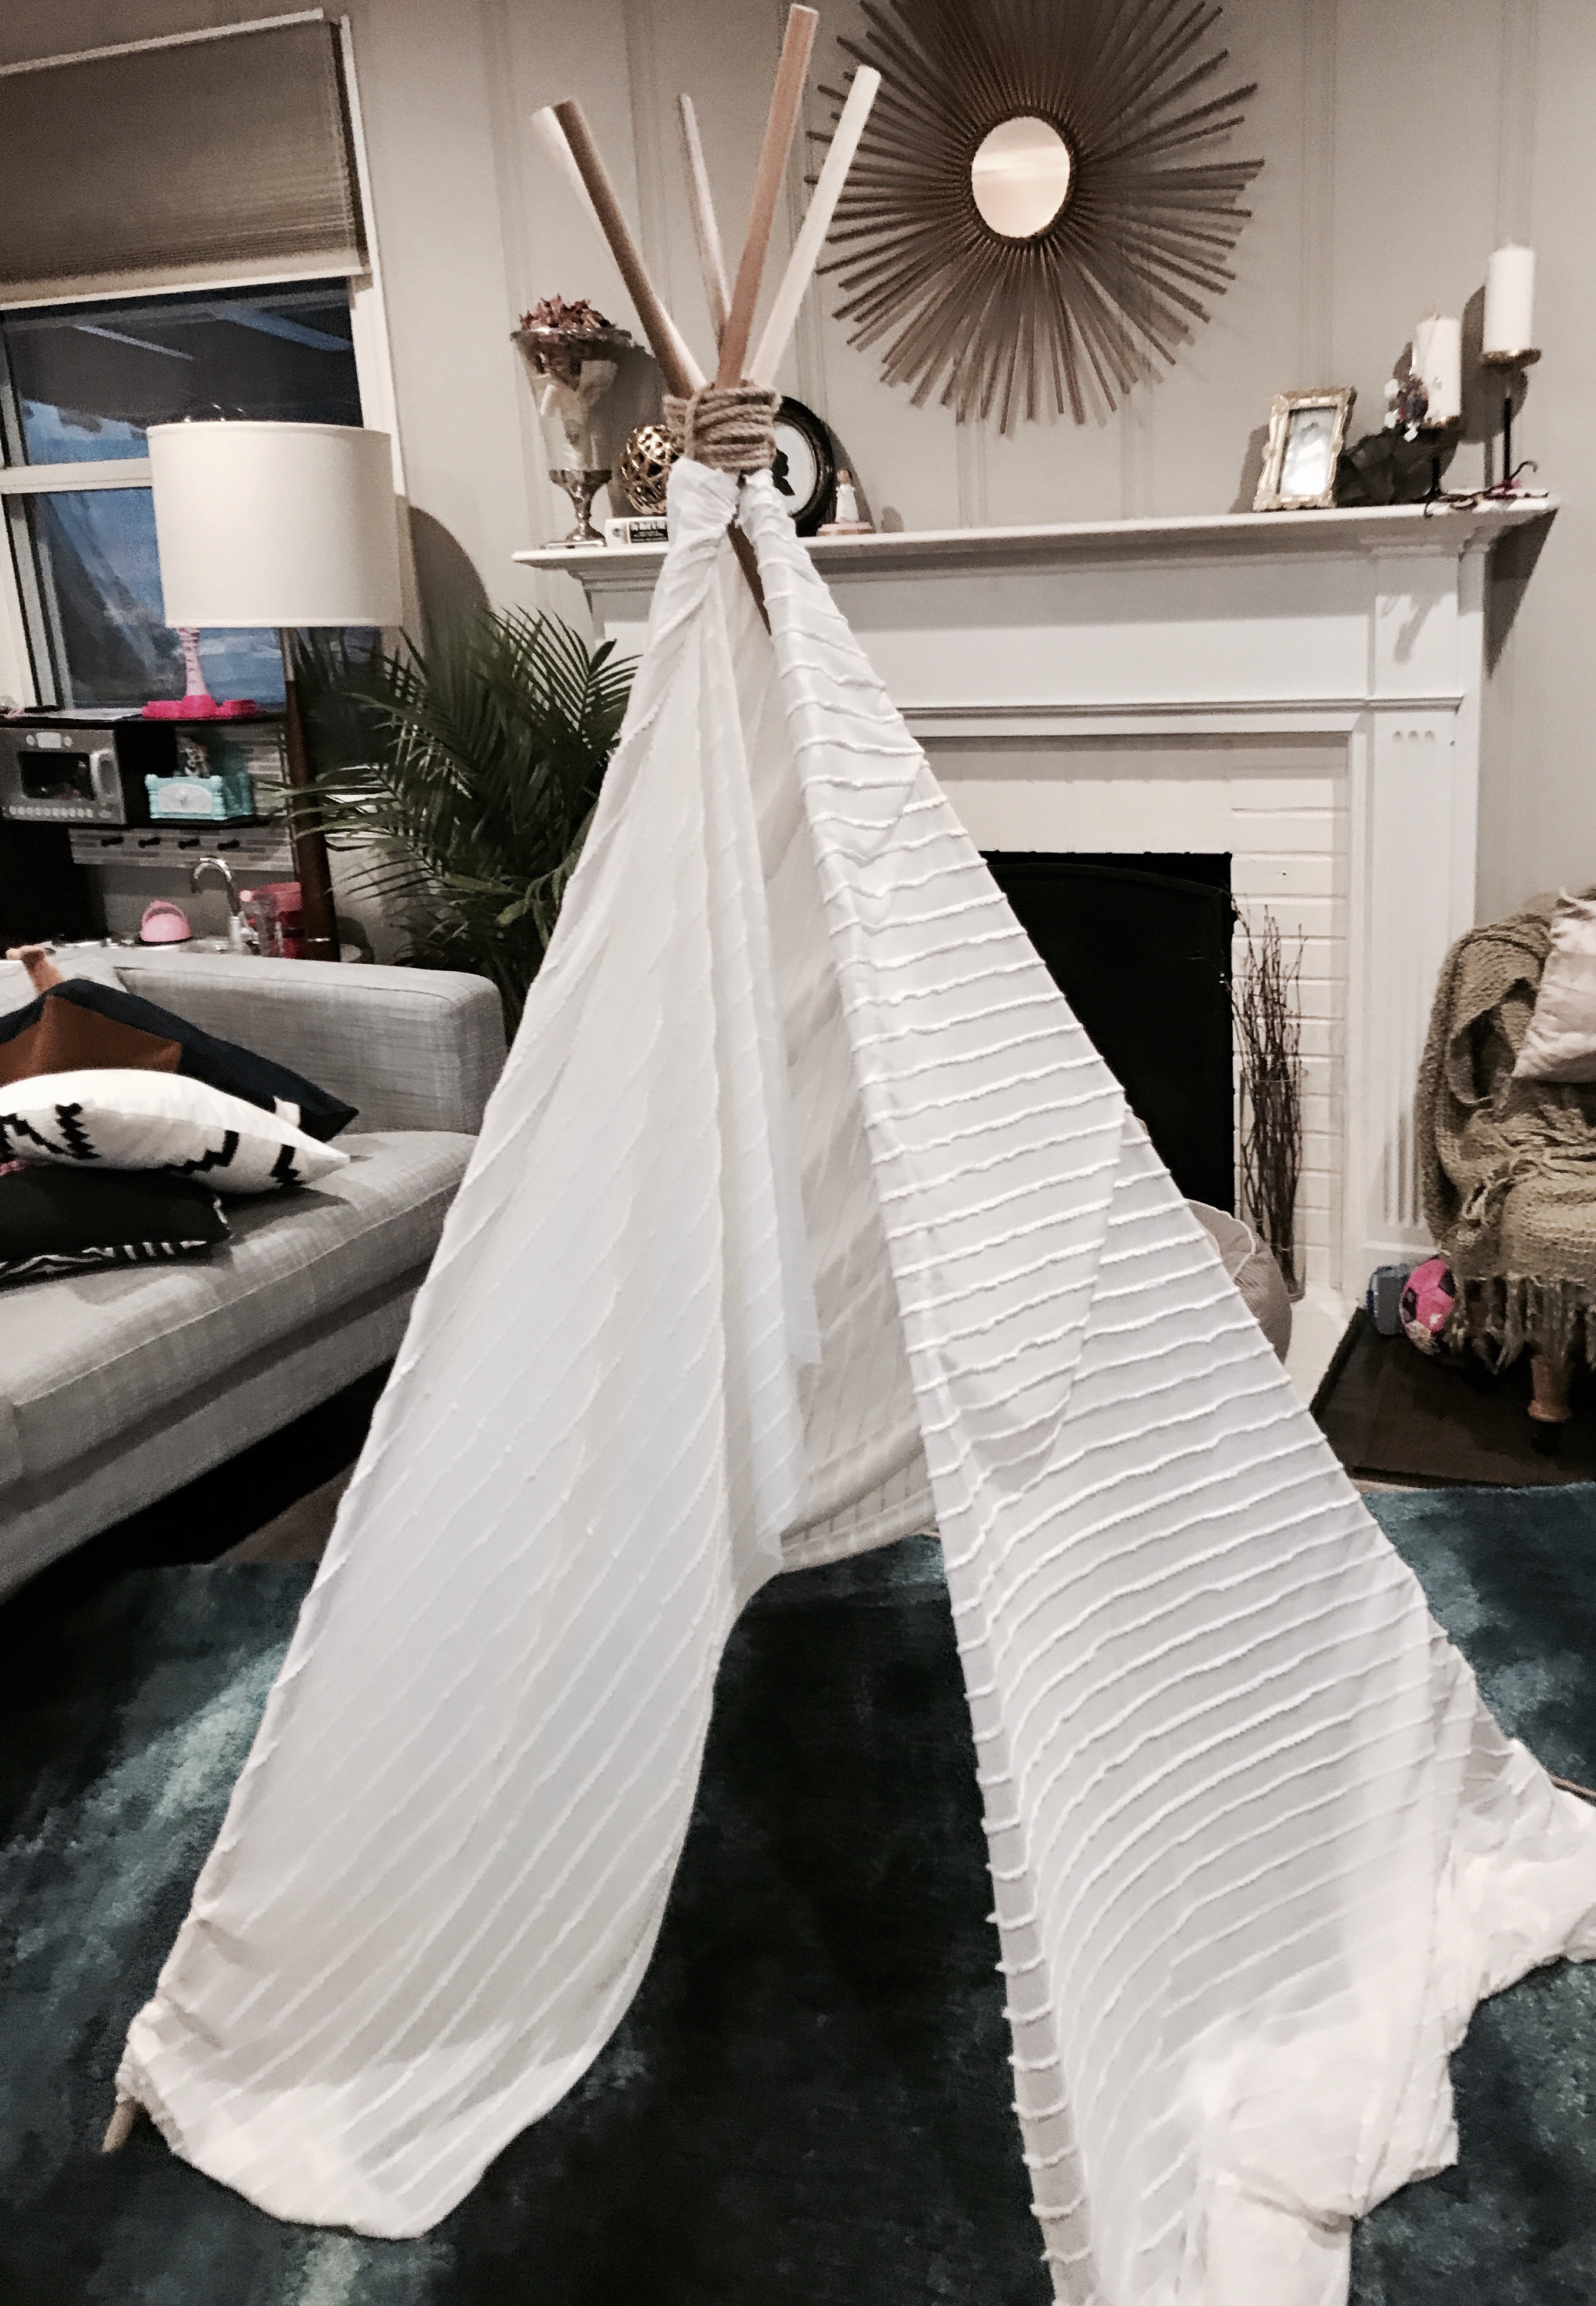
Step 3.  Then, with your thin twine, place it in one hole and tie a knot and then weave more twine through the second dowel connecting the two and tie a knot. Continue until all the dowels are connected.

Step 4.  Next, stand your dowels up and arrange them like a teepee. Since they are tied together, they should be able to stand up on their own. Now, grab the bigger jute twine and wrap together and in many different directions until you feel like it’s secure.

Step 5.  Once you feel like it’s secure, start draping your fabric over the dowels. I tied the fabric together at the top using white hair ties leaving an opening space to enter.

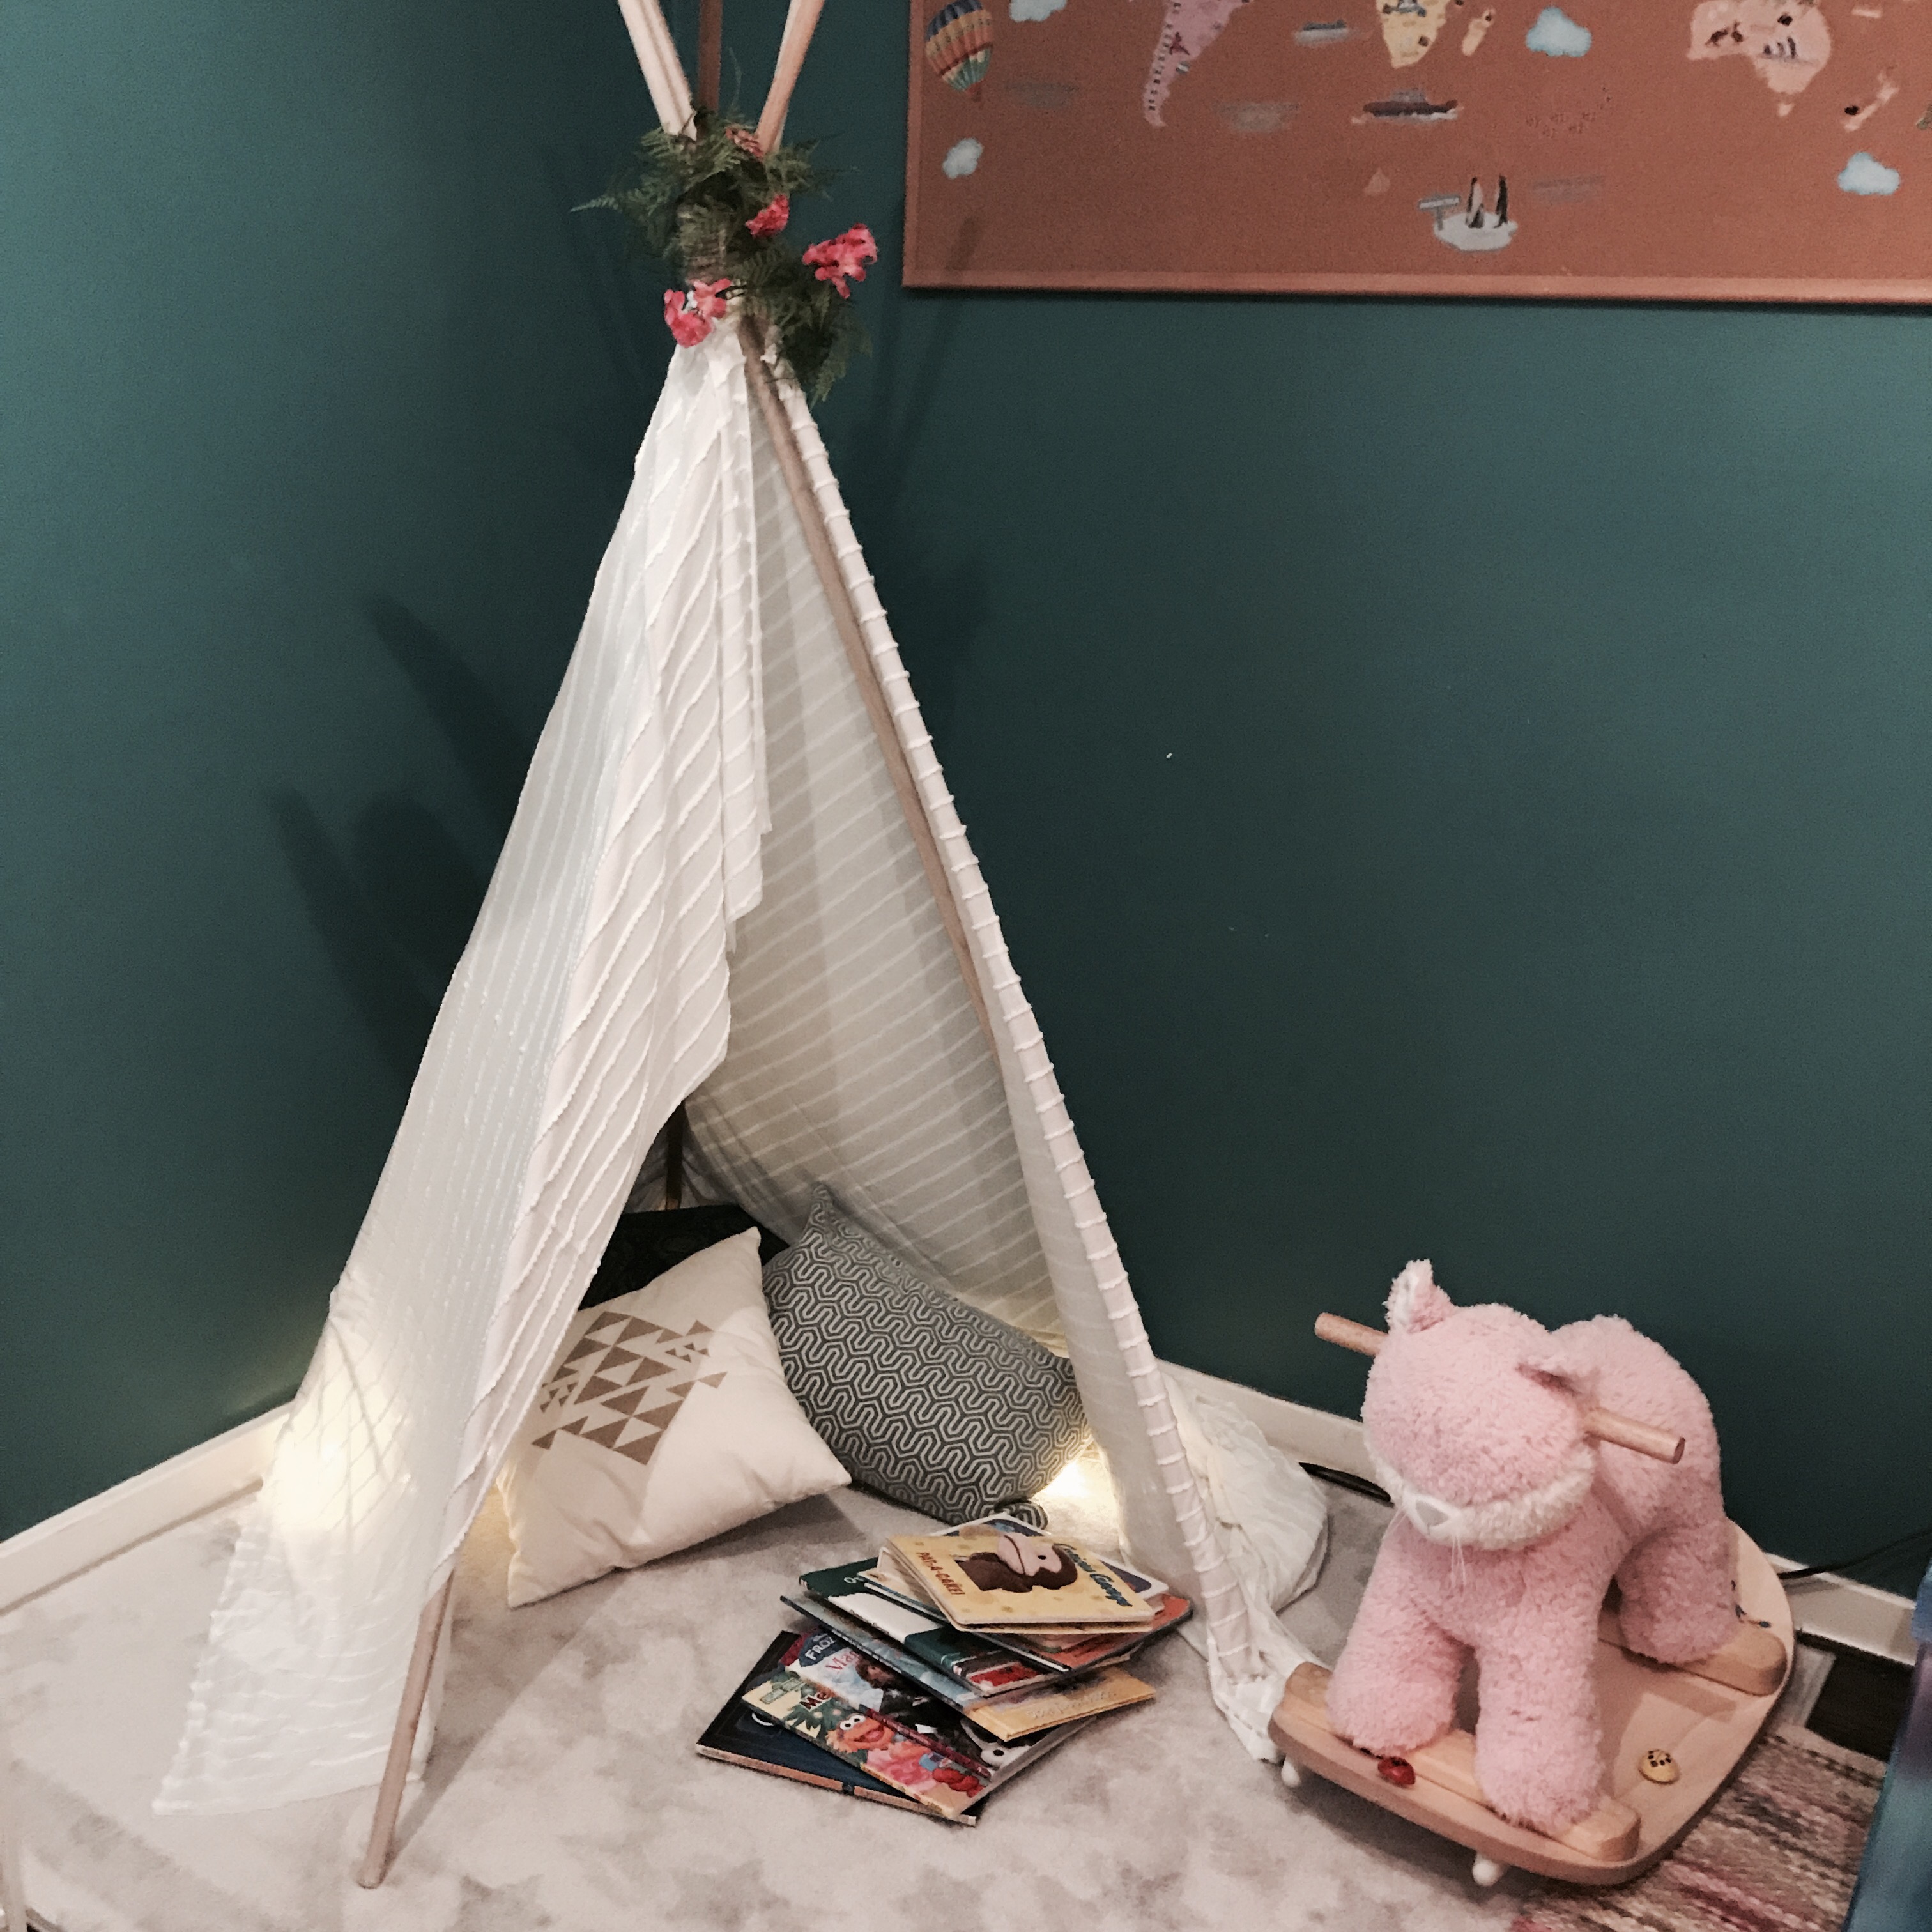
Step 6.  You’re actually done with the basics! But from here, I wanted to add more to the teepee, so I grabbed some faux fern and flowers that I had leftover from previous projects and placed it at the top. I think it makes it look so pretty! 

Step 7. (optional)  I also added lights and though the photos show the lights inside, I have since tried them atop the teepee and that may be a better look.

Step 8.  Lastly, add pillows, a bean bag, and some books and you’ve got your own little teepee for reading, lounging or whatever else you put your mind to!

Related Posts:

  • 15 No Sew Christmas Holiday Cushions
«
»

Have you read?

Building with Nature: My Experience with Natural Birdhouses

If you’re someone who enjoys DIY woodworking projects and has a soft spot for garden wildlife, Natural Birdhouses by Maria and Amen Fisher is a must-read. I picked this book up recently and have been completely inspired by the earthy, sustainable approach it offers to building homes for birds, bats, and even beneficial bugs.

What really drew me in was the focus on using found wood and natural materials—think branches, logs, reclaimed boards, and other bits of nature you can often source from your own backyard or a nearby forest. Not only does this make the projects eco-friendly, but it also gives everything a beautiful, rustic feel that blends effortlessly into any garden or backyard setting.

The book includes 25 step-by-step projects, all clearly explained and illustrated, which makes it accessible for both beginner and seasoned crafters. Even if you don’t have a fully-equipped workshop, most of these can be tackled with just a few basic tools and a bit of patience.

I started with a simple birdhouse design, using some weathered fence boards I had stashed in the shed. The instructions were easy to follow, and I was surprised how quickly it came together. Within a couple of days of putting it out in the garden, a curious little sparrow showed up—talk about instant reward! I’ve since bookmarked the bat box project and one of the insect hotel builds for next weekend.

What I really love about this book is that it’s not just about crafting; it’s about encouraging wildlife and creating a more natural, welcoming habitat right in your own yard. It’s a great way to involve kids, too—mine were fascinated by the idea of building a bug hotel and couldn’t wait to help collect materials.

If you’re looking for nature-inspired DIY garden projects that not only look good but also serve a purpose, Natural Birdhouses is full of ideas that check all the boxes. It’s creative, environmentally conscious, and a great way to spend time outdoors while giving something back to the ecosystem.

I’d definitely recommend this to anyone into sustainable gardening, backyard birdwatching, or rustic outdoor décor. Let me know if you give it a try—I’d love to hear what you build!

Explore

Bedrooms Christmas Craft Ideas Easter Garden and Yard Halloween Holidays Home Decor Kitchens Living Areas Makeovers and Redos More DIY's Organizing Outdoor Decor Porches, Patios and Decks Recycled Crafts Seasonal Trash to Treasure Windows and Walls Wreaths

RSS More Articles

  • Bookmark Cross Stitch Patterns
  • FREE Summer Vacation Die Cut Files to Download
  • Knit a Linen Stitch Hot Pad
  • Agnes Sweater Vest PDF Crochet
  • Coldplay Caught on Camera?! This Free Coloring Page Will Leave You in Stitches!
  • Democratic Republic of the Congo for Kids
  • Primrose and Bee Punch Needle Pattern from DMC
  • Striped Ripple Afghan- Free Crochet Pattern
  • Knitting Pattern Review: Sabai Top by PaulaStrickt
  • Book Review – Capture Your Own Life with Collage Quilting

Copyright © 2025 · CraftGossip | Start Here | Contact Us | Link to Us | Your Editors | Privacy and affiliate policy