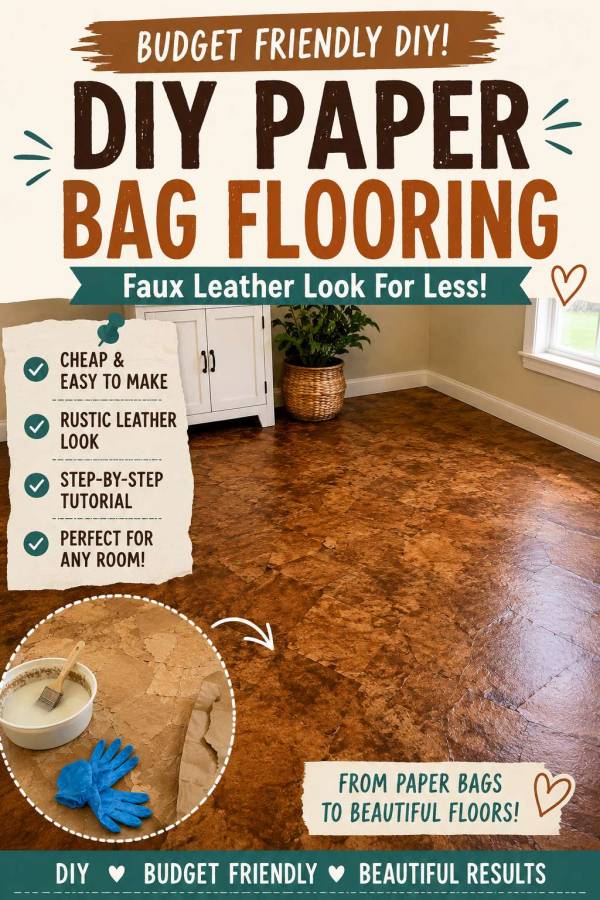
If you have an old floor that is ugly, stained, scratched, or just plain depressing, this DIY paper bag flooring idea might be one of the cleverest budget makeovers you’ll ever try.
Yes, paper bags.
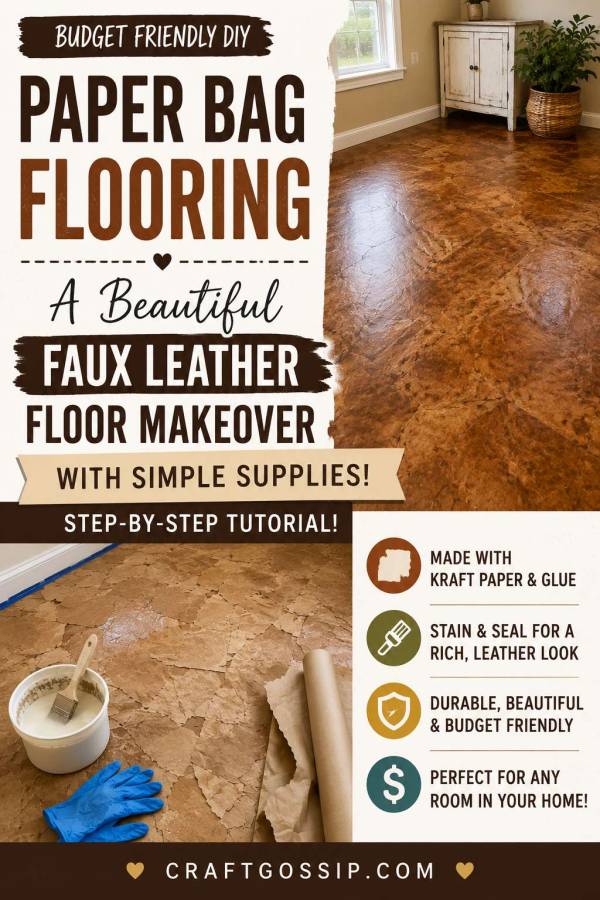
Or more realistically these days, a roll of brown kraft paper. The finished look can resemble worn leather, rustic stone, or aged parchment, depending on how you stain and seal it. It is warm, textured, handmade-looking, and surprisingly effective for a low-cost flooring project.
This is the kind of home DIY that feels a little bit mad while you’re doing it, but absolutely brilliant when it’s finished. And honestly, those are often my favourite projects.
Paper bag flooring is especially handy for craft rooms, offices, bedrooms, hallways, closets, and other interior spaces where you want a fresh look without paying for new flooring. It takes time and patience, but the supplies are inexpensive and the results can be gorgeous.
What Is Paper Bag Flooring?
Paper bag flooring is a DIY floor finish made by gluing torn pieces of brown kraft paper onto a prepared floor, then staining and sealing the surface with multiple coats of floor-grade polyurethane.
The overlapping paper pieces create a natural textured effect. Once sealed, the floor takes on a rich, mottled look that can feel a bit like faux leather or rustic stone.
It is not instant flooring, and it is not a five-minute weekend job. There is drying time, sealing time, and a fair bit of kneeling involved. But if you enjoy practical DIY home projects and love a good budget transformation, this one is wonderfully satisfying.
For more thrifty home ideas, you might also like browsing our DIY home decor projects and trash to treasure ideas for more ways to give old spaces a second chance.
Best Places To Use Paper Bag Flooring
Paper bag flooring works best on smooth, stable interior floors.
Good places to try it include:
- craft rooms
- bedrooms
- home offices
- closets
- hallways
- spare rooms
- playrooms
- low-moisture utility spaces
- plywood subfloors
- concrete floors
- old vinyl flooring, if properly prepared
I would be cautious using paper bag flooring in bathrooms, laundries, or anywhere that gets regular moisture. The sealer protects the paper, but water is still not its best friend. If you do use it in a higher-moisture area, make sure every edge and corner is sealed extremely well.
Supplies You Will Need
- Brown kraft paper, builder’s paper, or brown paper bags
- White school glue or PVA glue
- Water
- Bucket or mixing bowl
- Paintbrush or foam brush
- Rubber gloves
- Painter’s tape
- Sandpaper or sanding block
- Vacuum or broom
- Damp cloth or mop
- Wood filler or floor patch, if needed
- Optional wood stain
- Floor-grade polyurethane or water-based floor sealer
- Paint tray
- Roller suitable for sealer
- Small brush for edges and corners
- Knee pads
- Utility knife or scissors
- Felt pads for furniture legs
If you are doing a full room, a roll of brown kraft paper is much easier than collecting grocery bags. You can usually find kraft paper rolls, foam brushes, sanding blocks, disposable gloves, painter’s tape, and floor-grade polyurethane on Amazon or at your local hardware store. It is one of those projects where the supply list is simple, but having everything ready before you begin makes the process much smoother.
Before You Start
The secret to a good paper bag floor is not the paper. It is the preparation and the sealing.
Your floor needs to be:
- clean
- dry
- smooth
- grease-free
- dust-free
- stable
- free from peeling paint or loose flooring
If the floor underneath is dusty, oily, loose, damp, or flaking, the paper will not stick properly. This is one of those annoying DIY truths we all wish we could ignore, but sadly, the floor always knows.
Take your time with the prep work. It makes the finished result much better.
Step 1: Clear The Room
Remove all furniture, rugs, and loose items from the room. Take off floor vents if possible.
Use painter’s tape around skirting boards, trim, built-ins, door frames, or anywhere you do not want glue or sealer to go.
Start with a completely empty space if you can. You will need room to work and a way to move backward as you apply the paper so you do not trap yourself in a corner.
Step 2: Clean The Floor Thoroughly
Sweep or vacuum the entire floor.
Then mop or wipe it down to remove dirt, dust, grease, wax, and residue from old cleaning products.
If the floor has sticky patches, scrub them properly. Glue will not bond well over grime or mystery household stickiness. Every home has at least one mystery sticky patch, usually in a corner where nobody admits responsibility.
Let the floor dry completely before moving on.
Step 3: Repair Holes And Rough Spots
Check the floor for cracks, gaps, nail holes, dents, uneven seams, or peeling areas.
Use wood filler, floor patch, or a suitable repair product for your floor type. Allow it to dry according to the product instructions.
Once dry, sand the repaired areas smooth.
Paper bag flooring has texture, but it will not hide large bumps or deep holes. In fact, once the sealer goes on, some flaws can become more obvious.
Step 4: Lightly Sand The Floor
Lightly sand the surface so the glue has something to grip.
You do not need to sand dramatically. You are just removing shine and roughing up the surface slightly.
This is especially important if you are working over old vinyl, painted floors, or any smooth sealed surface.
After sanding, vacuum very thoroughly. Then wipe the floor again with a damp cloth and let it dry.
Step 5: Tear The Paper
Tear your brown kraft paper into irregular pieces.
A good size is roughly the size of your hand, but mix in some smaller and larger pieces for a more natural look.
Avoid cutting perfect squares unless you want a patchwork tile effect. Torn edges blend much better and help create that organic faux-leather look.
For more texture, crumple each piece of paper into a ball, then smooth it back out. This adds wrinkles and gives the finished floor more character once it is stained and sealed.
Set aside smaller pieces for corners, edges, and around door frames.
Step 6: Mix The Glue
In a bucket or bowl, mix:
- 1 part white glue
- 1 part water
Stir until smooth.
The mixture should be thin enough to brush easily but still sticky. If it feels too watery, add a little more glue. If it is too thick and dragging, add a splash more water.
Wear gloves for this part. It gets messy, and while messy crafting is often a sign of progress, nobody needs gluey hands for the rest of the afternoon.
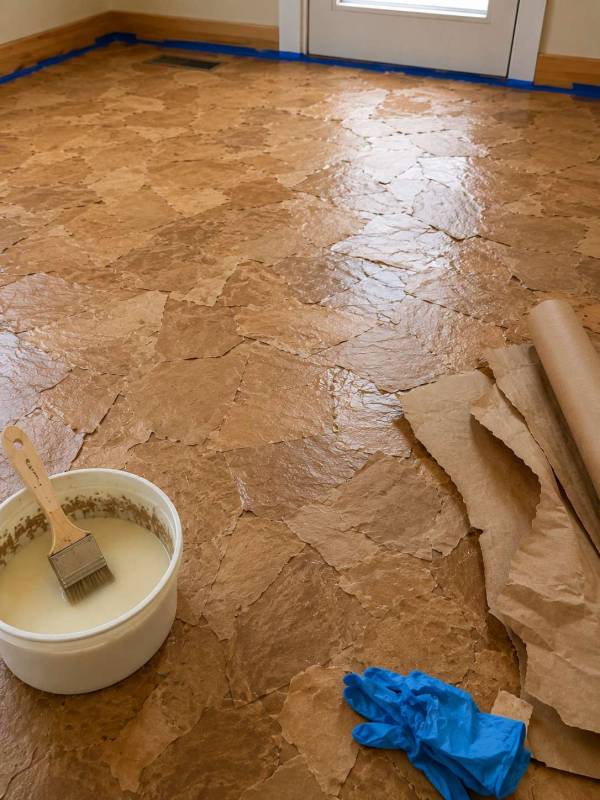
Step 7: Start Applying The Paper
Begin in the farthest corner of the room and work toward the exit.
Brush a small section of floor with the glue mixture.
Take one piece of paper, brush glue onto the back, place it onto the floor, and smooth it down with your hands or brush.
Brush a little more glue over the top if needed.
Overlap each piece slightly so there are no gaps. Continue placing pieces in a random pattern.
Press out large air bubbles as you go. Small wrinkles are fine and actually add to the finished texture, but big raised bubbles may cause problems later.
Step 8: Work In Small Sections
Do not cover the whole floor with glue at once. Work in small, manageable areas so the glue does not dry before you apply the paper.
Keep turning the paper pieces in different directions. This helps avoid obvious lines or repeating patterns.
Use smaller pieces along edges and in corners. Press these firmly so they do not lift.
If you accidentally create a section that looks too uniform, just add a few smaller pieces over the top to break it up.
This is a forgiving project. It is meant to look handmade and textured, not factory-perfect.
Step 9: Let The Paper Dry Completely
Once the floor is covered, let it dry fully.
This may take overnight or longer, depending on the weather, humidity, floor type, and how much glue you used.
Do not rush this stage. If moisture is trapped under the sealer, the finish can turn cloudy, bubble, or lift.
The floor should feel completely dry and firmly bonded before you add stain or sealer.
Step 10: Stain The Floor, If Desired
Staining is optional.
Natural brown kraft paper already has a warm rustic look, but stain can deepen the colour and make the floor look more like aged leather.
Before staining the whole floor, test your stain on a spare piece of glued paper. Paper absorbs stain differently from wood, and it can become dark very quickly.
Apply stain lightly with a brush or rag. Work in small sections and wipe away excess stain so it does not pool too heavily in the wrinkles.
Popular stain looks include:
- medium brown for a soft leather look
- dark walnut for a richer rustic finish
- light brown for a parchment-style floor
- no stain for a natural kraft paper look
Let the stain dry completely before sealing.

Step 11: Seal The Floor
This is the most important step.
Use a floor-grade polyurethane or durable water-based floor sealer. Do not use ordinary craft varnish. This floor needs a tough protective surface.
Apply the first thin coat with a roller. Use a brush around the edges, corners, and trim.
Let the coat dry according to the product directions.
Apply several more thin coats, allowing each coat to dry properly before adding the next. Lightly sand between coats if the sealer instructions recommend it, and always remove dust before applying another coat.
For a low-traffic room, you may be able to use three to four coats. For a room that will be used regularly, I would use at least five to six thin coats.
Thin coats are better than thick coats. Thick sealer can dry unevenly, bubble, or look cloudy.
Step 12: Allow The Floor To Cure
Dry to the touch does not always mean fully cured.
Follow the sealer instructions for cure time before moving furniture back into the room. This may be several days, depending on the product.
When you do replace furniture, add felt pads to the legs. Avoid dragging furniture across the floor, especially while the sealer is still curing.
A little patience here can save you from scratches, dents, and the sort of DIY heartbreak that makes you stand silently in the room questioning every life choice.
Can You Use Paper Bag Flooring Over Concrete?
Yes, but the concrete must be clean, dry, and free from moisture problems.
Concrete can hold moisture, so test first if you are unsure. Tape a piece of plastic to the floor and leave it overnight. If condensation appears under the plastic, the floor may not be suitable without proper moisture treatment.
Paper bag flooring over concrete works best in dry indoor areas, not damp basements or garages.
Can You Use Paper Bag Flooring Over Vinyl?
Yes, you can apply paper bag flooring over vinyl if the vinyl is firmly attached, smooth, and not peeling or bubbling.
Clean it very well and lightly sand the surface first so the glue can grip.
If the vinyl is loose or cushioned, it is better to remove it or choose a different flooring solution.
How Durable Is Paper Bag Flooring?
Paper bag flooring can be surprisingly durable when it is sealed properly.
The paper creates the decorative layer, but the polyurethane creates the protective wear layer. That means the durability depends heavily on how well you seal it.
It is not the same as tile, hardwood, or commercial vinyl, but it can hold up well in light to moderate household areas.
For high-traffic spaces, add extra coats of sealer and use rugs or mats in the busiest spots.
Paper Bag Flooring Tips
Use kraft paper from the same roll for a consistent colour.
Tear paper instead of cutting it.
Crumple the paper first for more texture.
Work from the far corner toward the doorway.
Do not leave gaps between pieces.
Do not oversaturate the paper with glue.
Let the glue dry completely before staining.
Test stain before applying it to the whole floor.
Use a proper floor-grade sealer.
Apply several thin coats instead of one or two thick coats.
Let the floor cure before replacing furniture.
Add felt pads under furniture legs.
Common Mistakes To Avoid
The biggest mistake is rushing.
Paper bag flooring is inexpensive, but it is not quick. Every layer needs time to dry.
Avoid these common problems:
- applying paper to a dirty floor
- skipping sanding
- using too much glue mixture
- leaving air bubbles
- not overlapping the paper
- staining before the glue is dry
- using too few coats of sealer
- moving furniture back too soon
- using the wrong type of sealer
If you take your time, the result will look much better and last longer.
Paper Bag Flooring Style Ideas
You can change the finished look depending on how you prepare and finish the paper.
For a faux leather floor, crumple the paper well and use a warm brown stain.
For a rustic stone look, use larger torn pieces and vary the stain slightly.
For a lighter farmhouse finish, skip the stain and use a matte or satin clear sealer.
For a dramatic old-world look, use darker stain and a satin finish.
For a craft room or studio, try adding a darker border around the edge using smaller paper pieces.
This technique works beautifully in creative spaces because it already has that handmade, slightly imperfect charm. If you are refreshing a craft room, you may also enjoy our craft room storage ideas for making your space more functional once the floor is finished.
Is DIY Paper Bag Flooring Worth It?
If you want a cheap flooring makeover and you do not mind a hands-on project, paper bag flooring is absolutely worth considering.
It is budget-friendly, creative, and surprisingly attractive when done well. It gives an old floor a completely new look without the cost of laminate, timber, tile, or professional installation.
It does take patience. You will spend time tearing paper, gluing, smoothing, waiting, staining, sealing, and waiting again. But the finished floor has so much character.
And there is something very satisfying about telling people your lovely new floor started with brown paper and glue.
Quick Step-By-Step Paper Bag Flooring Instructions
- Remove all furniture from the room.
- Tape around trim, skirting boards, and door frames.
- Sweep and mop the floor thoroughly.
- Repair holes, cracks, and rough spots.
- Lightly sand the floor.
- Vacuum and wipe away all dust.
- Tear brown kraft paper into irregular pieces.
- Crumple each piece, then smooth it out.
- Mix equal parts white glue and water.
- Brush glue onto a small section of floor.
- Apply paper pieces, overlapping the edges.
- Smooth out large air bubbles.
- Continue until the whole floor is covered.
- Let the floor dry completely.
- Apply stain if desired.
- Let the stain dry fully.
- Seal with multiple thin coats of floor-grade polyurethane.
- Allow the floor to cure.
- Add felt pads to furniture legs.
- Move furniture back carefully.
You can make a floor out of brown paper bags . Really you can. Don’t believe me?


I think that if you did the stain in two coats and wiped it down with a clean rag after applying you wouldn’t get those dark puddles.
Very cool idea
I would like to try this on my front porch. It is painted wood, do I need to take the paint off first before applying the paper bags?
I would love to do this in by kichen