• Home
  • Suggest A DIY
  • DIY Newsletter

Home and Garden

Ideas For DIY

  • About CraftGossip
  • Our Network
    • Bath & Body Crafts
    • Candle Making Ideas
    • Crochet Ideas
    • Cross Stitch
    • Edible Crafts
    • Felting Patterns
    • Glass Art
    • Home & Garden Ideas
    • Indie Crafts
    • Jewelry Making
    • Kids Crafts
    • Knitting Patterns
    • Lesson Plans
    • Needlework
    • Party Ideas
    • Polymer Clay
    • Quilting Ideas
    • Recycled Crafts
    • Scrapbooking
    • Sewing Patterns
    • Card Making
    • DIY Weddings
    • Not Craft Ideas
  • Giveaways
  • Roundups
  • Store
  • Search

60 New Uses For Everyday Items

May 24, 2014 by Vikram Goyal

Lots-of-creative-new-uses-for-old-things

Are you looking for new and innovative ways to use everyday items around your home? Look no further than this comprehensive list of 60 new uses for everyday items, hand-picked by our editor. This list, curated by Listotic, is packed with creative and unexpected ways to repurpose common items that you may have never thought of before.

From using nail polish as an invisible glue to repurposing shower caps as shoe protectors, this list is sure to surprise and inspire you. You will also find new ways to use items like rubber bands, binder clips, and even old t-shirts. These ideas are not only unique and interesting but also very practical.

This list is perfect for anyone looking to save money, reduce waste, and get the most out of the items they already have. So, whether you’re a DIY enthusiast or just looking for ways to be more resourceful, head over to Listotic and check out their list of 60 new uses for everyday items and start getting creative with the items you already have!

If the answer to both those questions is no, then you need to look at this list of great new ideas for everyday items from listotic: new ideas for everyday items. Some of these ideas are weird and whacky, but some are actually quite useful.
 

«
»

Comments

  1. Becky PS says

    May 26, 2014 at 12:44 pm

    Cool. Thanks!

Have you read?

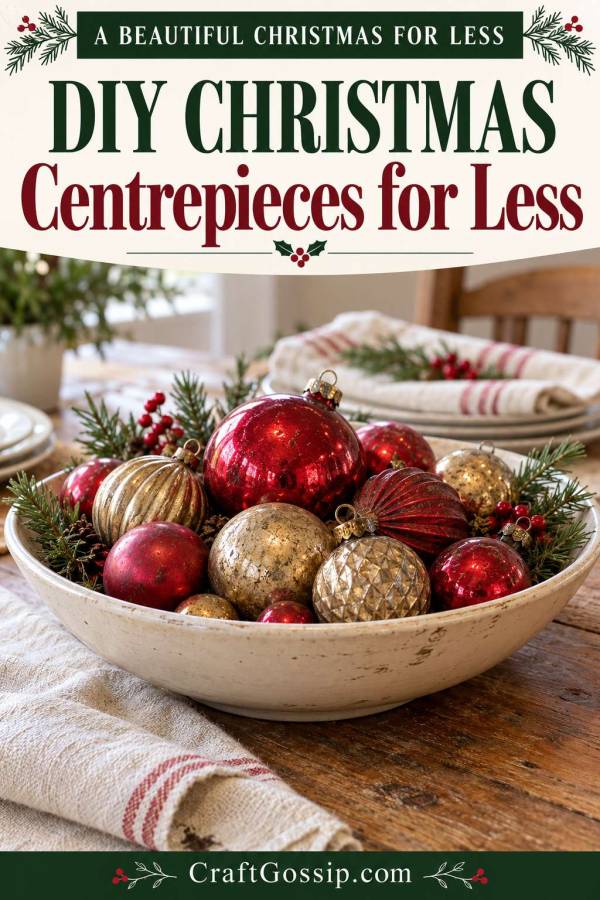
DIY Christmas Table Centrepieces That Look Expensive but Cost Less

A ready-made Christmas centrepiece can be very tempting.

It is coordinated, arranged and waiting to go straight onto the table. Unfortunately, that convenience can take a noticeable bite out of the Christmas budget.

If you are saving money, making your own centrepiece is worth considering. You may already have the container, decorations and finishing touches tucked away at home.

The most effective arrangements usually have one clear idea. They do not need a bit of everything from the craft cupboard.

Choose the project that best matches your existing supplies.

Before you start, choose the right size

Place your serving dishes on the table first.

A centrepiece should fit into the space that remains, with room for people to reach glasses and pass food. Sit down and check that it does not block the person opposite.

For a narrow table, use one compact arrangement or move your display to a sideboard.

That is more useful than creating a magnificent decoration that gets evicted as soon as lunch appears.

1. A bowl of Christmas baubles

Gather: a shallow bowl, existing ornaments and an optional fabric mat.

Choose one or two colours from your decorations box. Place larger baubles in the bowl first, then fill visible spaces with smaller ones.

Turn hanging loops discreetly towards the middle where practical, and keep the arrangement low and stable.

Our Christmas bauble centrepiece tutorial offers a more structured option. Keep yours loose if you want the ornaments available for other displays.

Keep costs down: use a fruit bowl or serving dish that will not be needed for lunch. Skip floral picks and glitter sprays.

2. A row of small greenery jars

Gather: three or five small recycled jars, water, suitable stems and existing ribbon.

Clean the jars and remove labels if needed. Group similar sizes together or use a repeated ribbon colour to connect different shapes.

Add a little water and a few short stems to each.

Use identifiable plants that are appropriate for your household, avoid sprayed material and keep foliage away from food. Leave unknown berries in the garden.

Keep costs down: use fewer stems and give them space. You do not need to recreate a florist’s bouquet.

3. A generous bowl of citrus

Gather: an ordinary bowl and whole oranges or lemons from your grocery supply.

Arrange the fruit so the bowl looks comfortably full rather than precariously stacked.

Repeat one fruit colour elsewhere through paper place cards or existing ribbon. Orange looks particularly cheerful with white plates and a timber table.

Keep the fruit free of paint, glue and glitter.

Keep costs down: use fruit you will eat afterwards. Buying decorative quantities that go to waste is not a saving.

4. A handmade paper village

Gather: cardstock, scissors, glue and a suitable base or tray.

Our paper Christmas town tutorial provides a detailed starting point.

Choose one paper colour for a simple, coordinated display. A small group of houses can look more polished than a large village with lots of competing colours.

Allow time for cutting and drying. This is a prepare-ahead project rather than something to begin while the guests are parking.

Keep costs down: use suitable cardstock already in your stash and leave out optional embellishments.

5. Small cinnamon bundles on a tray

Gather: cinnamon sticks you already own, ribbon and a small tray.

Follow our cinnamon bundle centrepiece for the basic arrangement.

One or two small bundles can provide a natural detail without taking up much space. Do not expect a strong room-filling fragrance; the effect will vary.

Keep costs down: choose this option only if the sticks are already available or fit comfortably within your budget.

Do you need to add lights?

For a daytime Christmas meal, probably not.

For evening, existing battery lights may be enough. If you need them for repeated use, compare warm-white LED candles on Amazon, including battery costs and secure battery compartments.

Keep lighting suitable for its surroundings and follow the manufacturer’s instructions.

Avoid the “cheap project” shopping trap

Before starting, list everything you would need to purchase.

If a simple arrangement suddenly requires a new bowl, paint, glue, ribbon and specialty decorations, choose a different project.

The centrepiece that saves you the most money is often the one your cupboard can already provide.

Explore

Bedrooms Christmas Craft Ideas Easter Garden and Yard Halloween Holidays Home Decor Kitchens Living Areas Makeovers and Redos More DIY's Organizing Outdoor Decor Porches, Patios and Decks Recycled Crafts Seasonal Trash to Treasure Windows and Walls Wreaths

RSS feed: More Articles More Articles

  • 10 Gingerbread Cross Stitch Patterns for a Handmade Christmas
  • 8 Christmas Activities for Babies and Infants That Support Development Through Play
  • Vintage Christmas Bell Crochet Pattern – A Festive Make for Holiday Kitchens and Handmade Gift Baskets
  • 10 Old Book Christmas Crafts For Vintage Holiday Decor
  • DIY Christmas Table Centrepieces That Look Expensive but Cost Less
  • From Amateur to Etsy-Worthy: Polymer Clay Tips That Change Everything
  • Clay Studio Series – YouTube Video Review DIY Pottery Christmas Tree Platte
  • Christmas Tree Crochet Scarf – A Fun and Festive Pattern Worth Revisiting
  • Paper Snowflake Art Book Review: 100 Patterns for a Nostalgic Paper Craf
  • 20 Infant Lesson Plan Ideas for Birth to 12 Months

Copyright © 2026 · CraftGossip | Start Here | Contact Us | Link to Us | Your Editors | Privacy and affiliate policy