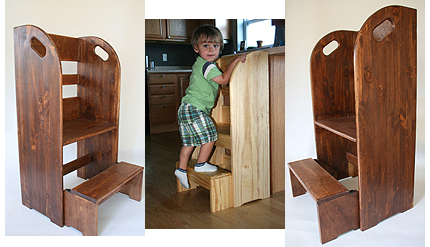
 I was over at a friend’s house last week getting a carton of farm fresh eggs from her cute and friendly chickens 🙂 when I noticed this nifty looking step stool at the end of her kitchen counter. Turns out she and her husband make these cool step stools and have decided to go into business for themselves. Love that entrepreneurial spirit! Anyway, she told me about the stools and turns out these are not only cool, but a great way for kids to show some independence while safely standing at the counter with mom or dad.
Does your little one like to watch while you cook, or maybe help stir while you bake? I know when mine were little I was always worried about them climbing and then falling off of those little kitchen step ladders or stools. I wish I’d had one of these “Step On Up Stepstools” when mine were little! I still have a little while before it’s grandma time for me, but when that time comes I know what I’ll have at my kitchen counter!
These aren’t just great in the kitchen either. This is a nifty helping hand in the bathroom too for washing little hands and brushing baby teeth. 🙂 This is even ideal for young toddlers. Because the sides of this stool surrounds them on all sides, there’s no worry of them falling off backwards!
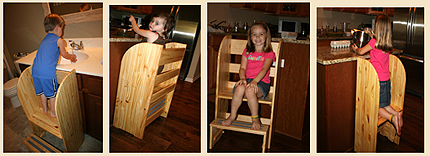 I was definitely impressed with the quality of workmanship that Claudia and her husband put into these items. Their enthusiasm shines through and they use these regularly in their own home with their grandchildren. Don’t take my word for it though, have a look at some of the testimonials on their website, Wheatland Woodcraft. They also offer other items in their shop, so be sure to take a look around while you are there. 🙂
Do you have a friend who’s product really impressed you? Send it my way!
Check out this Dollar Tree Rustic ladder tutorial here on our sister site Craftbits.com

It looks like it needs to be anchored or when the kids grab onto it, it will fall over.
I actually have this step stool and I run an in-home daycare, and have an almost 3-year-old son. I have kids as young as a year, and as old as 8 who have used this with no problems at all. It is a heavy piece, and wide enough at the base that it will not fall over. I think if your personal preference is to anchor it, that wouldn’t be a big deal to do, however, it really is not needed.
Thank you so much for your feedback. As with any product (in this situation a children’s product) children must be supervised and educated. It’s up to the adult to use their judgment on how they can communicate safety to the child. We have written a disclaimer (see below). We have reviewed and studied many stepstools that perhaps can cause harm from a fall that are out on the market. One in particular with the same purpose, the child can step the wrong way and fall through any of the sides. I think your idea can most definately be a preference that a consumer can add to our product if they feel the need to. As a Nanny and a grandmother myself I make it a point to never leave a child unsupervised. The Step On Up Stepstool is meant for that family closeness at the counter with adult supervision, yet to prevent a child from running around when they need to be supervised in general. Also to encourage the child to feel independent at the adult level with some activity near the adult in case the adult needs to be in a specific room such as kitchen. We have sent out warning labels with our step stools reminding parents to not leave children unsupervised. What we appreciate about your comment is the thought of detail. Feedback is important to us to improve or add variety to our products. Thank You!!!
Claudia and Keith
Wheatland Wood Craft, LLC
**We are committed to producing the safest products available in the marketplace. Each of our items is designed to be as safe as possible. Since we cannot control the ultimate use of our products, we cannot assume responsibility for injury due to misuse or misapplication of our products by the user or consumer. This product has not been safety tested. It is intended for children only. Never leave a child unattended.
Please visit our website at http://www.wheatlandwoodcraft.com for reviews