• Home
  • Suggest A Craft
  • DIY Newsletter

Home and Garden

Ideas For DIY

  • About CraftGossip
  • Our Network
    • Bath & Body Crafts
    • Candle Making Ideas
    • Crochet Ideas
    • Cross Stitch
    • Edible Crafts
    • Felting Patterns
    • Glass Art
    • Home & Garden Ideas
    • Indie Crafts
    • Jewelry Making
    • Kids Crafts
    • Knitting Patterns
    • Lesson Plans
    • Needlework
    • Party Ideas
    • Polymer Clay
    • Quilting Ideas
    • Recycled Crafts
    • Scrapbooking
    • Sewing Patterns
    • Card Making
    • DIY Weddings
    • Not Craft Ideas
  • Giveaways
  • Roundups
  • Store
  • Search

Top Excuses For Not Being Organized, Are You Guilty?

January 30, 2020 by Shellie Wilson

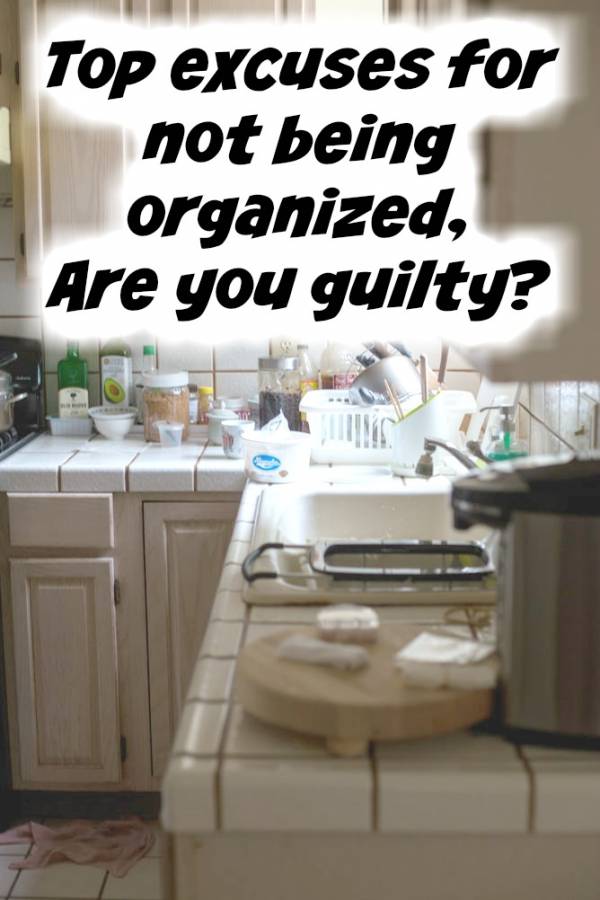
We all know becoming better organised remains a key to victory in terms of organising our personal life combined with our possessions. However common excuses offer a simple way of negating the effort required to create a sense of effective organisation. The top excuses encountered range from modified mental as well as emotional excuses. Combine the inability to visualise goals with a defeatist attitude, and you’ll start to recognise these excuses sound all too common. Learning the top excuses allows you to create a valuable proactive defence, ensuring you complete your organisation attempts every time.

Failure to see goals

Not seeing the organisational goals or how they will become accomplished leads to a lack of imagination that disallows organisation to occur. The mind fails to see positively the results of organising so a lazy complacency sets into the conscious mind. It’s important to see the end result.

The attitude “Somebody else remains better at organising than me”

This attitude exists as a referral system that takes responsibility and passes it onto somebody else. Referral remains a chief excuse for becoming redundant about organising. In essence it’s easier to make someone appear better in your own eyes, if it involves you doing less work.

Getting organised is hard work

Getting organised will only mean another mess later on once the organisational sparkle wears off. A natural entropic state gets created through the physical act of organisation. The mind creates many barriers yet the physical process remains extremely easy to complete. Keeping organised does require maintenance, to avoid the entropy creeping in a preferred direction of disorganisation.

To live in disorganised state reflects an inner creative spirit

This prime example of not becoming organised reflects a person’s ability to define their existence as artistic in nature. Living in a disorganised mess allows the excuse of creativity to interfere with efficiency or organisation. Challenging this misconception remains difficult as the core perception here involves changing a personal belief.

Emotional as well as mental states

Stating illness, depression, anxiety, and vocal frustrations connected with wasted money may seem to offer ideal top excuses for not becoming organised. However these emotional mental states effectively creating mind barriers to the start of the organising process. Organisation requires effort. Break the mind barriers to start reorganisation simply through the act of starting. The thoughts drag out the negativity into physical complacency.

Once you recognise the top excuses for remaining inactive, whether in yourself or other people, you can begin to negate the justification for doing nothing. Becoming better organised results in a more efficient lifestyle. Creating a streamlined mode of living helps achieve a greater positive experience. Superior organisation equals supplementary time for social, as well as leisure events. Less time’s wasted in your daily life searching for lost items. Every place has a unique easily identifiable home, providing you avoid the top excuses for not organising yourself, as well as listening to those around you.

Related Posts:

  • Book Review - Cozy White Cottage: 100 Ways to Love…
  • Imagine being able to send Mom flowers every month…
«
»

Have you read?

DIY Eyeball Plant – Creepy Halloween Craft with Ping Pong Balls

Halloween crafts are the most fun when they’re a little bit spooky and a little bit silly. This DIY Eyeball Plant ticks both boxes—it’s quirky, creepy, and surprisingly easy to make. With nothing more than ping pong balls, pipe cleaners, and a flower pot, you can whip up a planter that looks like it came straight out of a mad scientist’s greenhouse.

It’s budget-friendly, kid-friendly (with a bit of hot glue supervision), and the kind of decoration you’ll want to bring out year after year. Let’s get crafting!

Supplies You’ll Need

  • 12–20 white ping pong balls 
  • Permanent markers or acrylic paints (black, blue, green, yellow, red) 
  • Fine red marker or paint pen (for veins) 
  • Green chenille stems (pipe cleaners) 
  • Small pot, tin bucket, or Halloween-themed planter 
  • Floral foam or foam block 
  • Hot glue gun and glue sticks 
  • Optional: fake moss, shredded paper, or Halloween spider webbing to cover the foam 
  • Optional: gauze or bandages to wrap the pot for a “mummy look” 

Step-by-Step Instructions

Step 1: Make Your Eyeballs

  1. Start with plain white ping pong balls. 
  2. Use a black marker or paint to draw the pupil. 
  3. Add a ring of color around the pupil for the iris—blue, green, yellow, and red all look fantastic. 
  4. With a fine red marker, draw little squiggly lines radiating out from the iris to make veins. 
  5. Set aside to dry. 

Crafty Tip: Add a coat of glossy Mod Podge or clear nail polish to give your eyeballs a wet, realistic shine.

Step 2: Attach to Stems

  1. Use a thumbtack or skewer to poke a small hole in the back of each ping pong ball. 
  2. Add a dab of hot glue into the hole. 
  3. Insert one end of a green chenille stem into the hole and hold it until the glue sets. 
  4. Bend the stems at different angles so your eyeballs “grow” like wild plants. 

Step 3: Plant Your Eyeball Stems

  1. Place a block of floral foam inside your flower pot. 
  2. Stick the eyeball stems into the foam, varying the heights and angles for a natural, chaotic look. 
  3. Cover the foam with moss, shredded paper, or fabric scraps to finish it off neatly. 

Step 4: Style and Decorate

  • Mummy Wrap: Wrap gauze or white fabric strips around the pot and add a painted eye for a fun, spooky twist. 
  • Extra Creepy: Add small plastic spiders, snakes, or bugs crawling among the stems. 
  • Glow Factor: Use glow-in-the-dark paint for pupils so the eyeballs glow at night. 
  • Party Favors: Make mini versions in paper cups for table centerpieces or party giveaways. 

Where to Display Your Eyeball Plant

  • On your Halloween buffet table as a quirky centerpiece. 
  • By the front door to greet trick-or-treaters. 
  • In your living room with pumpkins and cobwebs for a full spooky effect. 
  • At the office desk or classroom for a non-messy, attention-grabbing decoration. 

Variations to Try

  • Bouquet Style: Tie stems together with black ribbon instead of planting them in foam. 
  • LED Glow Eyes: Use clear ping pong balls with mini LED lights inside. 
  • Rainbow Eyes: Paint each iris a different bright color for a fun twist. 

This DIY Eyeball Plant is the kind of project that proves Halloween decorating doesn’t need to be complicated or expensive. With just a handful of supplies, you can make something wonderfully creepy that gets people talking.

So, what do you think—will you stop at one eyeball plant, or make a whole garden of them?

10 Halloween Crafts Made From Scrap Wood [Home and Garden]

12+ Halloween Spider Crafts For Kids [Kids Crafts]

13 Awesome Halloween Cape Free Sewing Patterns [Sewing]

Explore

Bedrooms Christmas Craft Ideas Easter Garden and Yard Halloween Holidays Home Decor Kitchens Living Areas Makeovers and Redos More DIY's Organizing Outdoor Decor Porches, Patios and Decks Recycled Crafts Seasonal Trash to Treasure Windows and Walls Wreaths

RSS More Articles

  • Learn about Costa Rica for Kids
  • DIY Eyeball Plant – Creepy Halloween Craft with Ping Pong Balls
  • Trick or Treat in Style with the Free Happy Jack Treat Bag Pattern
  • DIY Milk Jug Halloween Skeleton Faces – Day of the Dead Inspired
  • 13 Witchy Halloween Card Ideas using Stamps and Dies
  • Create Personalized Dish Towels with DIY Infusible Ink: A Simple Craft Idea
  • DIY Clay Egg Tray – Handmade Farmhouse Charm for Your Kitchen
  • Textured Hat Knitting Patterns
  • Free Crochet Skull and Bones Granny Square Pattern
  • Easy Fall Crafts To Decorate Your Home

Copyright © 2025 · CraftGossip | Start Here | Contact Us | Link to Us | Your Editors | Privacy and affiliate policy