• Home
  • Suggest A Craft
  • DIY Newsletter

Home and Garden

Ideas For DIY

  • About CraftGossip
  • Our Network
    • Bath & Body Crafts
    • Candle Making Ideas
    • Crochet Ideas
    • Cross Stitch
    • Edible Crafts
    • Felting Patterns
    • Glass Art
    • Home & Garden Ideas
    • Indie Crafts
    • Jewelry Making
    • Kids Crafts
    • Knitting Patterns
    • Lesson Plans
    • Needlework
    • Party Ideas
    • Polymer Clay
    • Quilting Ideas
    • Recycled Crafts
    • Scrapbooking
    • Sewing Patterns
    • Card Making
    • DIY Weddings
    • Not Craft Ideas
  • Giveaways
  • Roundups
  • Store
  • Search

Unicorn Door Wreath Tutorial

September 19, 2017 by Shellie Wilson

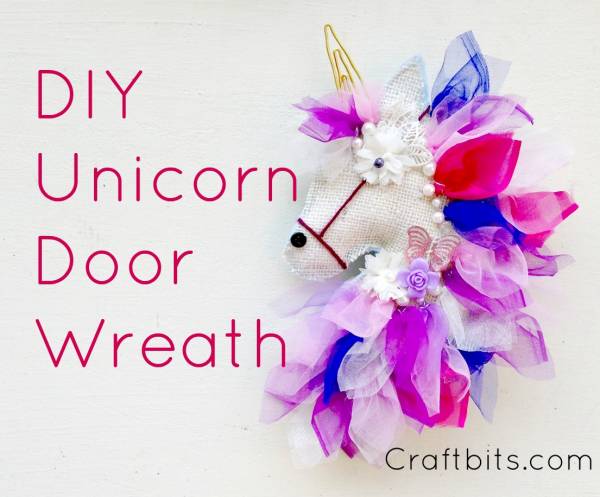
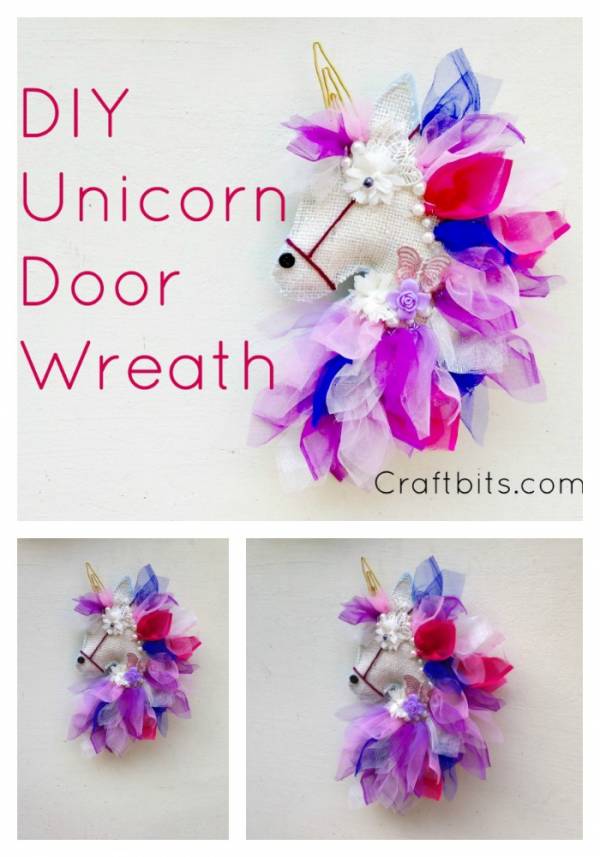
This Unicorn wreath can be a great gift for unicorn lovers and a great project for crafty unicorn fans! Learn how to make a Unicorn wreath with this free step by step tutorial. The colors of this DIY door wreath can be changed out to suit your decor or party style. The burlap in this wreath is light colored but you can get darker fabric colors if you wish to make a darker unicorn. However, we all know unicorns are either white or pink right?

We love our Unicorn parties around here so much that we decided to create our own DIY Unicorn Party  Pinterest board. This means we have literally 100’s of our favorite Unicorn ideas, party decorations, Unicorn cakes, and other Unicorn tutorials and crafts all in one spot. You can check them all out here DIY Party Ideas – Unicorn.  Or check out these Unicorn Crafts and these fun Unicorn Party decorations.

Here are the how-to instructions

Materials required

• Burlap fabric

• Scissors

• Template

• Net fabric

• Hot glue

• Needle and thread

• Supplies for decorating

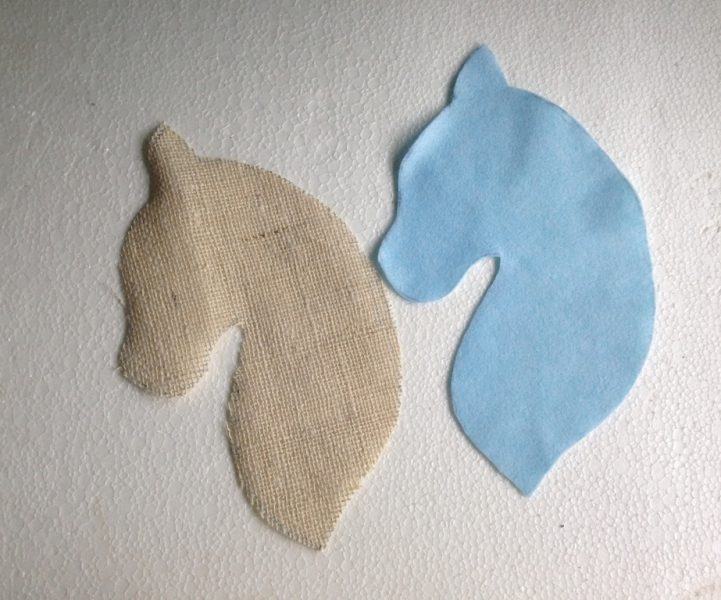
Step-1: Print a simple horse or unicorn head side pattern and cut out the pattern. Place the template on the selected fabric to trace and cut out 2 pieces of fabric along the traced pattern. I’m using a light blue felt fabric for the back side and burlap fabric for the front side of the unicorn.

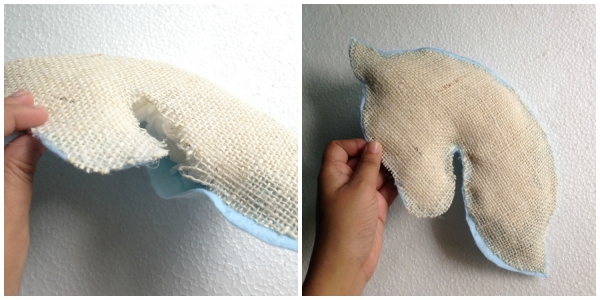
Step-2 Place both pieces together and glue the sides but don’t forget to keep a small open end for stuffing. Stuff the pattern using leftover fabrics or wool. Once you’re done stuffing make sure the close the open end to secure the stuffing.

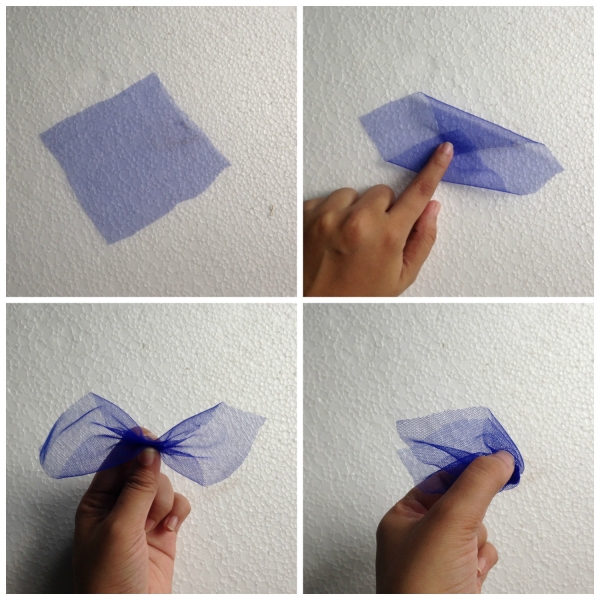
Step-3: Take a tissue or net fabric and cut it into a small square shape. Fold the square fabric from any 2 opposite corners and join them on the centre. Now create small folds on the centre, twist and fold it into half.

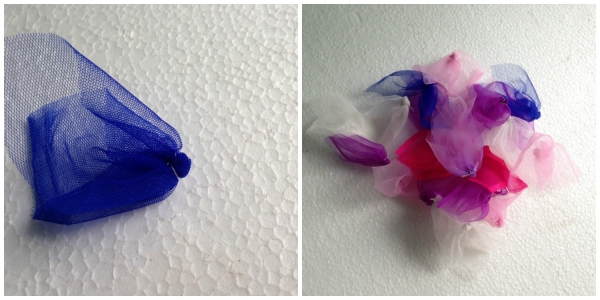
Step-4: Use thread and hook to secure the twisted centre of the pattern. Make as many as you want, you’ll need plenty of these, around 30 pieces. We’ll make the hair of the unicorn with these patterns.

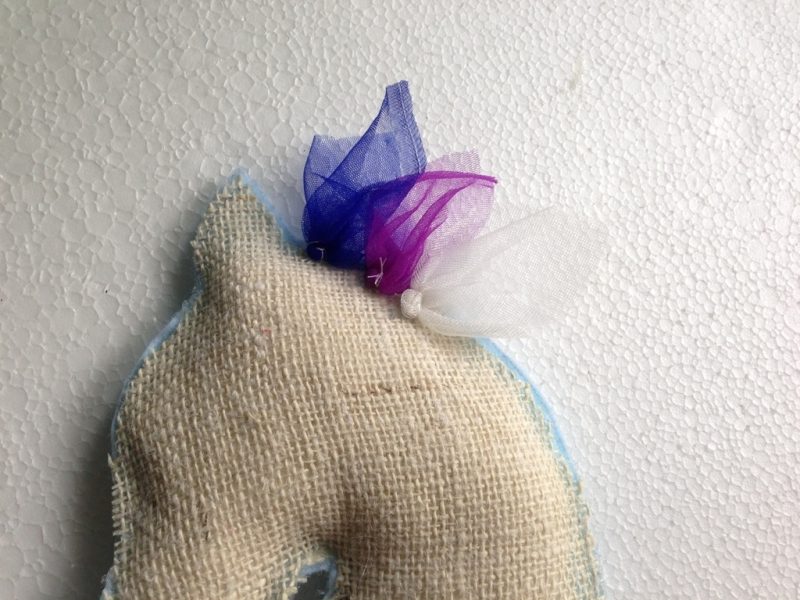
Step-5: Use hotglue gun to attach the fabric patterns with the base (head of the unicorn). Try to mix and match the colours while gluing them.

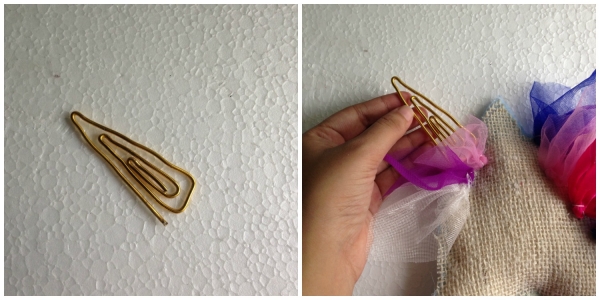
Step-6: I used a 14 gauge golden craft wire to create the horn of the unicorn, you can use anything you want to create the horn. Use hotglue to attach the horn on its place.

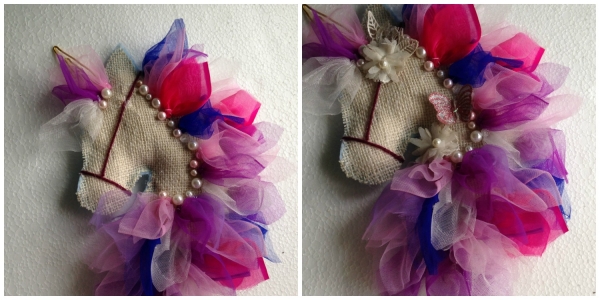
Step-7: Decorate the unicorn wreath with beads, fabric flowers, accessories, make sure to keep a vibrant colour and ornament combination.

Attach a hanging mechanism to complete the wreath.

happy Crafting!

Related Posts:

  • How To Make A Shell Door Wreath
  • Turn a Dollar Tree Shovel into the Cutest…
«
»

Comments

  1. Helen White says

    November 4, 2018 at 12:50 pm

    Cute’

  2. Kate says

    March 18, 2020 at 8:08 am

    I love how this is listed as a craftbits.com project, yet you do not link to them at all. It’s a shame when someone else’s hard work is stolen.

    • Shellie Wilson says

      March 22, 2020 at 7:13 pm

      Kate, thanks for your feedback. Craftgossip.com and Craftbits.com are owned by us. We share content regularly.

Have you read?

Master the Art of Polka Dots with This Easy Painting Tutorial!

Polka dots are timeless, fun, and the perfect way to add a little pop of personality to any project. Whether you’re looking to update home decor, clothing, or craft projects, learning how to paint polka dots is an easy way to elevate your designs. This step-by-step guide on how to paint polka dots will show you how to create perfect, uniform dots every time, no matter your skill level!

From choosing the right tools to picking the best surface for your project, this tutorial makes polka dot painting simple and fun. You can add them to pillows, canvas art, mugs, or even furniture for a fresh, playful look. So if you’re ready to get crafty and embrace the dot trend, this tutorial is for you!

Excited to start painting your own polka dots? href=”https://www.pillarboxblue.com/how-to-paint-polka-dots/” target=”_new” rel=”noopener” data-start=”888″ data-end=”979″>Check out the full tutorial here!

How To Strip Paint From Your Old Furniture With Easy Off Oven Cleaner

Transform Furniture For Under $10

Thrift Store Furniture Makeover

Explore

Bedrooms Christmas Craft Ideas Easter Garden and Yard Halloween Holidays Home Decor Kitchens Living Areas Makeovers and Redos More DIY's Organizing Outdoor Decor Porches, Patios and Decks Recycled Crafts Seasonal Trash to Treasure Windows and Walls Wreaths

RSS More Articles

  • How To Sew a Banner from felted wool sweaters
  • A Sweet Skater Dress to Knit
  • Printable Animal Flash Cards
  • 20 Cowl Crochet Patterns For Winter Gifting
  • Master the Art of Polka Dots with This Easy Painting Tutorial!
  • Do You Park Your Cross Stitch Thread? Try The Royal Roads Method
  • Etsy Spotlight – Sew Your Own Baby Dress with the Harper Dress Pattern PDF
  • July 4th Mini Scrapbook Album
  • Upcycled Writing Desk to Cocktail Cabinet
  • Create Stunning Pineapple String Art – A Fun and Easy Tutorial You Can’t Miss

Copyright © 2025 · CraftGossip | Start Here | Contact Us | Link to Us | Your Editors | Privacy and affiliate policy