• Home
  • Suggest A Craft
  • DIY Newsletter

Home and Garden

Ideas For DIY

  • About CraftGossip
  • Our Network
    • Bath & Body Crafts
    • Candle Making Ideas
    • Crochet Ideas
    • Cross Stitch
    • Edible Crafts
    • Felting Patterns
    • Glass Art
    • Home & Garden Ideas
    • Indie Crafts
    • Jewelry Making
    • Kids Crafts
    • Knitting Patterns
    • Lesson Plans
    • Needlework
    • Party Ideas
    • Polymer Clay
    • Quilting Ideas
    • Recycled Crafts
    • Scrapbooking
    • Sewing Patterns
    • Card Making
    • DIY Weddings
    • Not Craft Ideas
  • Giveaways
  • Roundups
  • Store
  • Search

What is your idea of the perfect craft room?

March 28, 2016 by Larissa Coleman

craftrooms

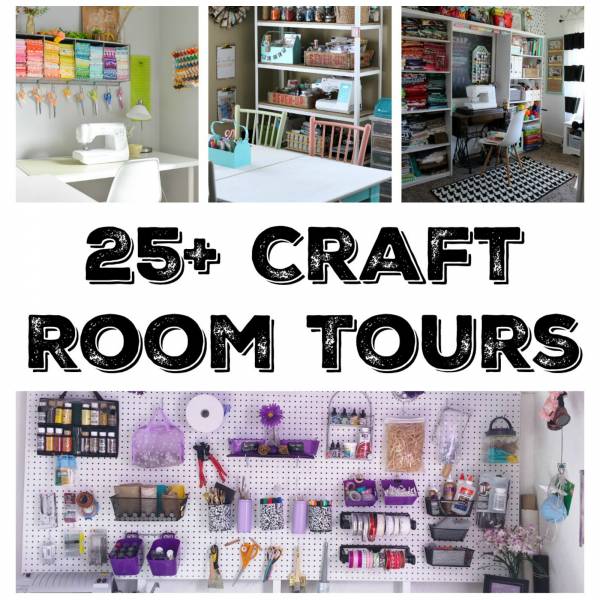
We all dream of having that perfect craft room.  A space that is both beautiful and efficient for our needs.  Whether you love paper crafting, jewelry making, sewing, or you simply need a place to store all of your yarn, one of these craft rooms are most likely on your wish list.  However, we want to know, What does your dream craft room look like?

See the post here: 25+ Craft Room Tours

With all the buzz behind the new Netflix series of “The Joy Of Tidying” by Marie Kondo (which was first a book) the internet has gone crazy for organizational tutorials and guides. Once you have worked out what sparks you joy, you still have to find a place for everything and these DIY organizational articles are a great guide.

Need help with organizing your supplies? Check out these organizational products from Scrapbook.com

Looking for more ideas on Organizing your home? Check out our Facebook Group Organize My House & Get My Sh*t Together and read some of the most popular Organization articles we have written below.

5 Tips for Organizing your Craft Room with Style

Cricut Tutorial: Fabric organizing baskets for your craft room

Tips for Craft Room Organization – Scrap Booking

Declutter and reorganize your sewing space – Sewing

Organize your sewing room – free printable checklist

10 Best Craft Room Organization Ideas Worth Stealing

20 Office & Craft Room Organization Tips – Scrap Booking

Related Posts:

  • How To Stock Your Whisky Room - Whisky Room Party Idea
  • How to Build Your Own Stylish Patio Cooler – A…
«
»

Have you read?

DIY Eyeball Plant – Creepy Halloween Craft with Ping Pong Balls

Halloween crafts are the most fun when they’re a little bit spooky and a little bit silly. This DIY Eyeball Plant ticks both boxes—it’s quirky, creepy, and surprisingly easy to make. With nothing more than ping pong balls, pipe cleaners, and a flower pot, you can whip up a planter that looks like it came straight out of a mad scientist’s greenhouse.

It’s budget-friendly, kid-friendly (with a bit of hot glue supervision), and the kind of decoration you’ll want to bring out year after year. Let’s get crafting!

Supplies You’ll Need

  • 12–20 white ping pong balls 
  • Permanent markers or acrylic paints (black, blue, green, yellow, red) 
  • Fine red marker or paint pen (for veins) 
  • Green chenille stems (pipe cleaners) 
  • Small pot, tin bucket, or Halloween-themed planter 
  • Floral foam or foam block 
  • Hot glue gun and glue sticks 
  • Optional: fake moss, shredded paper, or Halloween spider webbing to cover the foam 
  • Optional: gauze or bandages to wrap the pot for a “mummy look” 

Step-by-Step Instructions

Step 1: Make Your Eyeballs

  1. Start with plain white ping pong balls. 
  2. Use a black marker or paint to draw the pupil. 
  3. Add a ring of color around the pupil for the iris—blue, green, yellow, and red all look fantastic. 
  4. With a fine red marker, draw little squiggly lines radiating out from the iris to make veins. 
  5. Set aside to dry. 

Crafty Tip: Add a coat of glossy Mod Podge or clear nail polish to give your eyeballs a wet, realistic shine.

Step 2: Attach to Stems

  1. Use a thumbtack or skewer to poke a small hole in the back of each ping pong ball. 
  2. Add a dab of hot glue into the hole. 
  3. Insert one end of a green chenille stem into the hole and hold it until the glue sets. 
  4. Bend the stems at different angles so your eyeballs “grow” like wild plants. 

Step 3: Plant Your Eyeball Stems

  1. Place a block of floral foam inside your flower pot. 
  2. Stick the eyeball stems into the foam, varying the heights and angles for a natural, chaotic look. 
  3. Cover the foam with moss, shredded paper, or fabric scraps to finish it off neatly. 

Step 4: Style and Decorate

  • Mummy Wrap: Wrap gauze or white fabric strips around the pot and add a painted eye for a fun, spooky twist. 
  • Extra Creepy: Add small plastic spiders, snakes, or bugs crawling among the stems. 
  • Glow Factor: Use glow-in-the-dark paint for pupils so the eyeballs glow at night. 
  • Party Favors: Make mini versions in paper cups for table centerpieces or party giveaways. 

Where to Display Your Eyeball Plant

  • On your Halloween buffet table as a quirky centerpiece. 
  • By the front door to greet trick-or-treaters. 
  • In your living room with pumpkins and cobwebs for a full spooky effect. 
  • At the office desk or classroom for a non-messy, attention-grabbing decoration. 

Variations to Try

  • Bouquet Style: Tie stems together with black ribbon instead of planting them in foam. 
  • LED Glow Eyes: Use clear ping pong balls with mini LED lights inside. 
  • Rainbow Eyes: Paint each iris a different bright color for a fun twist. 

This DIY Eyeball Plant is the kind of project that proves Halloween decorating doesn’t need to be complicated or expensive. With just a handful of supplies, you can make something wonderfully creepy that gets people talking.

So, what do you think—will you stop at one eyeball plant, or make a whole garden of them?

10 Halloween Crafts Made From Scrap Wood [Home and Garden]

12+ Halloween Spider Crafts For Kids [Kids Crafts]

13 Awesome Halloween Cape Free Sewing Patterns [Sewing]

Explore

Bedrooms Christmas Craft Ideas Easter Garden and Yard Halloween Holidays Home Decor Kitchens Living Areas Makeovers and Redos More DIY's Organizing Outdoor Decor Porches, Patios and Decks Recycled Crafts Seasonal Trash to Treasure Windows and Walls Wreaths

RSS More Articles

  • Trick or Treat in Style with the Free Happy Jack Treat Bag Pattern
  • DIY Eyeball Plant – Creepy Halloween Craft with Ping Pong Balls
  • DIY Milk Jug Halloween Skeleton Faces – Day of the Dead Inspired
  • 13 Witchy Halloween Card Ideas using Stamps and Dies
  • Create Personalized Dish Towels with DIY Infusible Ink: A Simple Craft Idea
  • DIY Clay Egg Tray – Handmade Farmhouse Charm for Your Kitchen
  • Textured Hat Knitting Patterns
  • Free Crochet Skull and Bones Granny Square Pattern
  • Easy Fall Crafts To Decorate Your Home
  • Copycat Sizzler Cheese Toast Recipe – Bring Back the Family Favorite

Copyright © 2025 · CraftGossip | Start Here | Contact Us | Link to Us | Your Editors | Privacy and affiliate policy