• Home
  • Suggest A DIY
  • DIY Newsletter

Home and Garden

Ideas For DIY

  • About CraftGossip
  • Our Network
    • Bath & Body Crafts
    • Candle Making Ideas
    • Crochet Ideas
    • Cross Stitch
    • Edible Crafts
    • Felting Patterns
    • Glass Art
    • Home & Garden Ideas
    • Indie Crafts
    • Jewelry Making
    • Kids Crafts
    • Knitting Patterns
    • Lesson Plans
    • Needlework
    • Party Ideas
    • Polymer Clay
    • Quilting Ideas
    • Recycled Crafts
    • Scrapbooking
    • Sewing Patterns
    • Card Making
    • DIY Weddings
    • Not Craft Ideas
  • Giveaways
  • Roundups
  • Store
  • Search

Chic Tassel Easter Basket

April 7, 2017 by Shellie Wilson

Tassel Easter Basket

White is often overlooked when it comes to Easter decorations, but these Easter Rope Baskets prove that a clean, crisp white can be just as festive as the more traditional pastel shades. There’s something so fresh and timeless about the simplicity of white baskets, and they can easily be transformed into beautiful Easter accessories with just a few colorful details.

What really makes these baskets pop is the addition of embroidered floss tassels. The contrast between the bright, pure white rope and the vibrant colors of the tassels is eye-catching and perfectly captures the spirit of spring. The best part? Making the tassels is incredibly easy, and they’re a fantastic craft to do with the family, or as a fun DIY project to customize your Easter decor.

Embroidery floss is a versatile material, and creating these tassels adds a touch of personality and fun to your baskets. You can go for classic Easter colors like soft pinks, yellows, and lavenders, or opt for brighter, bolder tones that really pop. Whether you’re using these baskets as Easter basket alternatives, decorative centerpieces, or gift baskets for loved ones, the addition of these tassels will make them uniquely yours.

Want to learn how to make these adorable embroidery floss tassels? It’s super easy! Head over to Delineate Your Dwelling for a step-by-step tutorial.

You can learn how to make them over at delineateyourdwelling.com 
 

«
»

Have you read?

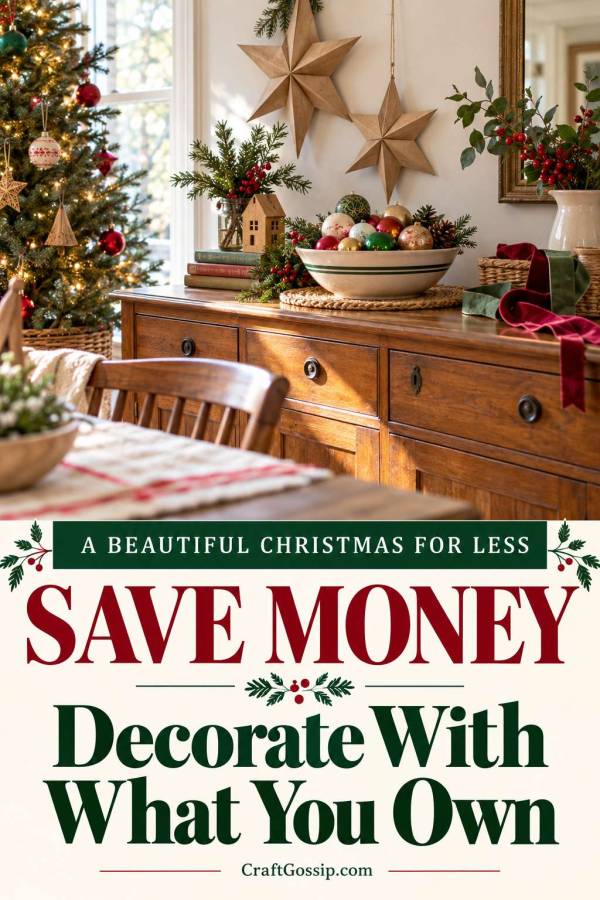
Christmas on a Budget – How to Style Your Christmas Table Using Things You Already Own

Before you buy a Christmas table runner, another packet of decorations or six matching napkin rings, have a proper rummage through your cupboards.

Not a quick glance. The sort of rummage that finds the lovely serving bowl behind the salad spinner and the ribbon you bought for a project you were absolutely going to finish.

There is a good chance you already own most of what you need for a beautiful Christmas table.

When you are saving money this Christmas, decorating is a sensible place to cut back. Everyday plates can look festive, ordinary jars can hold greenery, and a few decorations borrowed from the tree can become a centrepiece.

The secret is choosing a simple look and repeating a few details.

Start with the practical pieces

Set out your plates, cutlery, glasses and serving dishes before thinking about decorations.

Check how many people you are seating and whether everything fits comfortably. Place the empty serving dishes on the table temporarily, including protective mats for hot food.

This little rehearsal stops you creating a magnificent arrangement precisely where the roast potatoes need to go.

You do not need decorative charger plates or a different glass for every drink. Use what suits the meal and the people coming.

Gather a small decorating collection

Look around the house for:

  • A shallow fruit bowl, tray or small basket.
  • A plain tablecloth, runner or suitable fabric remnant.
  • Cloth napkins or paper napkins already in the cupboard.
  • Christmas ornaments.
  • Ribbon, twine and gift-wrap scraps.
  • Small jars or vases.
  • Cardstock for place cards.

Choose clean, colourfast fabric that will not catch easily or trail where someone could trip. If nothing suitable turns up, a clean bare tabletop is a perfectly good starting point.

Choose your colour from something you own

Rather than deciding you want a burgundy Christmas and then buying burgundy everything, let your existing supplies choose the palette.

Have plenty of red ornaments? Try red, green and cream.

Own blue-and-white dishes? Add silver or natural paper details.

Have a collection of colourful vintage baubles? Let those be the feature and keep the place settings simple.

Repeat one accent colour in the centrepiece, the napkins and the name cards. That repetition helps different objects feel connected.

Make an ordinary bowl your centrepiece

Put a shallow bowl in the middle of the table and loosely arrange a handful of baubles inside.

Start with larger ornaments, then fill gaps with smaller ones. Stop before they become unstable.

Our Christmas bauble centrepiece tutorial offers inspiration for a more constructed arrangement. For a temporary display, keep your ornaments loose so they can return to the tree.

If you need that bowl for food, choose another container now. Buying a replacement serving bowl defeats the exercise rather quickly.

Give each place setting one festive detail

Fold the napkins in the same way and position them consistently.

A simple rectangle tied with ribbon is enough. Measure one finished tie before cutting the rest so you do not waste ribbon on tails that are much longer than needed.

These festive napkin-folding ideas offer alternatives if you would rather skip ribbon.

For a craftier touch, make a set of paper angel napkin holders using card and paper scraps.

Choose one treatment rather than stacking several decorations on every plate.

Add greenery without turning it into a shopping trip

A few suitable stems in water can soften the table.

Use plants you can identify, avoid sprayed or irritating foliage, and keep plant material away from food. Skip unknown berries, especially around children and pets.

Short arrangements are easier to talk across and less likely to be knocked over.

No suitable garden greenery? Leave it out. It is an option, not a requirement.

Only fill a genuine gap

If everything works except the colour connection, one roll of fabric ribbon on Amazon might be useful. Check the full delivered price and your existing stash first.

Before buying anything, ask whether you could borrow it, substitute it or simply leave it out.

Your Christmas table does not need to look like a department-store display. It needs somewhere comfortable to sit, room for the food and a few thoughtful touches.

The money you keep is part of the success.

Explore

Bedrooms Christmas Craft Ideas Easter Garden and Yard Halloween Holidays Home Decor Kitchens Living Areas Makeovers and Redos More DIY's Organizing Outdoor Decor Porches, Patios and Decks Recycled Crafts Seasonal Trash to Treasure Windows and Walls Wreaths

RSS feed: More Articles More Articles

  • Book Review: Patty Lyons’ Knitting ER
  • 10 Scrapbook Layout Ideas with Mixed Patterns for Fall and Halloween
  • Easy Shortbread Recipe: Buttery Fingers With No Rolling Required
  • Make Rustic Christmas Ribbon from Old Bed Sheets and Tiny Stamps
  • Free Crochet Hot Chocolate Mug Ornament Pattern For Christmas
  • Hanukkah Cross Stitch Projects
  • Christmas on a Budget -Scrap Fabric Christmas Gift Bags You Can Use Every Year
  • 10 DIY Recycled Christmas Jewelry Ideas
  • The Miffy Crochet Book Review: 16 Sweet Projects for Bunny Lovers
  • Christmas on a Budget – How to Style Your Christmas Table Using Things You Already Own

Copyright © 2026 · CraftGossip | Start Here | Contact Us | Link to Us | Your Editors | Privacy and affiliate policy