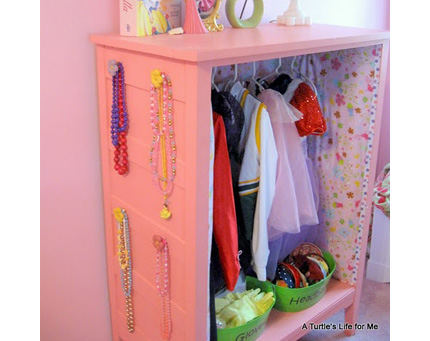
 When my daughter was little, I went to a thrift store and bought a bunch of dresses, hats, boas, necklaces, bangles and hair accessories. I packed them all into a big trunk and gave it to her for her 6th birthday. Her and all of her little friends had an absolute blast dressing up and playing make believe. It was so sweet! Natalie from A Turtle’s Life for Me kicked it up a few notches and made this amazing Dress Up Headquarters from an old broken dresser. I love how this turned out!
Comments
Have you read?
30 Handmade Christmas Gifts You Can Send in a Card or Envelope
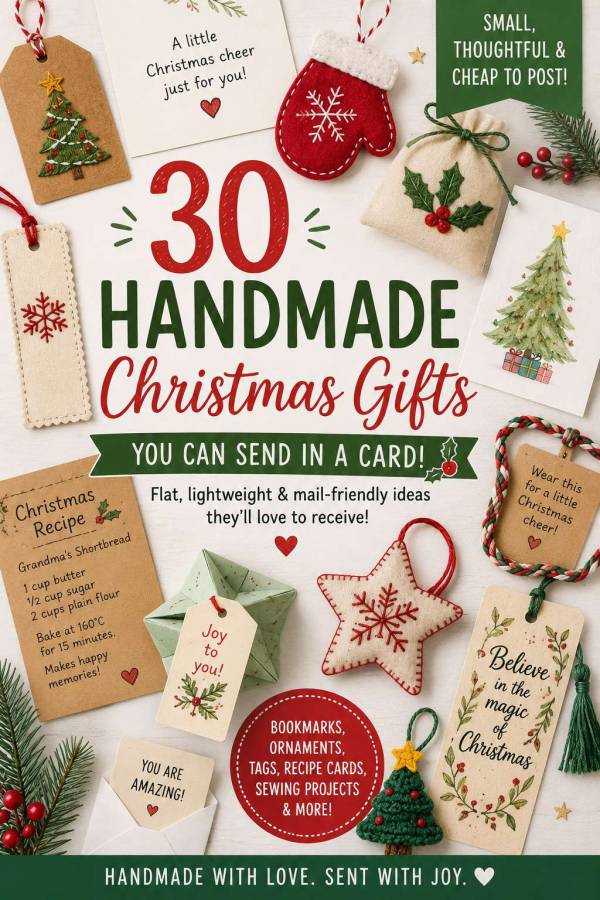
Christmas postage has a sneaky way of becoming far more expensive than the gift inside the parcel.
You start with one innocent handmade ornament, add a little treat, perhaps tuck in a second gift for a sibling, and suddenly the post office is charging enough to make personal delivery seem perfectly reasonable.
That is why I love small, flat handmade Christmas gifts.
These are the thoughtful little makes that can fit inside a Christmas card, standard envelope or slim padded mailer without costing a small fortune to send. Think bookmarks, paper ornaments, stitched cards, friendship bracelets, recipe cards and tiny keepsakes rather than mugs, candles and anything requiring half a roll of bubble wrap.
Many of these mail-friendly Christmas crafts can be made from fabric scraps, paper offcuts, leftover yarn and the slightly alarming collection of ribbon pieces most of us refuse to throw away.
They are ideal for grandchildren, teachers, neighbours, book-club friends, nursing-home residents and family members who live too far away to visit at Christmas.
What Makes a Handmade Christmas Gift Cheap to Post?
Weight matters, but thickness is often the real troublemaker.
A lightweight stuffed ornament may look harmless, yet its thickness can push an envelope into parcel pricing. A flat fabric bookmark or paper ornament is often much easier and cheaper to send.
Before making a large batch, check the current letter dimensions and thickness limits used by your postal service. It is worth testing one finished sample before you enthusiastically produce 40 padded gingerbread people.
The easiest handmade gifts to mail are generally:
- Flat or almost flat
- Lightweight
- Flexible rather than rigid
- Free from glass or breakable pieces
- Made without bulky buttons and beads
- Small enough to sit inside a greeting card
- Protected by a sheet of lightweight cardstock
And while glitter may be lightweight, I still recommend keeping it firmly attached. Nobody needs a festive envelope that continues shedding sparkle into February.
Paper Christmas Gifts That Fit Inside a Card
Handmade Christmas Bookmarks
A Christmas bookmark is practical, easy to personalise and one of the simplest handmade gifts to slip into a card.
Cut a strip from heavyweight cardstock and decorate it with rubber stamps, scraps of Christmas paper, washi tape, hand lettering or a tiny family photograph.
You can also recycle last year’s Christmas cards by cutting the prettiest sections into bookmark shapes and backing them with plain cardstock.
For more inspiration, this collection of DIY bookmark tutorials from The Spruce Crafts includes paper, fabric and mixed-media ideas that can easily be given a Christmas makeover.
Add a short tassel if your postage allowance permits, but keep it soft and flexible rather than adding a heavy bead.
Miniature Christmas Art
A small original painting can feel surprisingly special, even when it is no larger than a postcard.
Paint a tiny watercolour Christmas tree, snowy cottage, native Australian flower, sleeping reindeer or family pet wearing a Santa hat.
Sign and date the artwork so it becomes a miniature keepsake rather than simply another Christmas card.
It can be framed later, displayed on the refrigerator or used as a bookmark.
For a flatter finish, use watercolour pencils or fine-line pens rather than thick acrylic paint.
Hand-Cut Paper Snowflakes
A carefully cut paper snowflake is almost weightless and can be pressed flat inside a greeting card.
Use lightweight white, metallic or patterned paper and write the year discreetly near one edge.
Place the finished snowflake between folded cardstock to protect its delicate points during postage.
You could also include a few folded paper squares and a simple cutting template so children can make their own Christmas snowflakes.
Handmade Christmas Gift Tags
A coordinated set of handmade gift tags is useful, easy to batch-make and slim enough to send inside an envelope.
Cut tags from kraft cardstock, recycled cereal boxes, old Christmas cards or watercolour paper.
Decorate them using:
- Rubber stamps
- Small paper scraps
- Hand-drawn holly
- Stitched stars
- Tiny fabric pieces
- Washi tape
- Simple calligraphy
CraftGossip has plenty of inspiration in this collection of handmade Christmas gift tag ideas.
Package the tags inside a glassine bag or secure them with a flat paper belly band rather than bulky ribbon.
Family Christmas Recipe Cards
Handwritten recipes become more precious as the years pass, especially when they include a little family history.
Choose a recipe connected to your Christmas traditions, such as:
- Grandma’s shortbread
- Christmas pudding
- Gingerbread
- Rum balls
- Holiday fudge
- Mum’s trifle
- Boxing Day chutney
- A favourite festive punch
Write the recipe on decorated cardstock and add a sentence explaining where it came from.
You could send one family recipe each Christmas, gradually creating a complete handwritten collection.
Christmas Lunchbox Notes
Make a set of little Christmas notes that parents can place inside school lunchboxes during December.
Try messages such as:
- You are on Santa’s kind list.
- Have an elf-tastic day.
- You make every season brighter.
- Only three sleeps to go!
- Do one kind thing today.
- Grandma is thinking of you.
Cut the messages into small cards and tuck them inside a decorated envelope.
These are especially sweet for grandchildren who live too far away for regular visits during the Christmas season.
Christmas Joke Cards
Children rarely object to a terrible Christmas joke, especially when it arrives in the mail.
Write the question on the front of each card and the punchline on the back. Hold the little stack together with a paper band so it remains flat.
Leave one card blank and write:
“Add your best joke and send it back to Grandma.”
You may regret encouraging this when the same joke is repeated during Christmas lunch, but that is part of the experience.
Personalised Christmas Word Searches
A homemade word search can include family names, pets, favourite foods and Christmas traditions.
Possible words include:
- Grandma
- Reindeer
- Pavlova
- Tinsel
- Stocking
- Beach
- Carols
- The family dog’s name
Hide a secret message among the leftover letters or include a final clue that requires the child to phone you.
This is a lovely activity to include in Christmas cards for grandchildren, nieces and nephews.
Family Christmas Trivia Cards
Write a series of questions about family Christmas memories and traditions.
Try questions such as:
- Who once burnt the Christmas pudding?
- Which family member always falls asleep after lunch?
- What was Mum’s favourite childhood Christmas gift?
- Who makes the best pavlova?
- Which ornament has been on the tree the longest?
- What did Grandpa receive for Christmas when he was ten?
Seal the answers inside a small envelope marked “No peeking.”
It is a playful way to share family stories without making younger relatives feel as though they are attending a history lecture.
Fold-Flat Paper Decorations
Paper trees, stars and angels can be posted flat and opened into three-dimensional decorations after they arrive.
Accordion-folded Christmas trees work especially well because they compress neatly between two sheets of cardstock.
For something a little different, this origami octahedron tutorial creates a geometric decoration that can be hung on the tree.
Send it already folded for a special keepsake, or include squares of paper and instructions as a mini Christmas craft kit.
Mini Paper Quilt Cards
Quilters can turn leftover Christmas paper into miniature patchwork art.
Cut small squares or triangles from wrapping paper, old cards or scrapbook paper and arrange them in a traditional quilt-block design.
Simple designs include:
- Nine-patch blocks
- Log cabin blocks
- Sawtooth stars
- Christmas trees
- Red-and-green checkerboards
Glue the pieces onto cardstock and write your message on the back.
This is much faster than mailing everyone a full-size quilt, although naturally that does not stop us thinking about it.
Handmade Christmas Coupons
A handmade coupon booklet offers time and shared experiences rather than another physical gift.
Possible coupons include:
- One afternoon of crafting with Grandma
- A batch of homemade biscuits
- A family movie night
- A trip for ice cream
- An afternoon of gardening help
- One favourite meal cooked for you
- A long phone call whenever you need one
Keep the promises realistic. A coupon for “one king-size hand-quilted bedspread completed before New Year” may create more stress than Christmas cheer.
Flat Fabric Christmas Gifts
Scrap-Fabric Bookmarks
Fabric bookmarks are lightweight, useful and ideal for using narrow offcuts from larger sewing projects.
Cut two rectangles of fabric, add thin interfacing if needed and stitch around the edges.
Christmas cottons are an obvious choice, but fabric connected to a family quilt, apron or special garment can make the gift more meaningful.
CraftBits has a simple scrap-fabric bookmark tutorial that works well for beginner sewers and batch-made gifts.
Press the bookmarks flat before posting and avoid thick batting.
Scrap-Fabric Christmas Tree Ornaments
Tiny fabric trees make lovely keepsakes and can be stitched almost completely flat.
CraftBits has a tutorial for scrap-fabric Christmas tree ornaments that is perfect for using small pieces of festive fabric.
To keep the ornament mail-friendly:
- Use little or no stuffing
- Replace buttons with embroidery
- Use a narrow ribbon hanging loop
- Press the finished tree flat
- Place it between two pieces of cardstock
Add the year to the back with a fabric pen or embroidered numbers.
Felt Christmas Decorations
Felt is ideal for postal ornaments because it does not fray and can be used as a single layer.
Cut simple shapes such as:
- Christmas trees
- Stars
- Mittens
- Gingerbread people
- Stockings
- Puddings
- Robins
- Holly leaves
Decorate them with basic embroidery stitches and add a thread hanging loop.
Anyone new to hand-stitching can use this detailed beginner guide to sewing felt for advice on needles, thread, cutting and suitable stitches.
Avoid bulky beads if your goal is to keep the envelope thin.
Embroidered Felt Bookmarks
Cut a long strip from firm felt and embroider a small design at one end.
Christmas motifs could include:
- A snowflake
- Holly leaves
- A candle
- A Christmas tree
- An initial
- A row of French-knot berries
Because felt does not require hemming, this is an excellent last-minute sewing project.
CraftGossip’s collection of embroidered bookmark patterns offers more ideas that can be adapted into Christmas colours.
Flat Fabric Heart Keepsakes
Cut two small hearts from fabric and stitch them together with no filling, or just the lightest layer of stuffing.
Use fabric from a meaningful source, such as:
- A child’s outgrown Christmas outfit
- A family tablecloth
- Grandma’s sewing basket
- A loved one’s shirt
- Scraps from a special quilt
Add a little note saying:
“A Christmas hug for when we cannot be together.”
For children under three, avoid buttons, beads or detachable trims.
Reusable Fabric Gift Tags
Reusable gift tags are practical, eco-friendly and easy to mail in sets.
Cut tag shapes from fabric backed with lightweight interfacing. Stitch around the edges and add a small plain panel for writing the recipient’s name.
They can be used year after year or later hung on the Christmas tree.
A set made from coordinating fabric scraps also makes a useful gift for a sewing friend who appreciates anything reusable—and understands why you still own fabric scraps from 2009.
Fabric Tea Wallets
A small folding tea wallet can hold one or two individually wrapped tea bags.
Use festive cotton fabric and keep the closure flat with a ribbon tie, fabric loop or small piece of hook-and-loop tape.
Add a note saying:
“A quiet Christmas cuppa, just for you.”
This makes a thoughtful card insert for teachers, neighbours, work colleagues and friends who need a calm five minutes during December.
Remove the tea bags when sending overseas unless you have checked the destination’s food-import rules.
Flat Christmas Sachets
A slim lavender sachet can be stitched from two small fabric rectangles and filled very lightly.
For the lowest postage cost, use a flat scented insert rather than bulky dried filling.
Check biosecurity and postal restrictions before sending dried flowers or herbs internationally.
Seal the sachet in a protective bag so the scent does not perfume every item travelling in the same postal sack.
Thread, Yarn and Needlework Gifts
Embroidered Christmas Cards
Stitching directly onto cardstock creates a beautiful card and gift in one.
Pierce evenly spaced holes in the card and stitch a simple design using embroidery thread.
Easy patterns include:
- A geometric tree
- A snowflake
- A star
- A bauble
- A candle
- A row of Christmas lights
Cover the back of the stitching with a second piece of cardstock before writing your message.
This keeps the card neat while protecting the thread during postage.
Cross-Stitch Bookmarks
A narrow cross-stitch bookmark can be personalised with a name, initial or short Christmas phrase.
Stitch on Aida cloth, trim the edges and back it with felt or cardstock.
CraftGossip has a collection of free cross-stitch alphabets that can be used to create personalised Christmas gifts.
Add a small tree, holly sprig or snowflake beside the name for a festive finish.
Christmas Friendship Bracelets
Friendship bracelets are easy to post, inexpensive to make and particularly popular with children and teens.
Use embroidery thread in red, green, white, metallic gold or icy blue.
The DIY friendship bracelet tutorial on CraftBits explains the basic technique and can easily be adapted into Christmas colours.
Attach the finished bracelet to a flat card printed with a message such as:
“Wear this whenever you need a little Christmas cheer.”
For grandchildren or close friends, make a matching bracelet and keep one yourself.
Crochet Snowflakes
A fine crochet snowflake is light enough to slip inside a card and can be used as a tree ornament, gift tag or table decoration.
Block the finished snowflake flat and place it between two pieces of cardstock for mailing.
This roundup of free Christmas crochet patterns includes mini stockings, ornaments and appliqués that work well as small postal gifts.
Avoid heavy stiffeners and beads when you are trying to stay within letter thickness limits.
Tiny Crochet Stockings
A tiny crocheted stocking can hold a folded note, photograph or gift card.
Choose a flat construction and avoid bulky yarn.
Fine cotton or lightweight acrylic yarn creates a slimmer stocking than chunky wool.
After Christmas, the recipient can use it as a tree ornament or gift tag.
Mini Knitted Ornaments
Small knitted hearts, stars, trees and stockings make charming gifts for knitters to send in the mail.
Look for patterns worked flat rather than three-dimensional toys.
Use leftover sock yarn or fingering-weight yarn to reduce thickness and keep the finished ornament light.
Embroidery works better than buttons for adding eyes, names or small decorative details.
Thread Tassel Decorations
Create a small tassel using embroidery floss or fine yarn and trim it into a tree, angel or traditional tassel shape.
Use thread knots rather than wooden beads if the decoration needs to remain flat.
Wrap the finished tassel around a piece of cardstock before mailing so it does not arrive looking like it has spent several days arguing with the postal machinery.
Tiny Christmas Keepsakes
Mini Accordion Photo Books
Fold a long strip of cardstock into a small accordion and attach a photograph to each section.
Possible themes include:
- Family Christmases from past years
- Grandchildren at different ages
- Family pets
- Childhood photographs of Mum or Dad
- Christmas at Grandma’s house
- Favourite family decorations
Add handwritten captions and secure the booklet with a flat paper band.
Avoid raised embellishments so the closed book stays as slim as possible.
Favourite Christmas Memory Cards
Write one special family Christmas memory on a beautifully decorated card.
It might describe:
- A funny childhood Christmas
- The first Christmas in a new home
- A handmade present you never forgot
- A family tradition passed down by your parents
- The Christmas when everything went wrong
- A loved one who is no longer with you
Leave room for the recipient to add one of their own memories.
Over time, these cards can become a small family Christmas archive.
Angel Feather Poem Cards
An angel feather card can be a comforting keepsake for someone grieving or missing a loved one at Christmas.
CraftBits has a long-standing Angel Feather Gift Poem tutorial that can be adapted into a lightweight card insert.
Secure the feather beneath a paper strip or clear window so it cannot fall loose when the envelope is opened.
Use a paper or fabric feather for international post to avoid possible animal-material or quarantine restrictions.
Tiny Christmas Wish Envelopes
Make a miniature envelope and place a handwritten Christmas wish inside.
The wish could be heartfelt, silly or hopeful:
- More time together
- A peaceful New Year
- More afternoon tea
- Fewer tangled fairy lights
- Plenty of reasons to laugh
- One uninterrupted day of crafting
Attach the tiny envelope to the inside of the card with removable adhesive.
The recipient can keep it closed until Christmas Day or open it immediately if patience is not one of their festive gifts.
Pocket-Sized Fabric Hugs
Cut a simple fabric or felt shape that can be carried in a pocket, purse or school bag.
It might be a heart, star, tiny gingerbread person or miniature Christmas tree.
Stitch a message onto the back or attach a paper tag reading:
“A little handmade hug from me to you.”
Keep it flat and avoid loose embellishments for young children.
How to Package Flat Handmade Christmas Gifts
Even a slim gift needs some protection if it contains delicate paper, stitching or sharp corners.
Place the item between two pieces of lightweight cardstock before sliding it into the envelope.
Glassine bags, folded parchment pockets and slim paper sleeves are useful for keeping sets of tags or small pieces together.
For something decorative, use an origami gift box tutorial and send the box flattened with simple assembly instructions. This allows the recipient to create the box after it arrives without increasing your postage thickness.
When packaging thread, ribbon or tassels, wind them around a small card to prevent tangling.
Write the address on the envelope before adding decorations. There is nothing quite like completing an elaborately stamped Christmas envelope and then discovering you have left nowhere sensible to write the postcode.
Make It an Annual Christmas Tradition
You do not need to make every idea in this roundup in one heroic burst of December productivity.
Choose one small handmade gift and turn it into a yearly tradition.
You could send:
- A different bookmark each Christmas
- One handwritten family recipe
- A personalised ornament dated with the year
- A yearly photograph book
- A new stitched snowflake
- A family trivia card
- A favourite Christmas memory
- A small handmade heart
- A chapter from an ongoing Christmas story
Over time, those little gifts become a collection of family stories and handmade keepsakes.
Best of all, they arrive inside an ordinary envelope—proof that a thoughtful Christmas gift does not need to be large, expensive or wrapped in half a kilometre of bubble wrap to feel special.
I hate that this is named “girls dressup station”! Couldn’t it be a boy dressing up? Otherwise the whole set up looks great and fits a yound child perfect! 🙂 LOVE
Thanks so much for featuring this, Amanda! That was SO sweet of you!
Anna, I actually just called it a dress-up headquarters, but I made it for my daughter so it very much is girly in terms of this specific one! If you wanted to hop on over to my site, though, I actually mention that it could easily be modified for a boy!
Yes, I like the idea a lot! And I did visit your site and really liked it!
Great idea! Gotta be honest, if my son wanted one of these I’d be asking some serious questions… of course this is intended for girls.